O2A SAMPLES User Guide
Welcome to the O2A SAMPLES System User Guide.
This document provides comprehensive instructions on how to use O2A SAMPLES effectively for managing and organizing your samples.
There are two O2A Sample System available for users:
- Test system: https://samples-test.o2a-data.de
- Productive system: https://samples.o2a-data.de
Test System
The test system serves as an initial entry point for users to become familiar with the system and to try out available features. Data entered in the test system is temporary and is deleted on a regular basis. This allows users to experiment with the system without affecting any real data. The test system is ideal for learning how to navigate the interface, understanding the functionalities, and testing different scenarios before working with actual sample data in the productive system.
Productive System
The productive system is used for managing actual sample metadata. It is the environment where users can create, view, and manage real sample information. Data entered in the productive system is persistent and is not deleted regularly, ensuring that all sample information is securely stored and accessible for ongoing work. Users should use the productive system for all actual sample management. Additionally, the productive version is used to reset the test system. This means that everything entered into the productive system will also appear in the test system, but not vice versa.
The user guide is structured into two main blocks (A and B).
- Block A introduces the core functionalities of O2A SAMPLES, including navigation, sample creation, and basic management tasks.
- Block B covers additional features such as querying samples based on specific criteria and working with more advanced tools within the system.
 Overview of the O2A SAMPLES system. Block A (red) shows the main navigation menu and user login status. Block B (blue) displays sample categories via graphical icons. The central panel includes search filters, editing tools, and a welcome message guiding users to begin querying stored sample data.
To help you find your way through the user guide, you’ll find brief descriptions of key terms below:
Key Terms
| Term | Description |
|---|---|
| Samples | Actual physical samples that are described and identified by a set of descriptive properties. |
| Parent Samples | Physical samples such as material,substance or biological specimen that are collected during research. They are represented digitally by associated metadata. |
| Child Samples | These are samples obtained from physical parent samples. They can be derived from processing or transforming a parent sample. |
| Record | Actual stored data. |
| RecordType | This define classes or types of things, e.g., persons, experiments, time series. Can be viewed as member of the class defined by recordType |
| File | Stored file associated with the records. |
| Register | To create a new entry into O2A SAMPLES. |
| Upload | To add file to O2A SAMPLES. |
| Export | To export created file in a chosen format. |
| Container | Physical holders used to store or transport physical samples. |
| Entities | These are base object, which can be recordtype,record or abstract properties and has unique server generated ID. |
| EventType | Eventtype are usually implemented as a RecordType or a Property. It is used to categorize and manage structured data, particularly for tracking experimental workflows and sample life cycle. |
Login to O2A SAMPLES
Users must log in with their Helmholtz ID credentials before they can access O2A SAMPLES. Follow the steps below to complete the login process.
Step 1: Open the login page
On the O2A SAMPLES homepage, select the LOGIN button in the upper-right corner of the navigation bar.

O2A SAMPLES homepage with the login button. The O2A SAMPLES homepage is displayed before authentication. The red arrow points to the LOGIN button in the upper-right corner of the main navigation bar. Select this button to start the login process.
Step 2: Enter the Helmholtz ID credentials
After selecting the login button, the Helmholtz ID login page opens. Enter the assigned Username(no e-mail address!) and Password, then select the Login button.
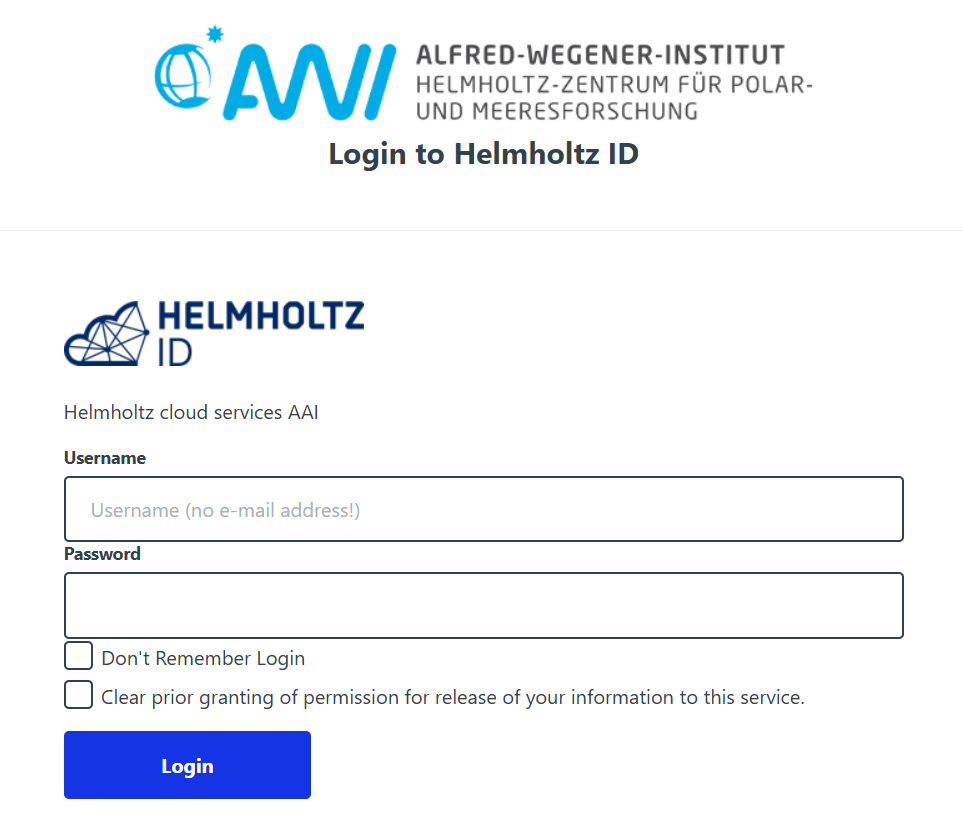
Helmholtz ID login page. The Helmholtz ID authentication page is displayed after selecting the LOGIN button on the O2A SAMPLES homepage. Users enter their Helmholtz ID username and password in the corresponding fields and select the Login button to continue. The username field requires a username without an email address.
Step 3: Allow access to O2A SAMPLES
After entering the login credentials, a confirmation page opens. This page shows that the user is logging in to O2A Samples : O2A Data Flow Framework.Select Allow to grant the required access and complete the login process.
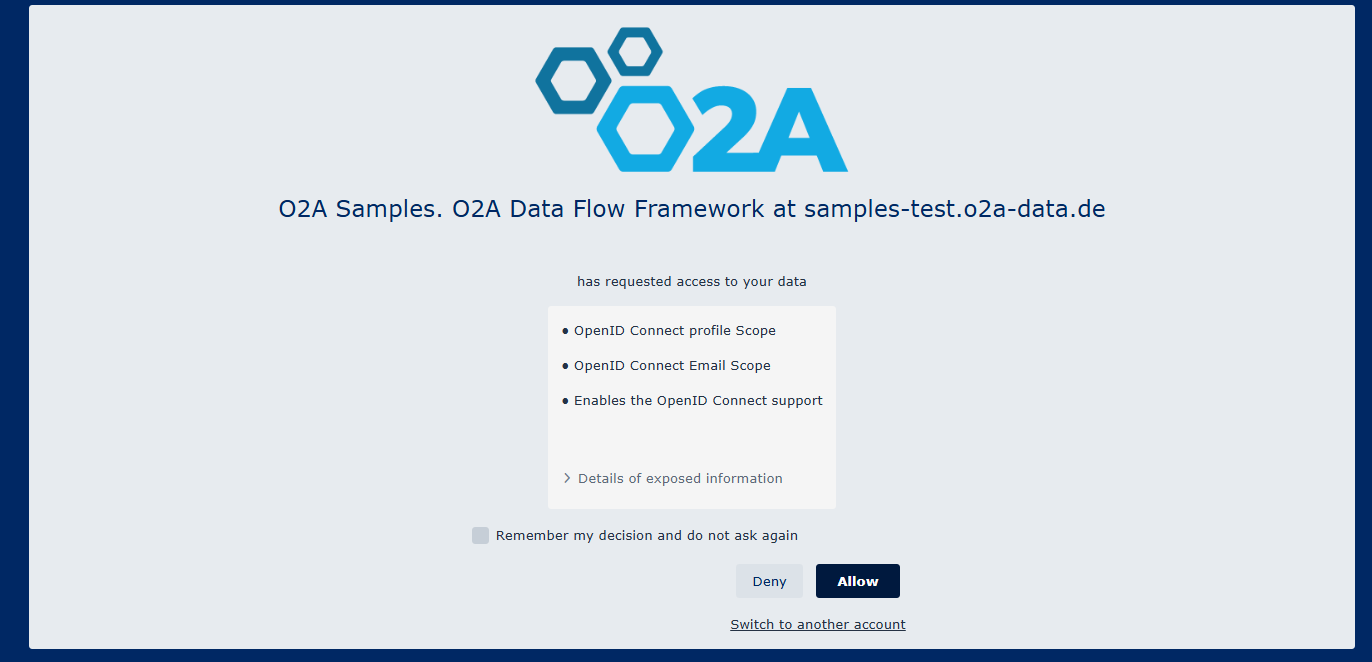
Access-confirmation page for O2A SAMPLES. The Helmholtz ID confirmation page shows that O2A Samples: O2A Samples: O2A Data Flow Framework at samples.o2a-data.de has requested access to the user's data. The requested permissions include access to the OpenID Connect profile and email scopes.The Allow and Deny buttons are visible at the bottom of the page. Select Allow to continue to O2A SAMPLES. Select Deny to cancel the login process.
Block A
Entities
The Entities drop down menu can be used to retrieve all the imputed Entities, including RecordTypes, Records, Properties and Files. On the navigation bar, click on the Entities menu to access the different sub-menus. Once clicked, a drop-down menu will appear showing the different sub-menus available under the Entities menu. Within each sub-menu, you can view, edit, delete or create new Entities as needed. Also you can directly create new RecordTypes or Property by clicking on the Edit Mode Toolbox menu seen at the right side of the page.
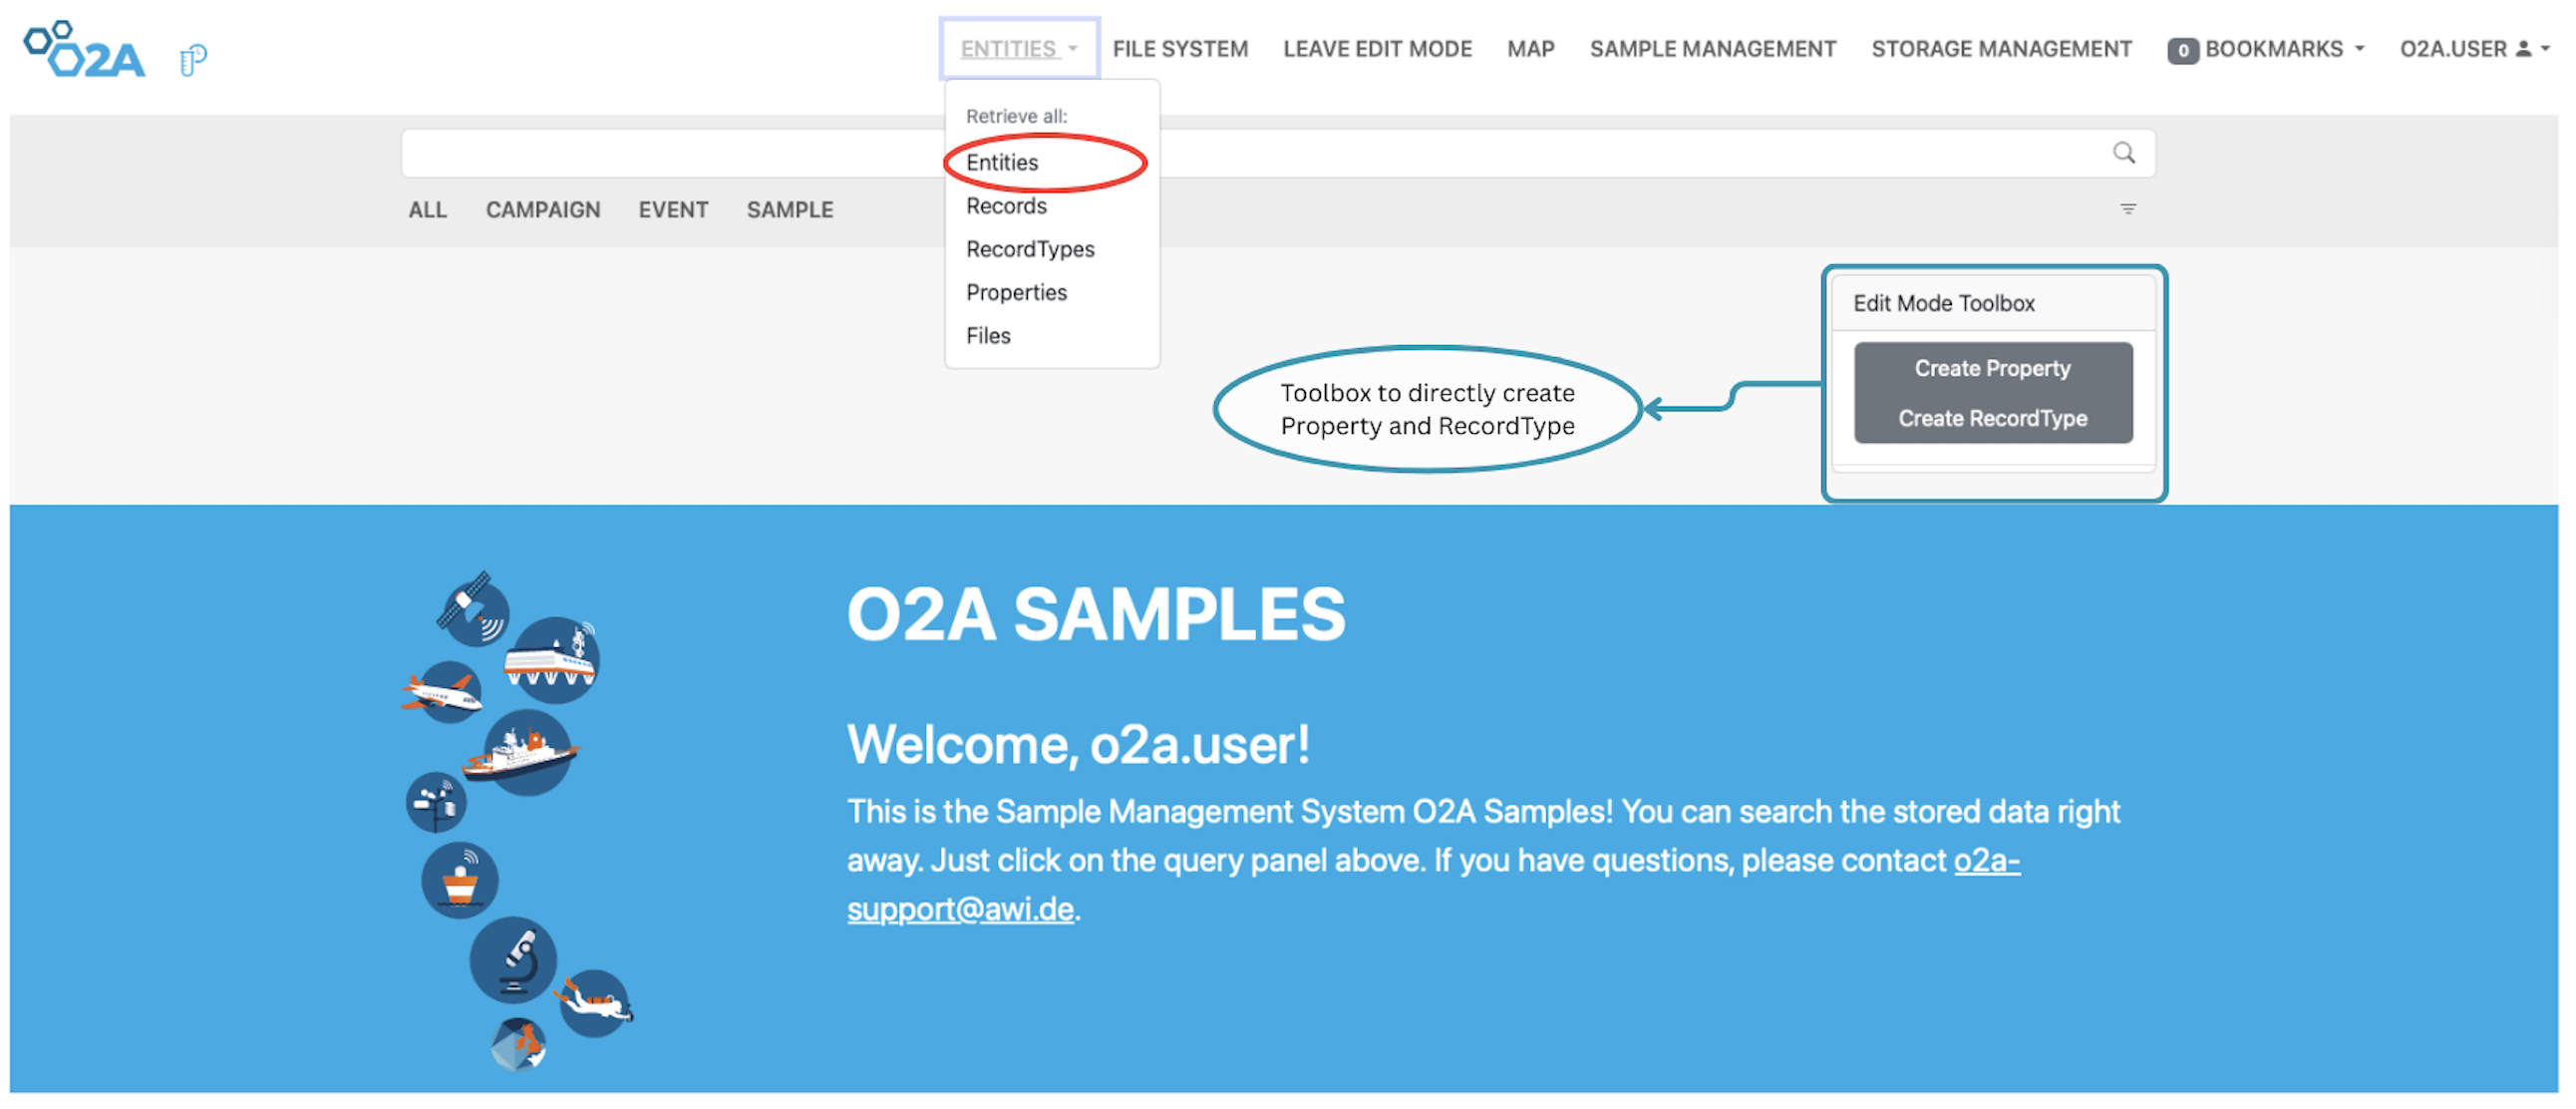 Interface view of the O2A SAMPLES system with expanded navigation and edit tools. The "Entities" dropdown is open, highlighting options for retrieving and managing data structures. The Edit Mode Toolbox allows direct creation of properties and record types. A welcome message guides users to begin querying sample data and provides support contact information.
Each sub-menu under the Entities menu is labeled with a shorthand identifier:
- R – Records
- RT – RecordTypes
- P – Properties
- F – Files
To view the contents of any category, simply click on the corresponding sub-menu. For example:
- Clicking on Records (R) displays a list of all records stored in the sample management system.
- Clicking on RecordTypes (RT) shows all defined record types.
- Clicking on Properties (P) reveals the available metadata properties.
- Clicking on Files (F) opens the file repository.
Records
This sub-menu allows you to view all the Records in O2A SAMPLES. You can also search for specific Records using the search bar at the top of the page.
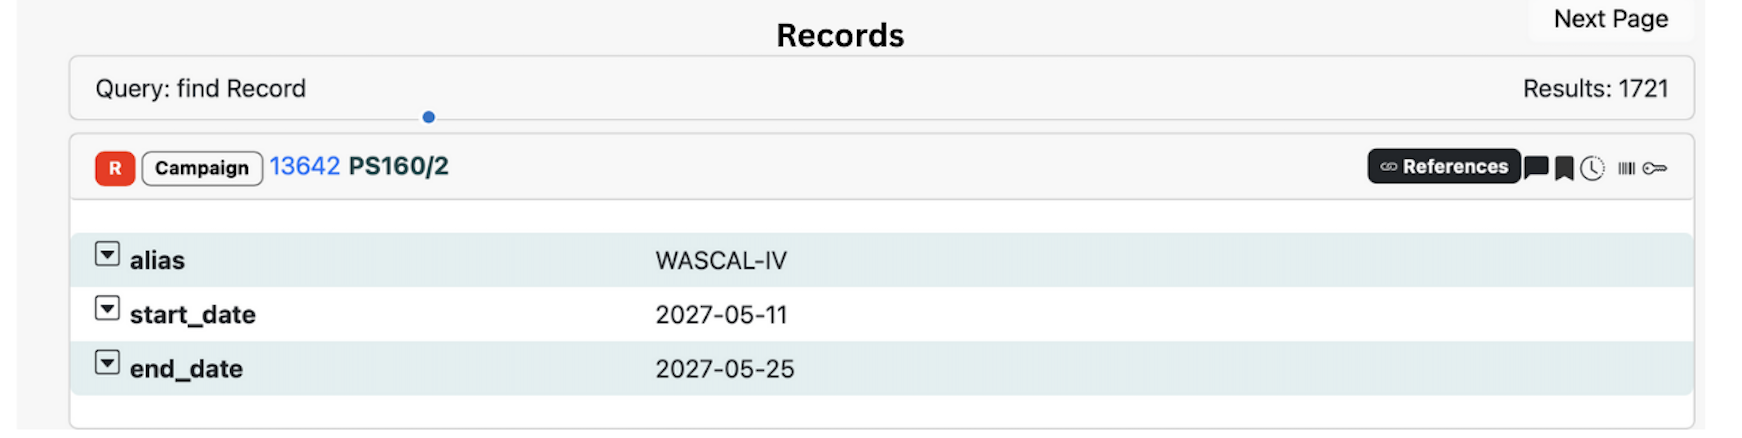 O2A SAMPLES System: Record interface view A list of records is displayed after record is quered in the search bar. A total of 1721 records are shown in the results. On the interface view,the record of a campaiagn further consists of information about the alias,start_date and end_date.
RecordTypes
This sub-menu allows you to view all the RecordTypes in O2A SAMPLES. You can also search for specific RecordTypes using the search bar at the top of the page.
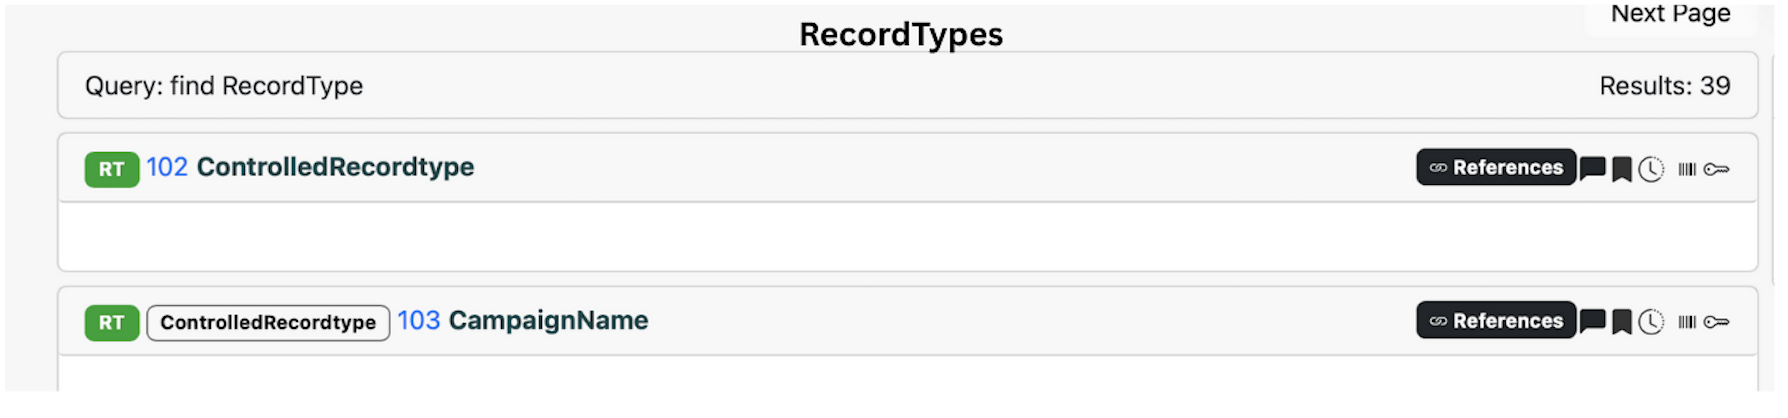 O2A SAMPLES SYSTEM: RecordTypes interface view The RecordTypes interface displays a list of all defined recordtypes in the O2A SAMPLES system. Users can search for specific recordtypes using the search bar at the top of the page. A total of 39 recordtypes are shown in the results.
Properties
This sub-menu allows you to view all the Properties in O2A SAMPLES. You can also search for specific Properties using the search bar at the top of the page.
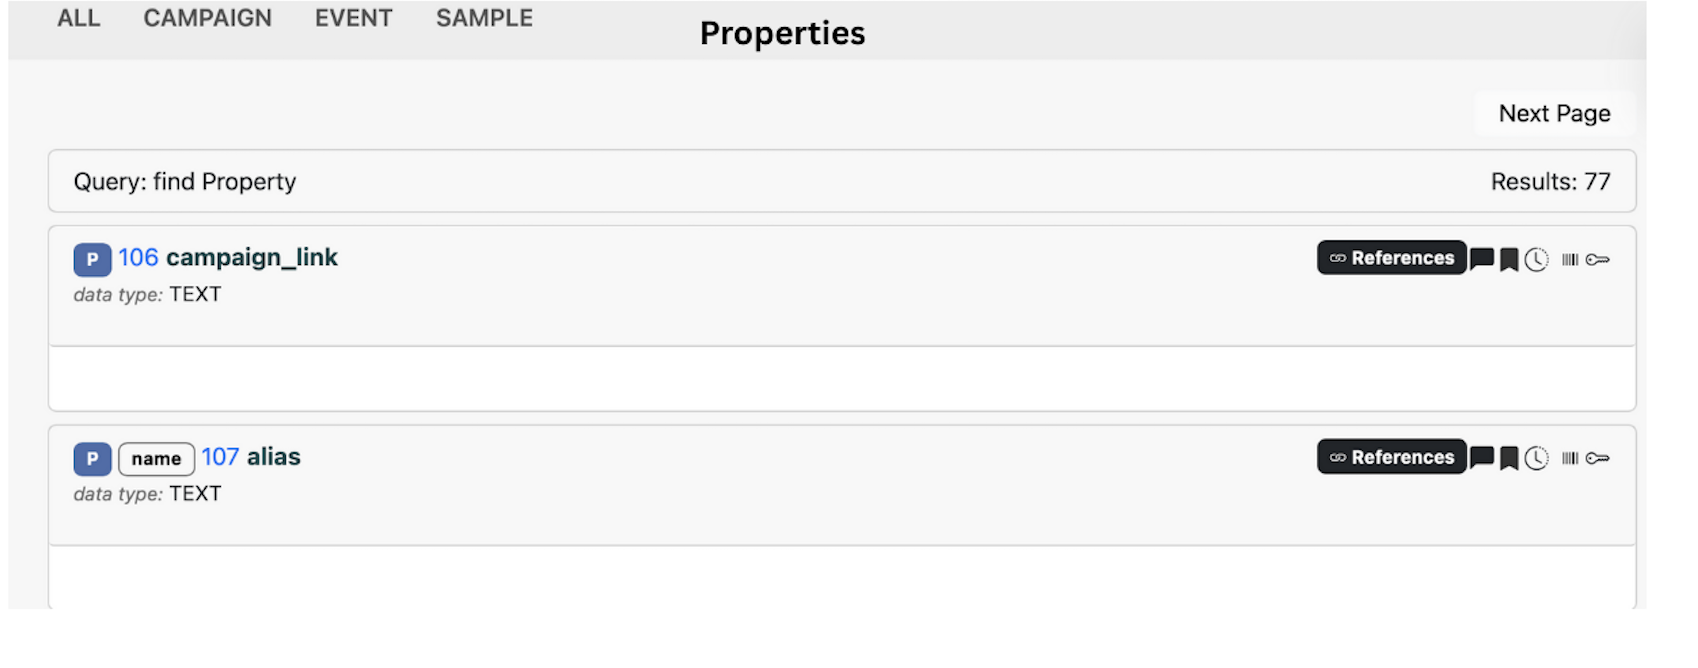 O2A SAMPLES SYSTEM: Properties interface view The Properties interface displays a list of all defined properties in the O2A SAMPLES system. Two properties are shown on the interface view. A total of 77 properties are shown in the results after a search is performed.
Files
This sub-menu allows you to view all the Files in O2A SAMPLES. You can also search for specific Files using the search bar at the top of the page.
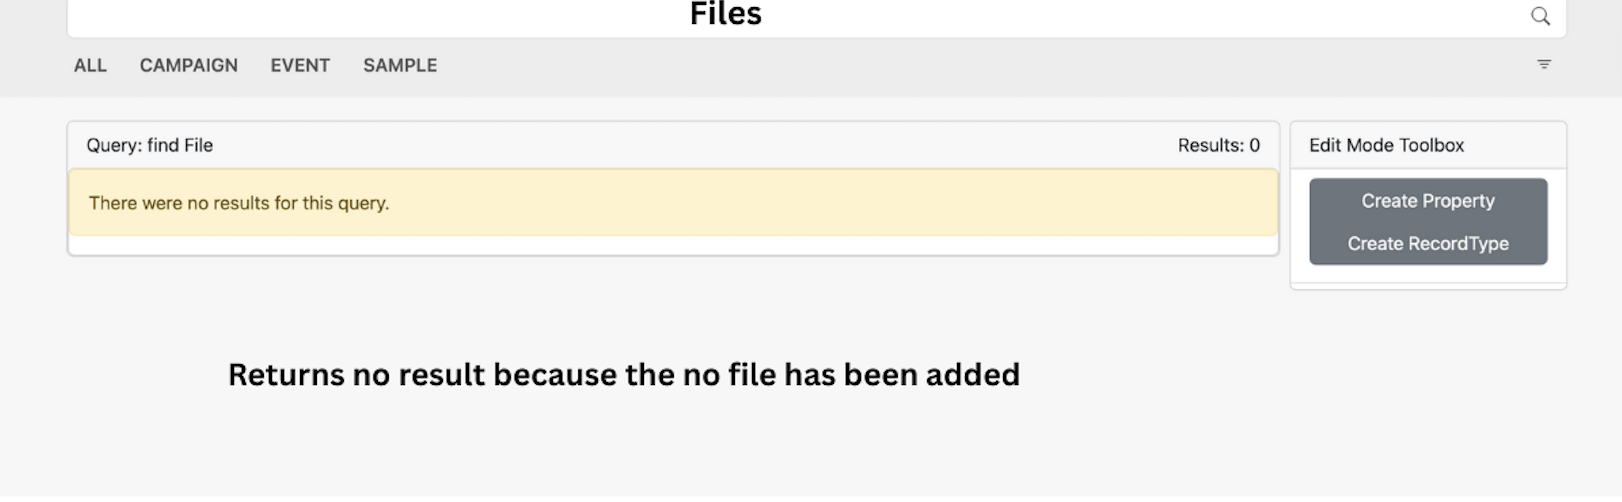 O2A SAMPLES SYSTEM: Files output view without results The Files interface allows users to view all files stored in the O2A SAMPLES system. In this example, a search for "file" returns no results, indicating that there are currently no files added to the O2A SAMPLES SYSTEM.
Features on the Entitties
Once you click on any entity, whether a Record, RecordType or Property, you can perform different actions. You have the ability to bookmark the entity, generate a QR code and view the version history of the entity. These features allow you to easily access and manage your entities within the O2A SAMPLES system.
QR Code
The QR code feature allows you to generate a QR code for the selected entity. This can be useful for quickly sharing or referencing the entity.
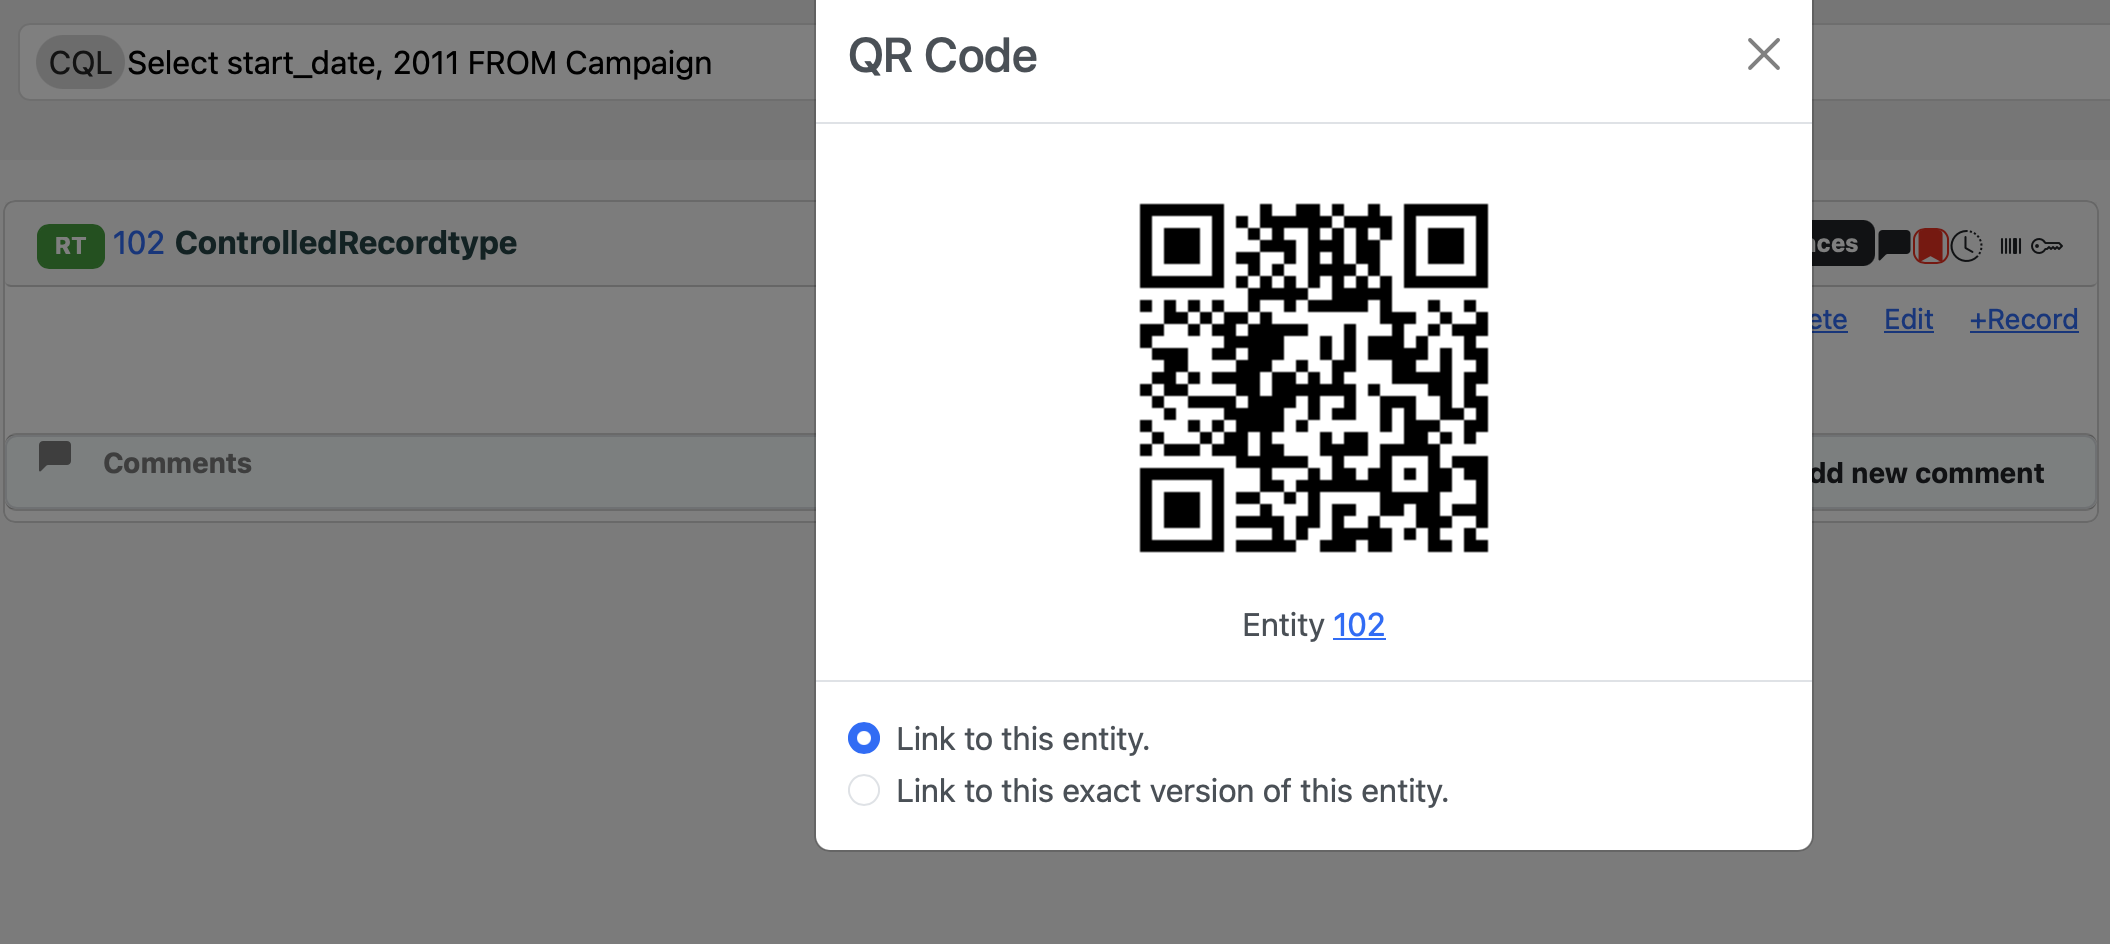 O2A SAMPLES SYSTEM: Entity features with QR code view The screenshot shows the features available for an entity in the O2A SAMPLES system. Users can generate a QR code for quick reference, and view the exact version of the entity.
Version History
The version history feature allows you to view the different versions of an entity, including details such as previous and current versions. This can be helpful for tracking changes.
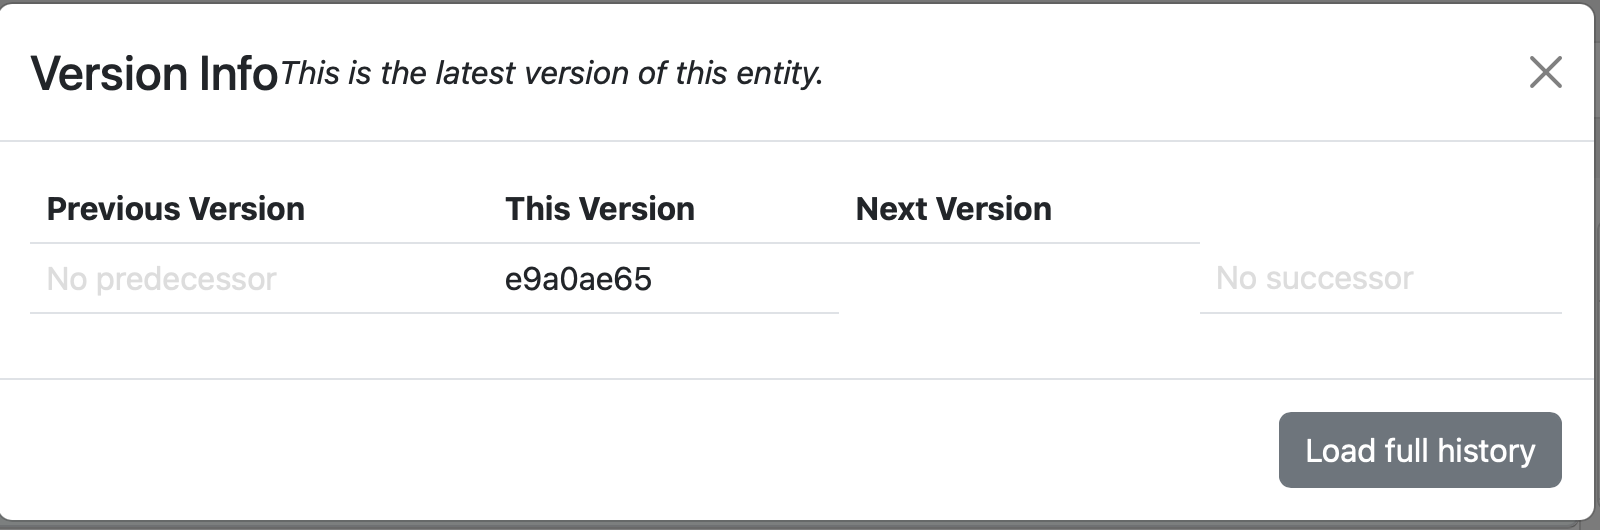 O2A SAMPLES SYSTEM: Entity features with version history view The screenshot shows the version history feature for an entity in the O2A SAMPLES system. Users can view the different versions of the entity, including details such as previous and current versions.
File System
You can upload files to the file system from your local machine by clicking the Upload File button. All uploaded files will appear in this section. Next to the Entities menu, you will find the File System menu, where files can be added. Files are uploaded according to their RecordType, allowing you to attach them to the appropriate category within O2A SAMPLES.
Steps to upload a file to the File System
Step 1: Click on the File System menu in the navigation bar to open the file system page. You will see a green button with a + symbol: click this button.
Step 2: Select the RecordType you want to upload the file to from the drop‑down menu.
Step 3: Click the Choose File button and select a file from your local computer.
Step 4: Click the Submit button to upload the file to O2A SAMPLES.
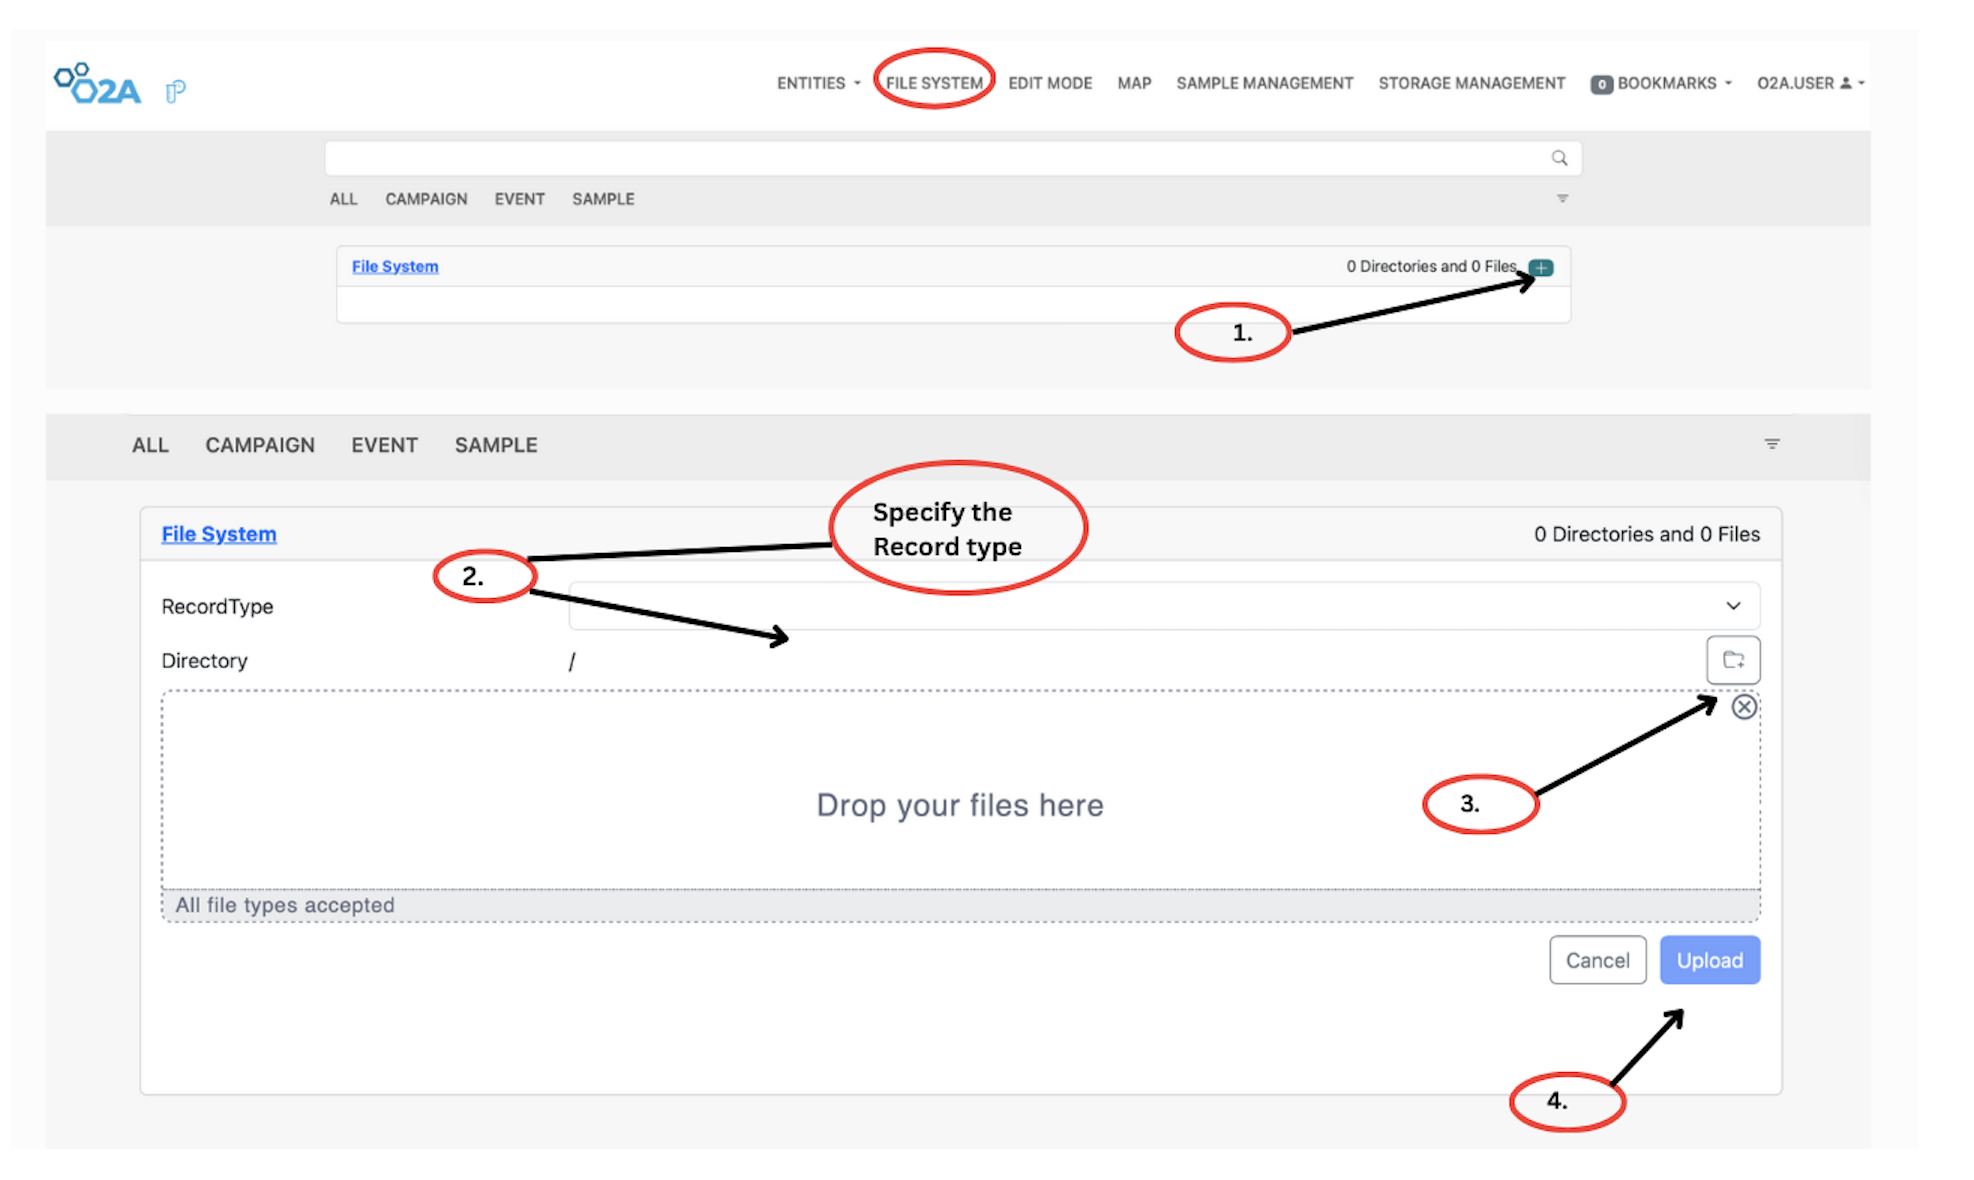
O2A SAMPLES SYSTEM: Outlined Form with steps on uploading files The screenshot shows the steps on how to upload a file to the O2A SAMPLES system. After clicking on the file system menu,a green button with a plus sign appears, which users can click to open the file upload form. The form includes a drop-down menu for selecting the RecordType, a file selection button, and a submit button to complete the upload process.
Edit Mode
Although the Edit Mode appears as a pop-up on most pages, its primary purpose is to create new RecordTypes or Properties within the sample management system. To access the Edit Mode menu, click the Edit Mode icon located at the top right corner of the navigation bar, next to the File System menu. This opens a pop-up window where you can choose to create either a new RecordType or a new Property. Fill in the required details in the form and click Submit to complete the creation process.
Steps to create a new RecordType
Step 1: Click the Edit Mode icon in the navigation bar to open the Edit Mode pop-up window.
Step 2: Drag a property from the list into the creation area to begin defining the new RecordType.
Step 3: Click Submit to finalize and create the new RecordType.
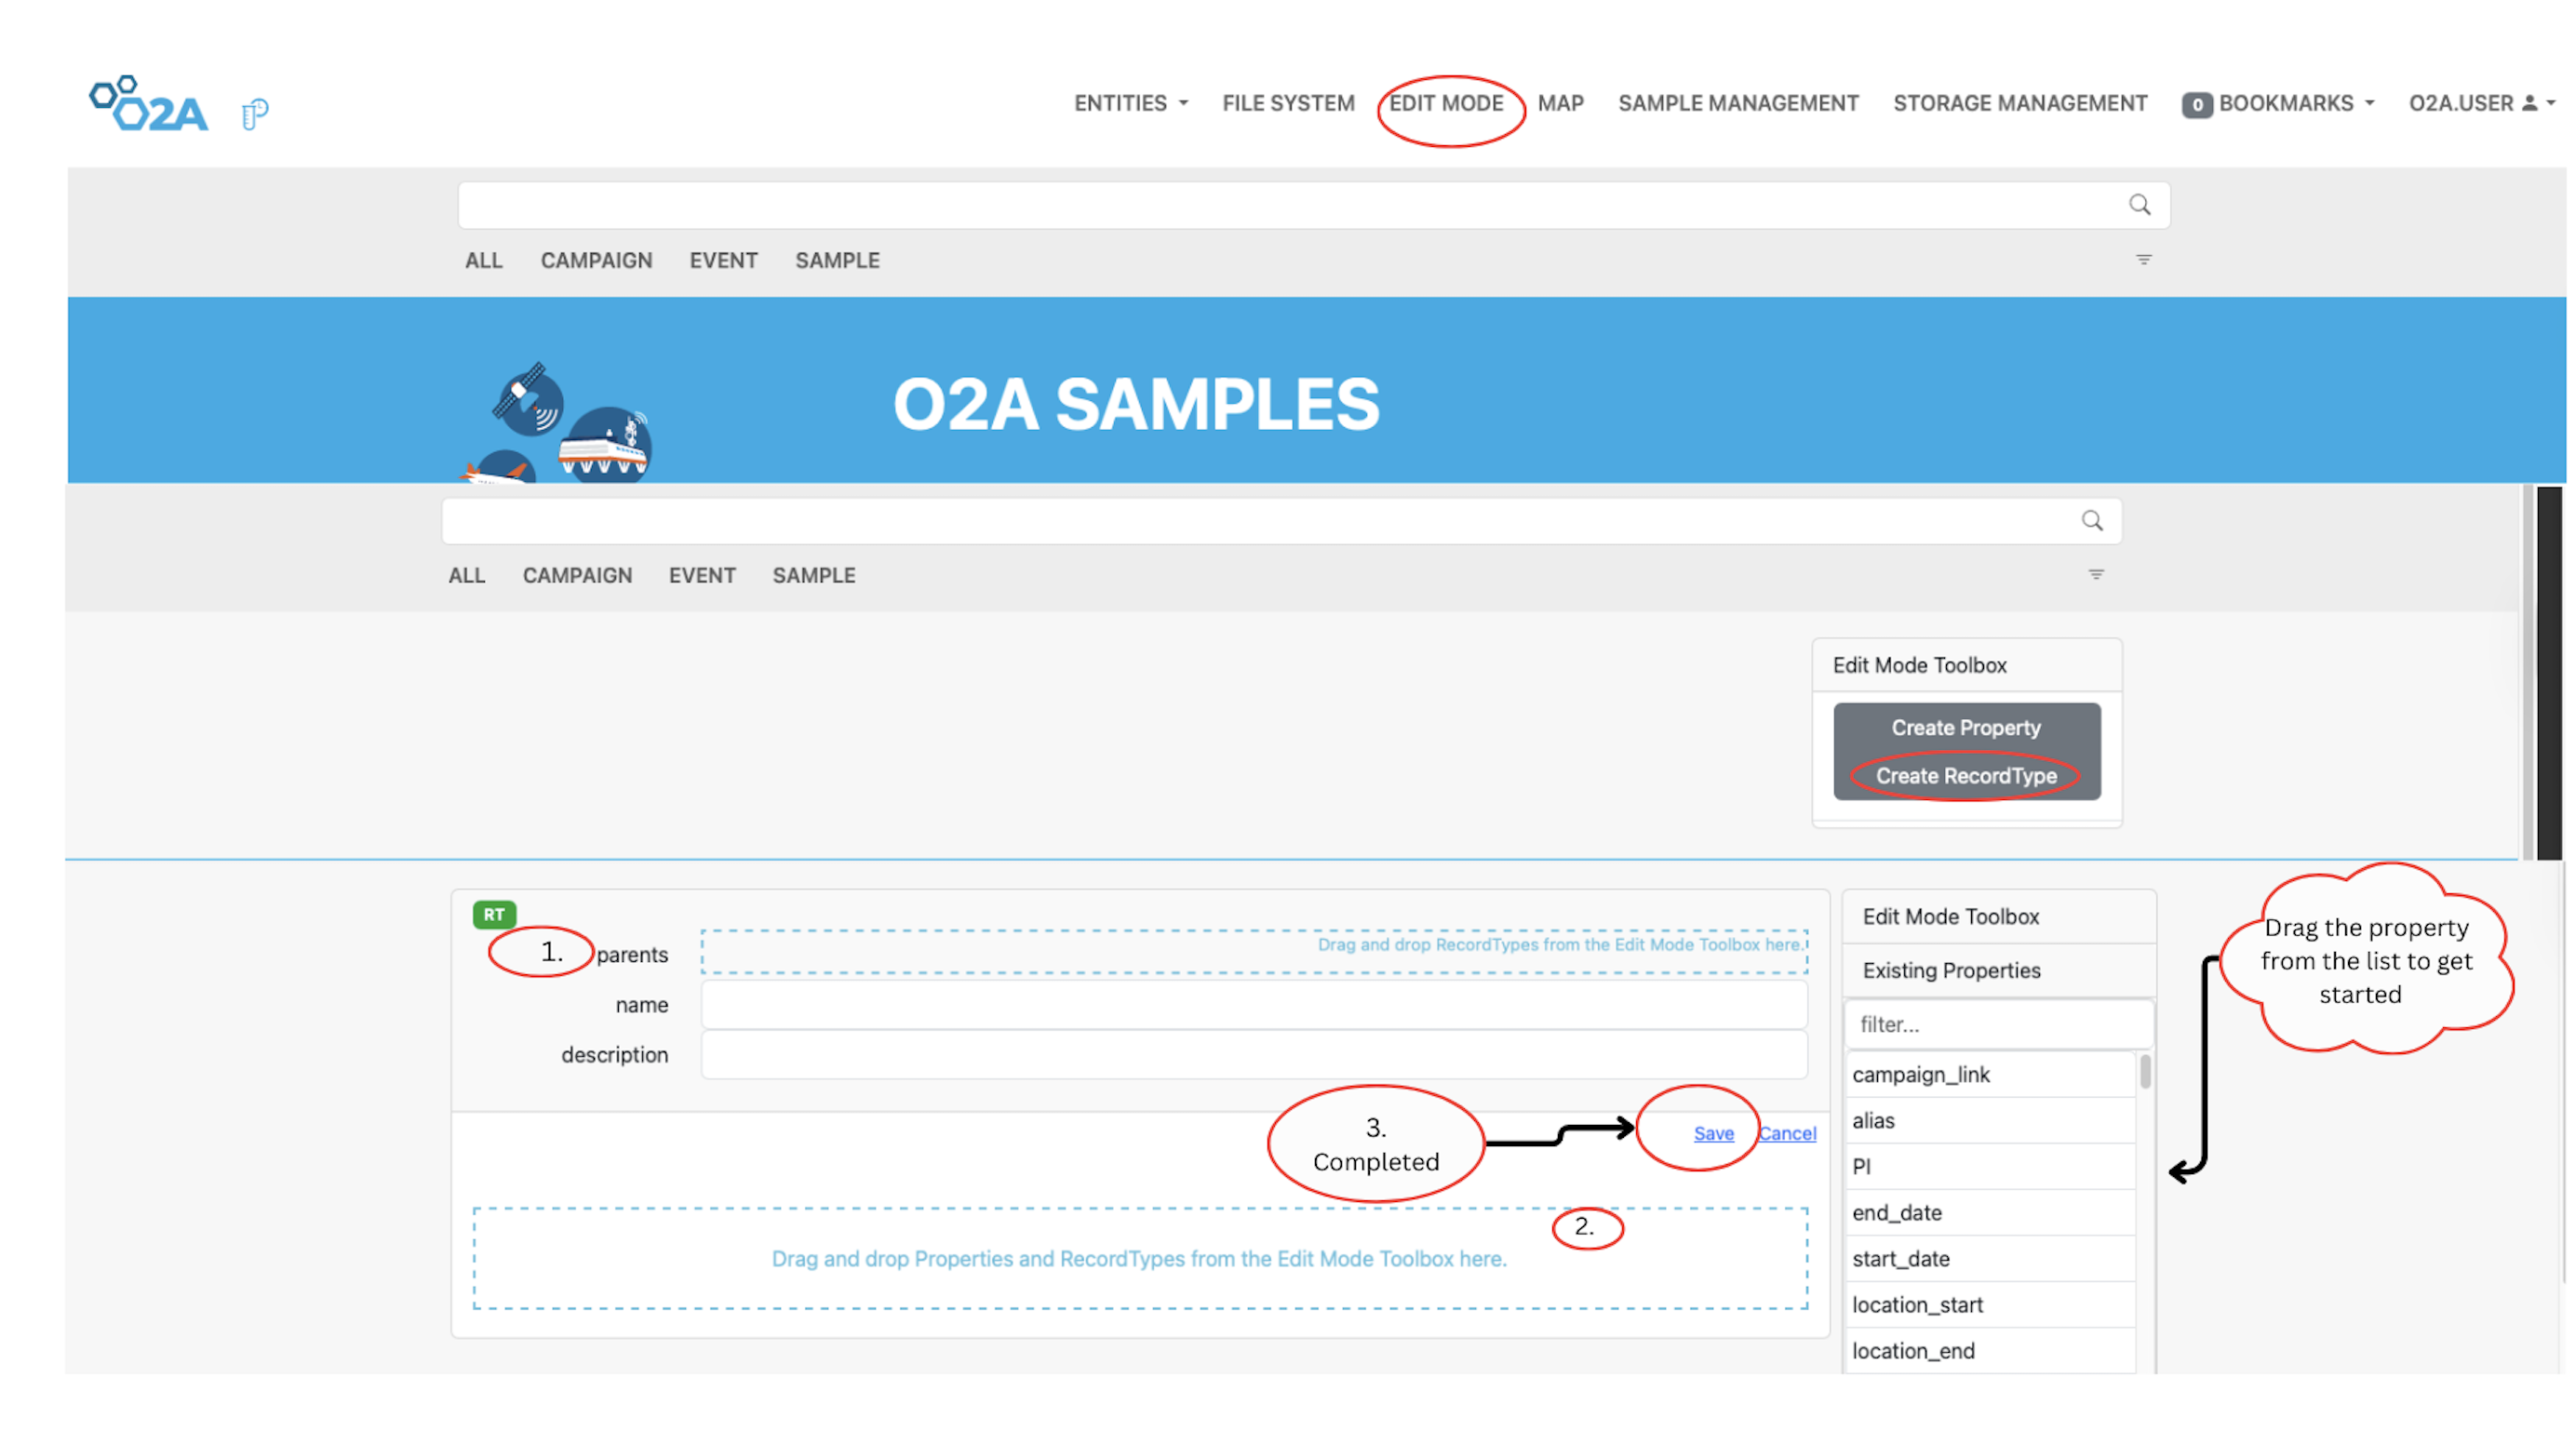 O2A SAMPLES SYSTEM: Steps on how to create new RecordType The screenshot shows the steps to create a new RecordType in the O2A SAMPLES system. After clicking the Edit Mode icon, fill in the parents details by draging the property from the list on the right side to get started. Click on the save button to create the new RecordType in the system.
Steps to create a new Property
Step 1: Click the Edit Mode icon on the navigation bar to open the Edit Mode pop-up window.
Step 2: Select the Property option from the pop-up window.
Step 3: Fill in the required details for the new Property, such as its name, decription, and data type.
Step 4: Click Submit to create the new Property in the system.
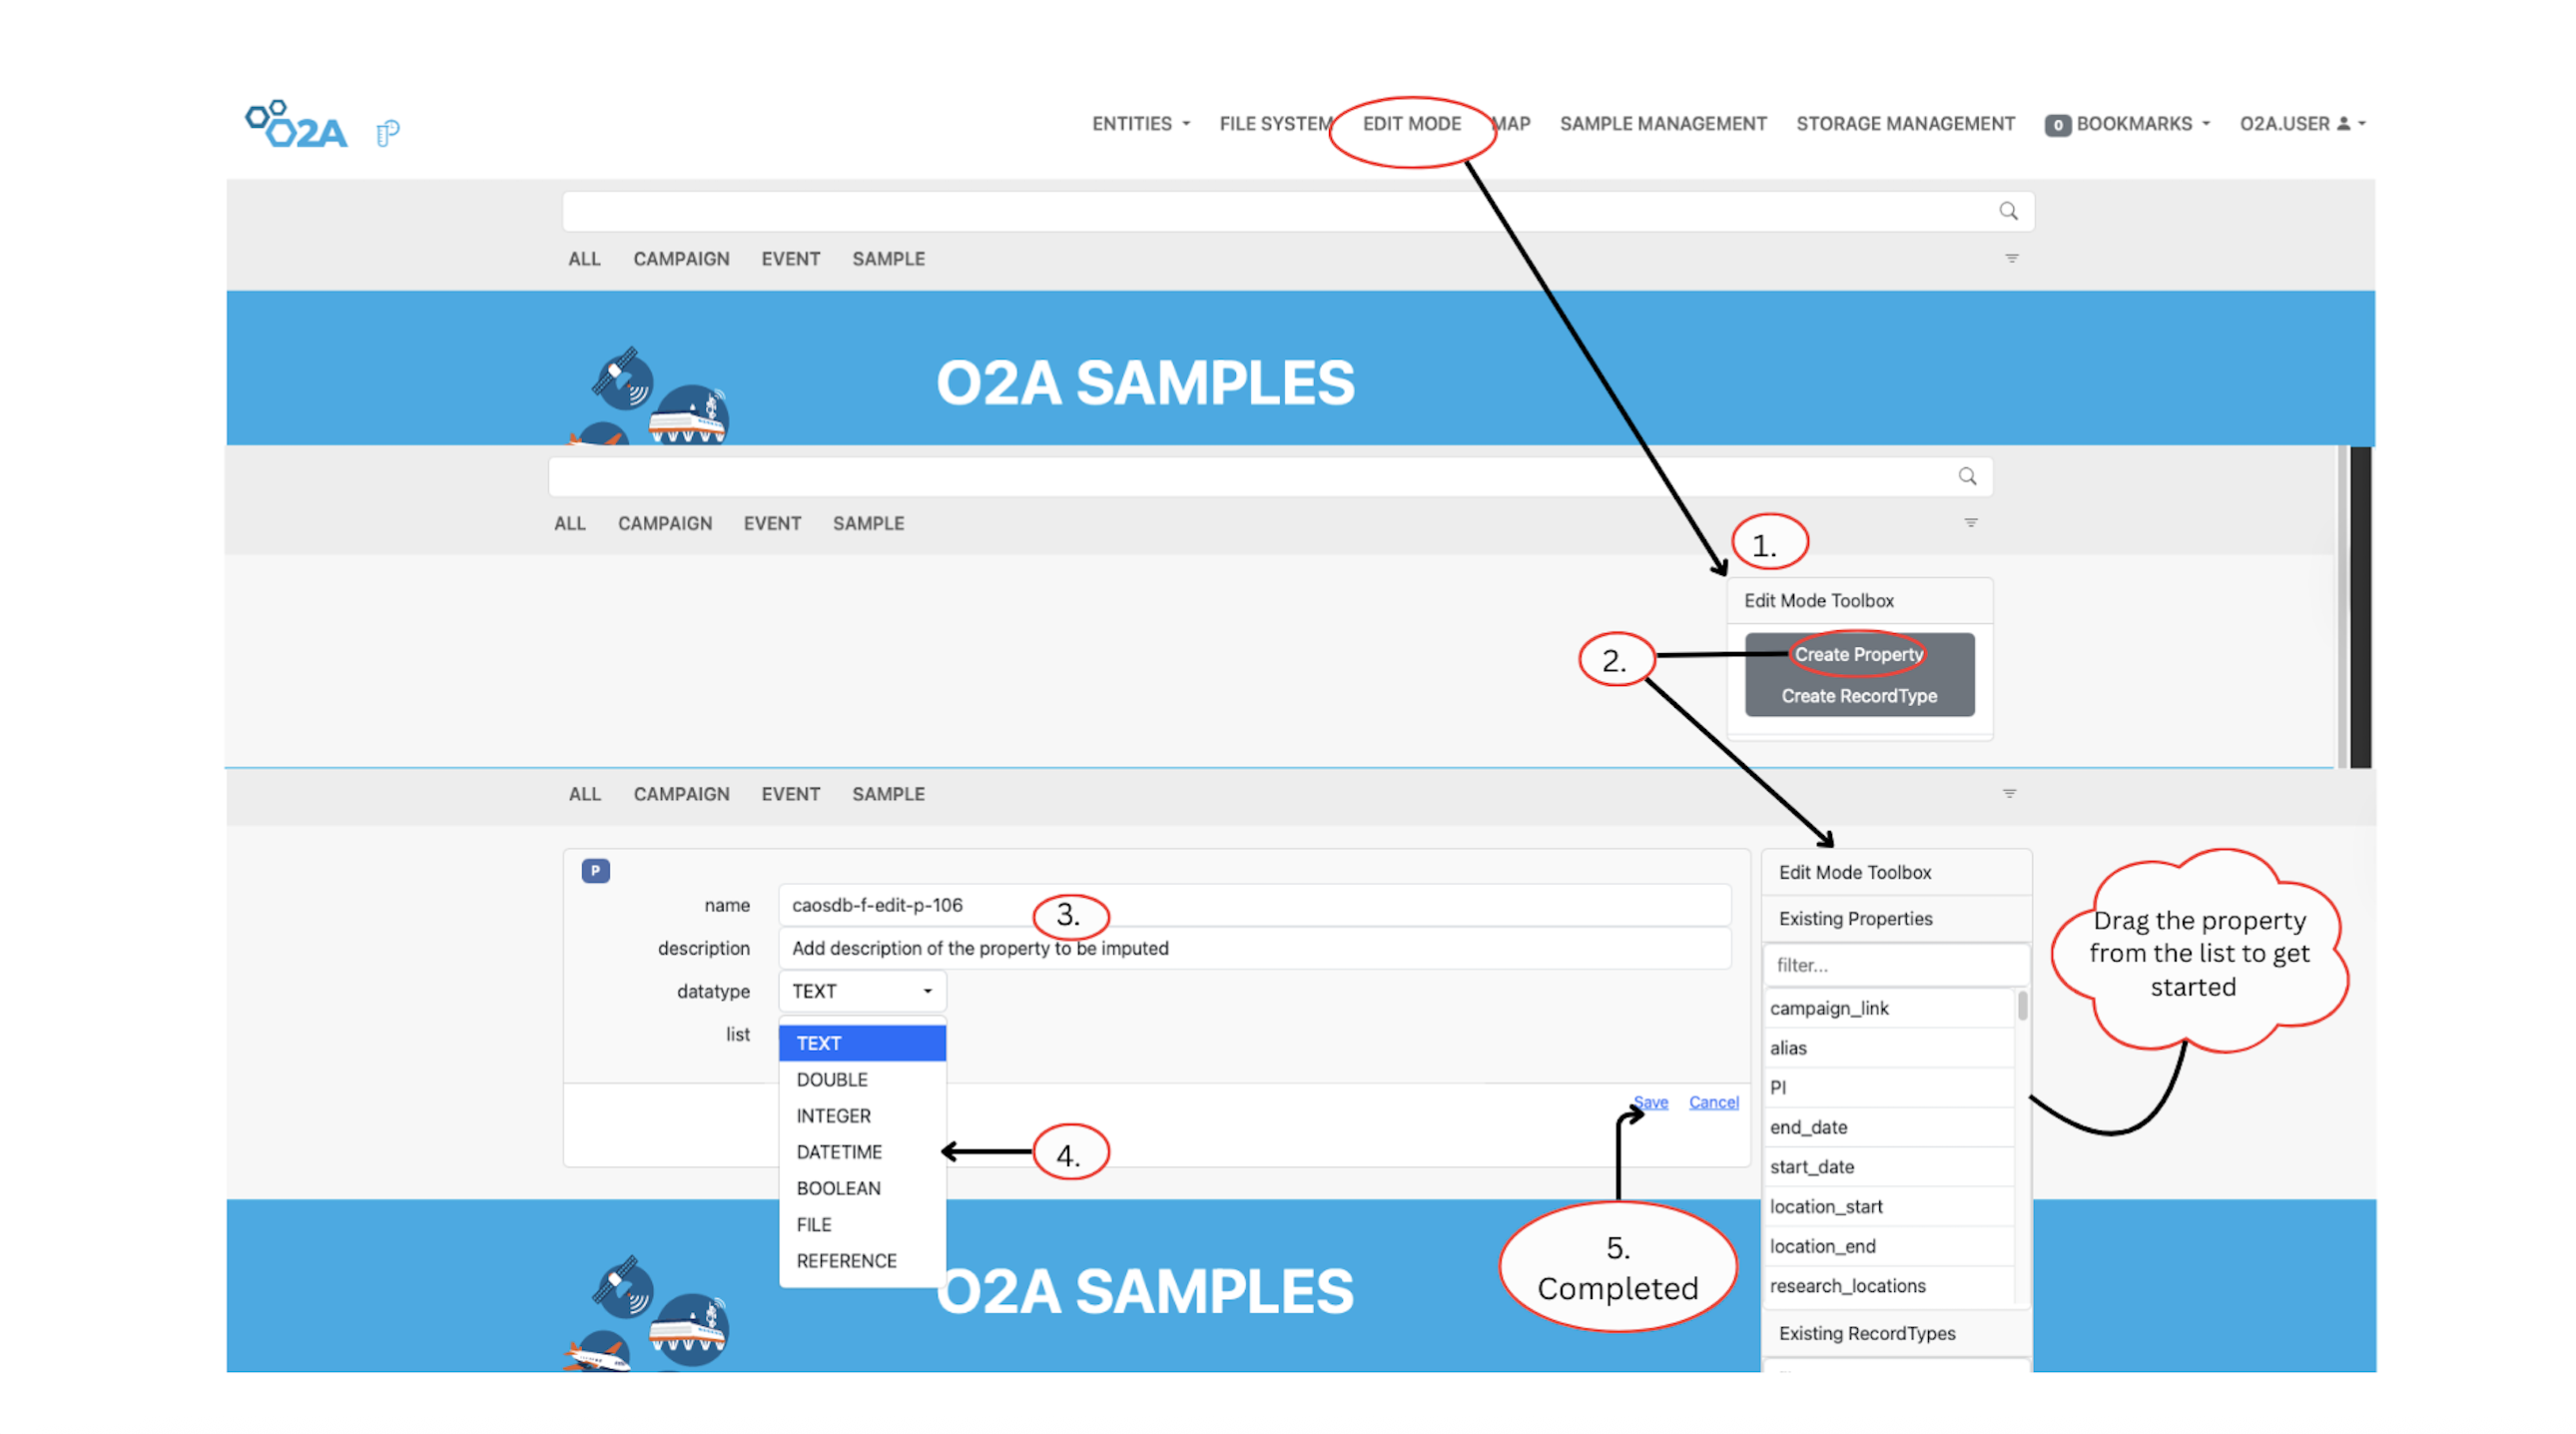 O2A SAMPLES SYSTEM: Steps on how to create new Property The screenshot shows the steps to create a new Property in the O2A SAMPLES system. After clicking the Edit Mode icon, select the Property option from the pop-up window to gett started. The name is filled on the first column,on the next column the datatype a drop down menu is available for selecting the data type. The final step is to click the save button to complete the Property creation in the system.
Sample Management
Under the Sample Management menu, you can manage your samples by registering new samples, viewing existing ones, exporting sample data, and upload sample information from your local machine. The Sample Management menu is located directly after the Map menu in the navigation bar.
Once you click on Sample Management, you will see several sub-menus. Each sub-menu provides access to specific actions related to sample management, allowing you to work with your data in a structured and efficient way.
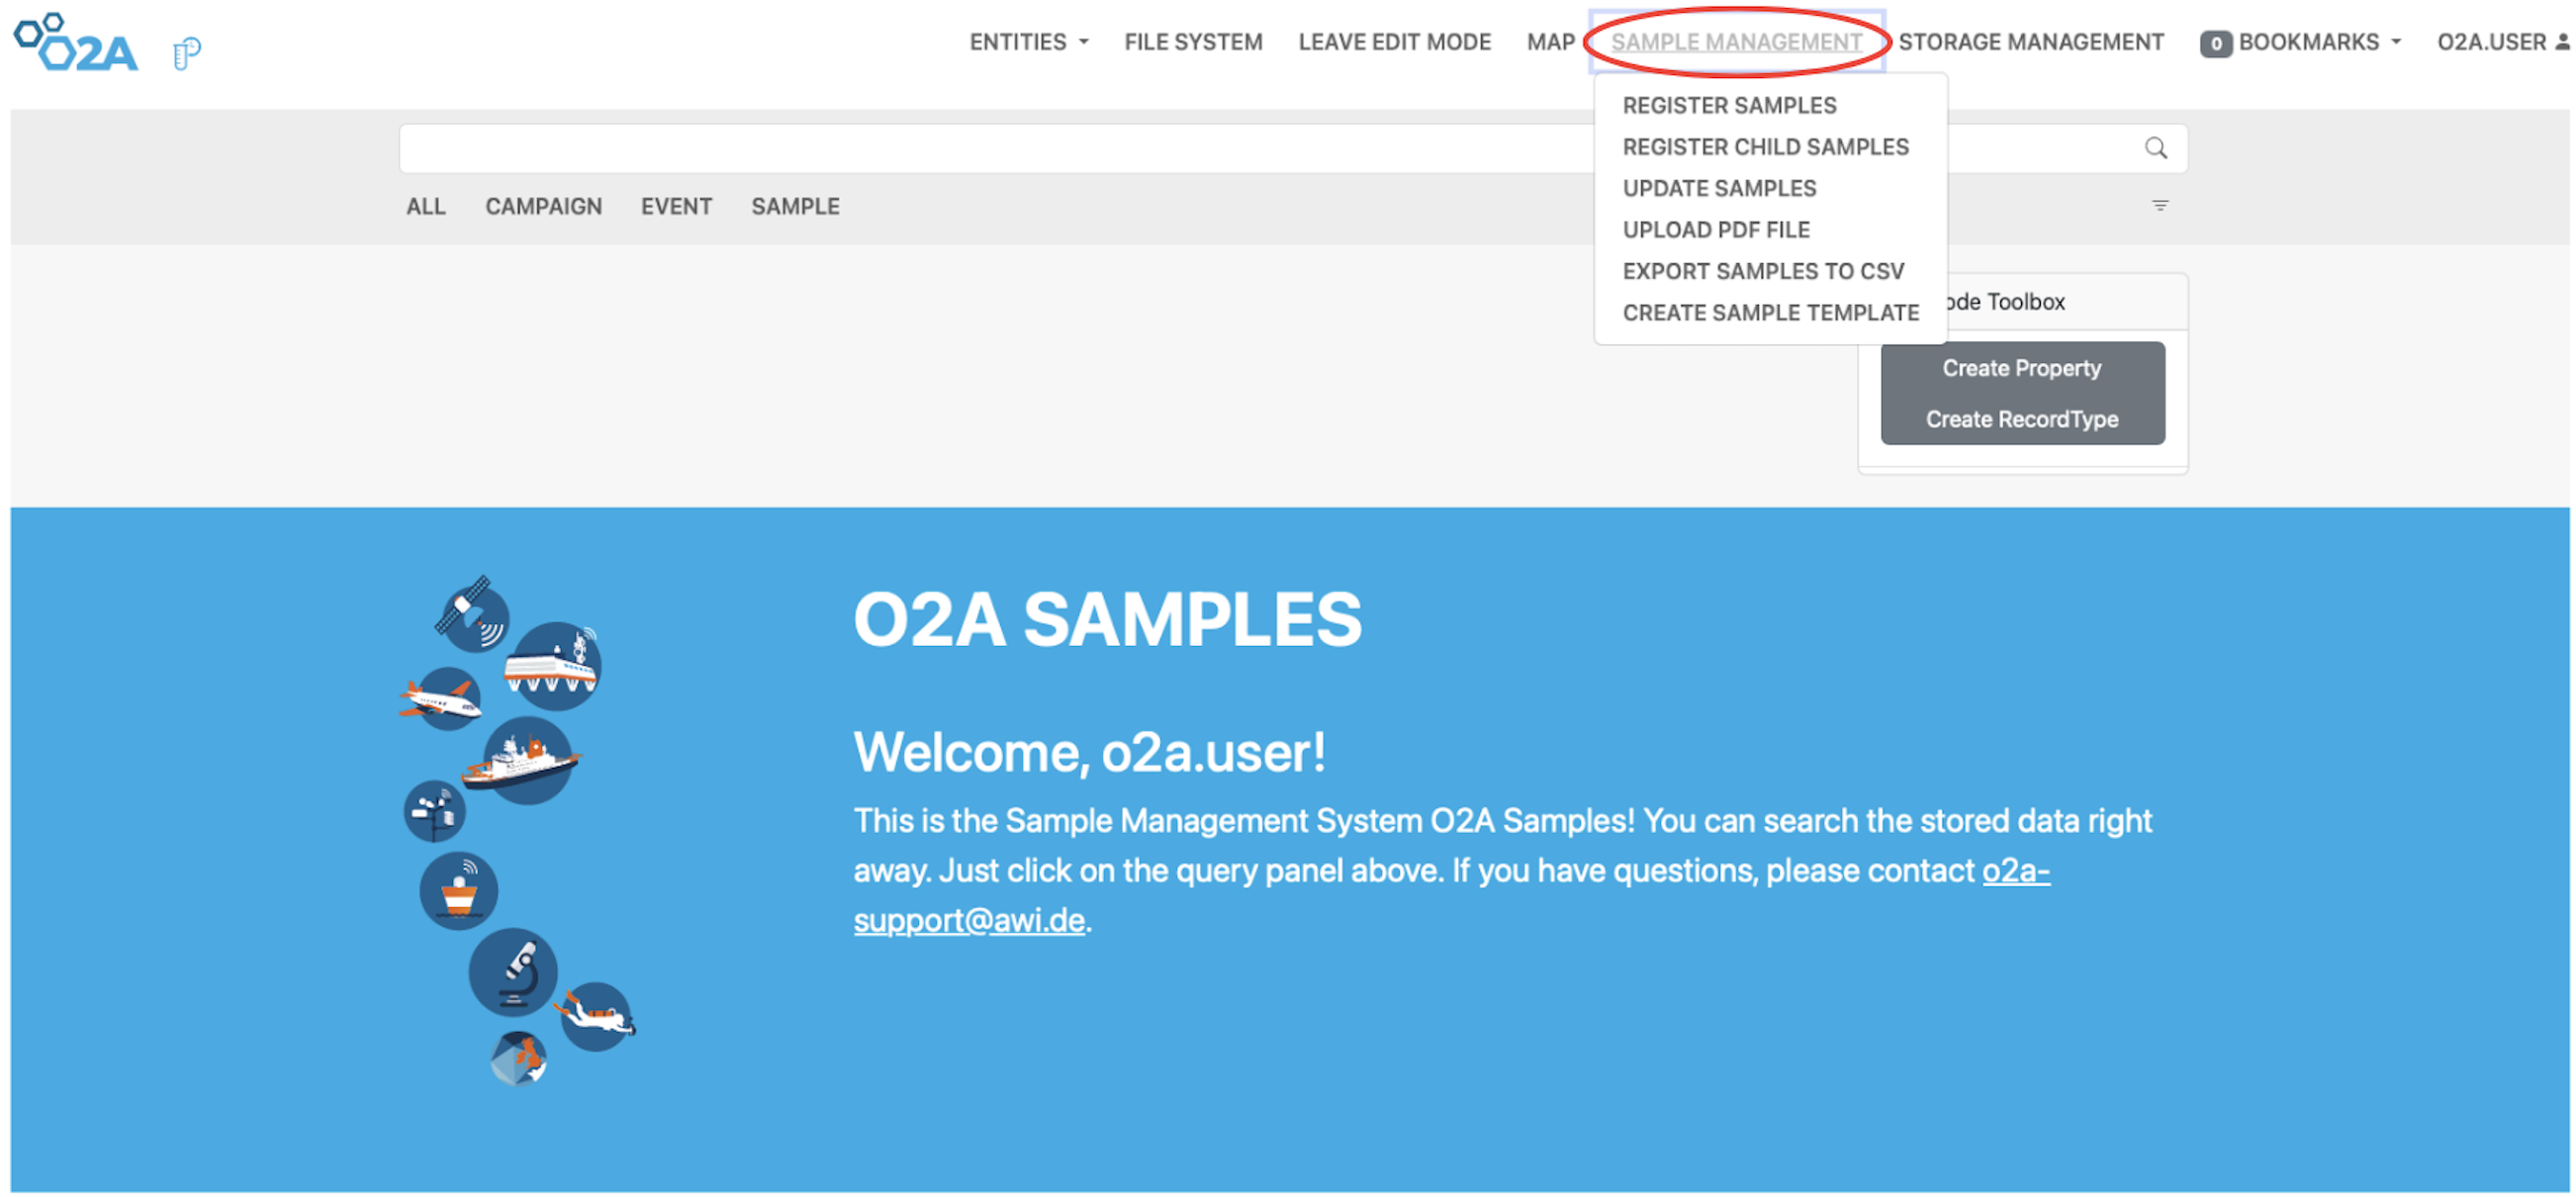 Expanded view of the Sample Management menu in the O2A SAMPLES system.The screenshot shows the sub-menu options of the Sample Management menu, including register samples,register child sample, updating samples, upload PDF file, export sample to CSV, and create sample templates.
Register Sample
To register a new sample, click the Register Sample button under the Sample Management menu. A pop-up form will appear to guide you through the registration process. The first field in the form is the Template field, which is optional. You can select a pre-existing sample template to standardize your registration. Once a template is selected, some columns may be auto-filled based on its configuration. The remaining fields are mandatory and must be completed before submitting the form. After entering your name, you’ll need to select both required and additional columns to include in your sample registration. Once all necessary details are filled in, click the Submit button to complete the registration.
Steps to register a sample
Step 1: Click the Register Sample button. A pop-up form will appear. In the first field, optionally select a sample template from the drop-down menu.
Step 2: Enter your name in the User Name field.
Step 3: Select the required columns from the Required Columns field.
Step 4: Select any additional columns from the Additional Columns field.
Step 5: Click the Submit button to register the sample.
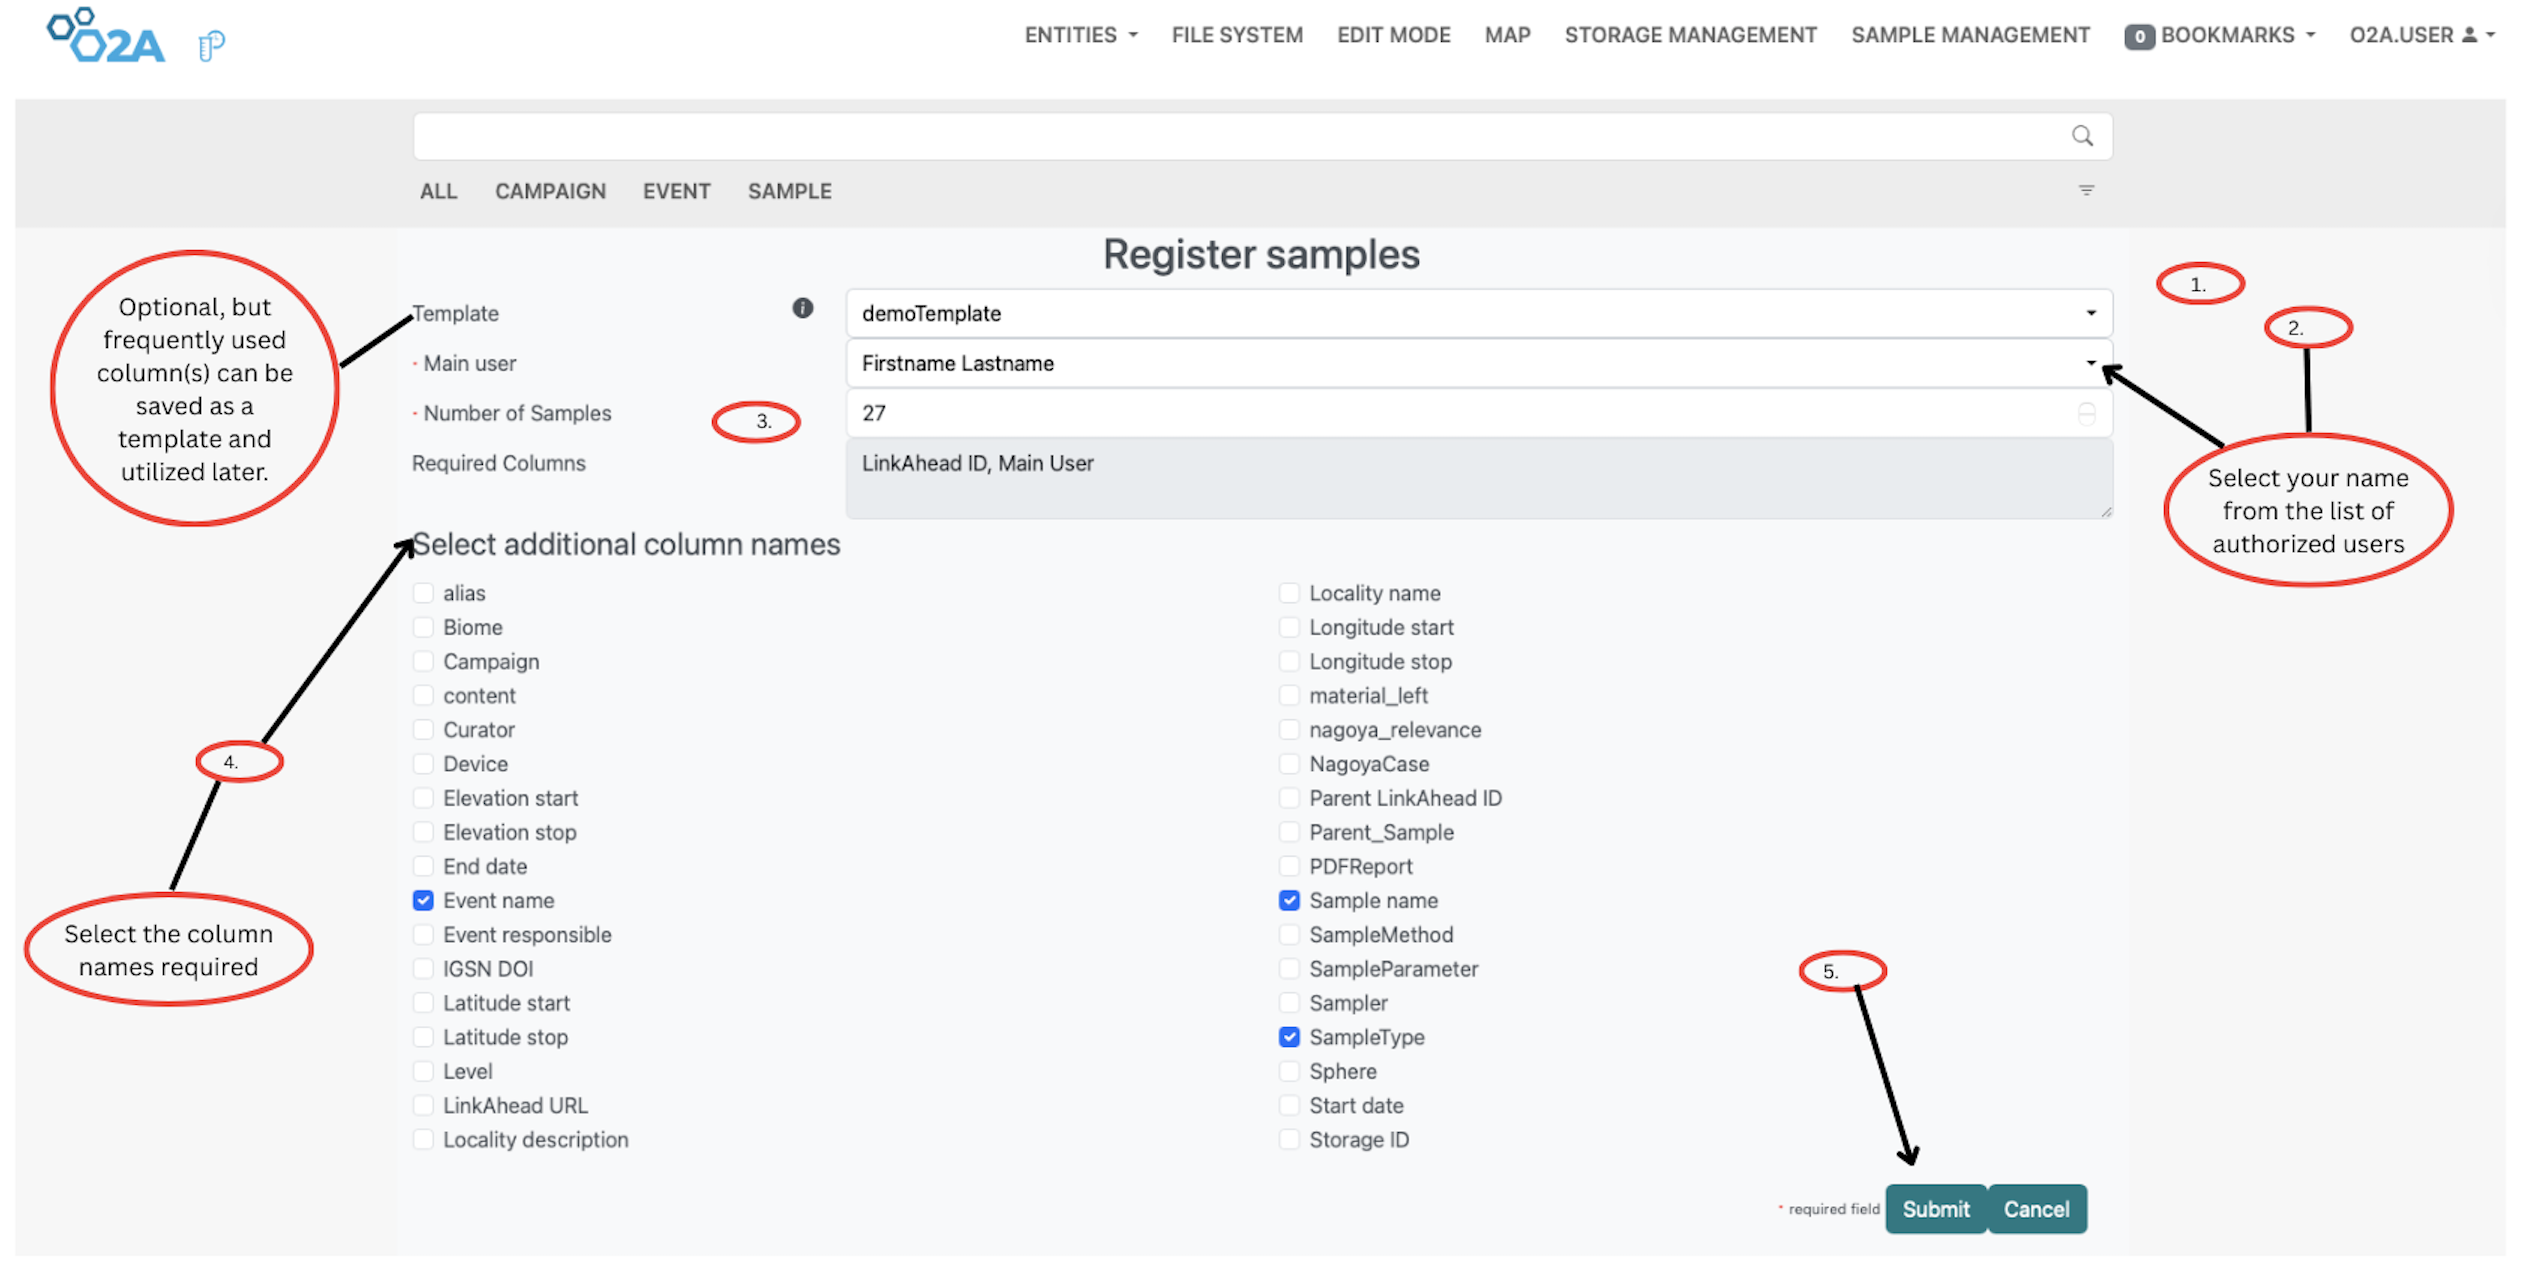 O2A SAMPLES SYSTEM: Steps on how to register a sample(s) The screenshot shows the steps to register a new sample in the O2A SAMPLES system. Users can optionally select a template, the next column to enter the main user fromthe list of authorized users. You can choose required and additional columns, and submit the form to register new samples in the system.
Register Child Sample
To register the child samples, users create new sample records with the Register Sample button under the Sample Management menu and include the column for the Parent O2A samples ID. This parent ID links each child sample to the original parent sample from which it was derived.
Users can either use a prepared template for child samples or manually select the required columns in the registration form. The important point is that the registration must include the parent sample reference column, so that the relationship between parent and child samples remains traceable in O2A SAMPLES.
Steps to register a child sample
Step 1: Use the Register Sample form to create new sample records for the child samples.
Step 2: Enter the main user and the number of child samples that should be registered.
Step 3: Use a suitable template if available. If no template is used, manually select the required columns.
Step 4: Make sure that the Parent O2A samples ID column is included. This column is used to connect each child sample to its parent sample.
Step 5: Select any additional metadata columns needed for the child samples, such as sample name, sample type, sample container, storage ID, event name, or device.
Step 6: Click Submit to complete the child sample registration.
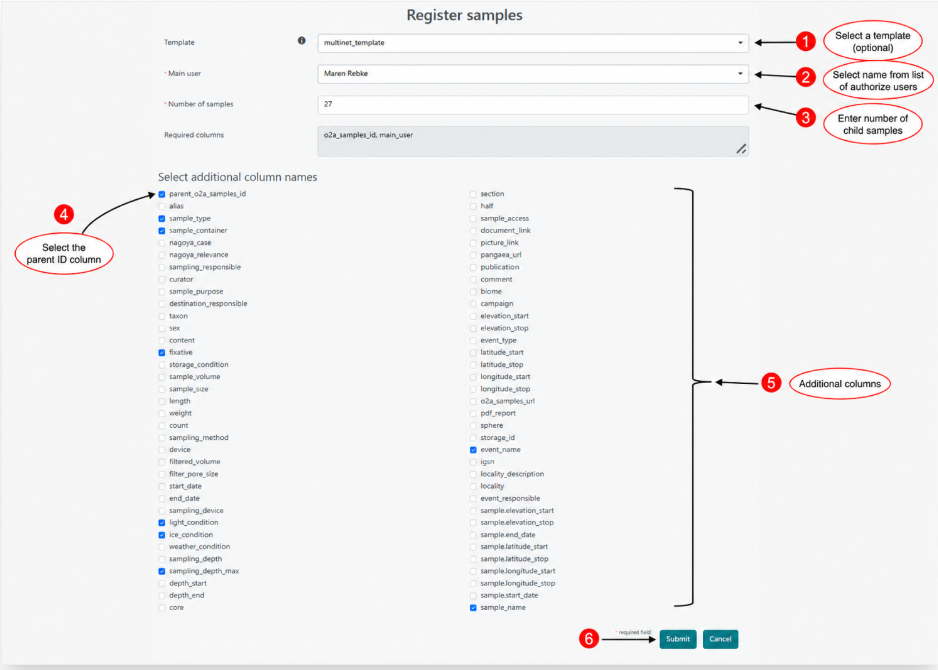 Child sample registration in the O2A SAMPLES system. Users can select their name, specify the number of child samples, 27 was imputed then choose required columns and additional columns,and mandatory select the Parent samples ID then click the submit button to complete.
Update Sample
With the Update Sample feature, you can modify existing sample details in the sample management system. Follow the steps below to update a sample using a template from your local computer.
Steps to update a sample
Step 1: Click the Update Sample button under the Sample Management menu. A pop-up window will appear where you can import a template file from your local machine. Choose the appropriate or updated document.
Step 2: After selecting the file, click the Submit button to apply the changes and update the sample details in the system.
 Update sample form in the O2A SAMPLES system. The screenshot shows the update sample form in the O2A SAMPLES system. On the sample import template, Users can choose file from their local machine to update sample details in the system. After selecting the file, click the Submit button to update the sample in the system.
Upload Pdf File
You also have the ability to upload a PDF file to the sample management system.
Steps to upload a PDF file
Step 1: Click the Upload PDF File button under the Sample Management menu. A pop-up window will appear where you can select a PDF file from your local computer.
Step 2: After selecting the PDF file, click the Submit button to upload it to the sample management system.
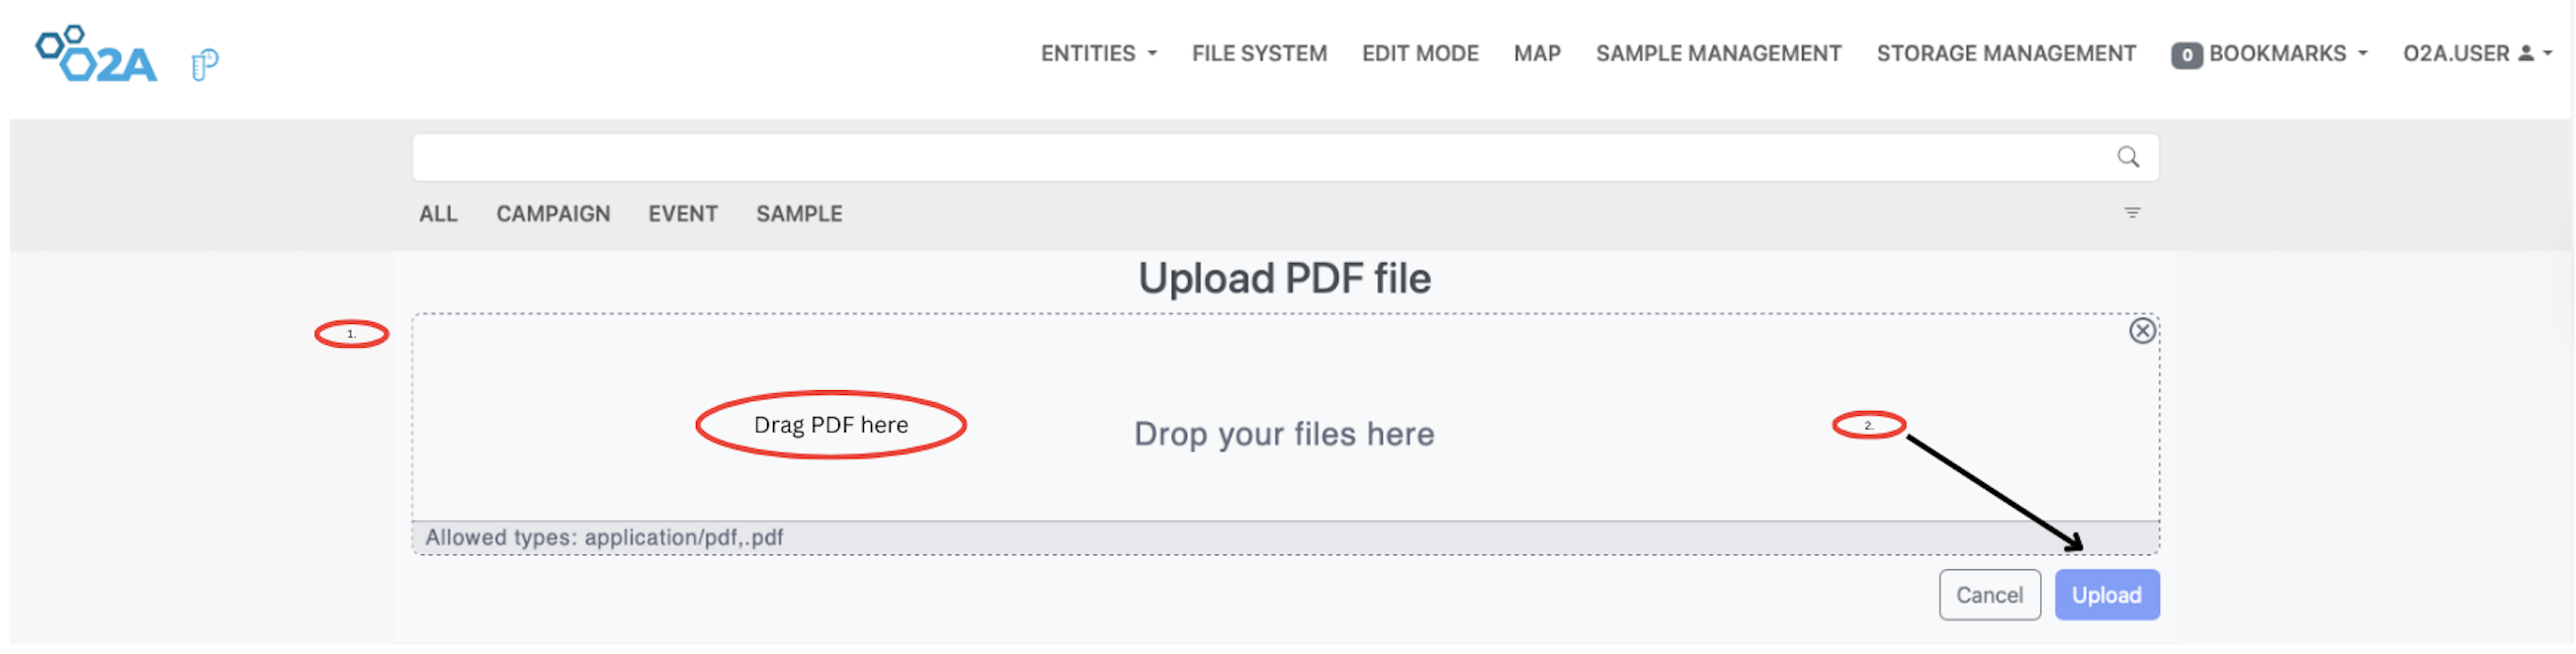 PDF upload interface in the O2A SAMPLES system.Users can drag and drop a PDF file or select one from their local machine. Allowed file types are
 .pdf, and the process is completed by clicking the Upload button. Navigation options are visible at the top, including Sample Management and File System.
Export Sample to CSV
You can export sample data to CSV format for further analysis or reporting. To export a sample, click the Export Sample to CSV button under the Sample Management menu. A pop-up window will appear where you can enter the Sample ID and the Query for the data you want to export. If you wish to exclude empty columns from the export, check the Remove Empty Columns box. Finally, click the Submit button to export the sample data in CSV format.
Steps to export sample data to CSV
Step 1: Click the Export Sample to CSV button under the Sample Management menu. A pop-up window will appear. In the first field, enter the Sample ID.
Step 2: Fill in the Query field with the appropriate query for the data you want to export.
Step 3: To exclude empty columns from the export, check the Remove Empty Columns box.
Step 4: Click the Submit button to export the sample data in CSV format.
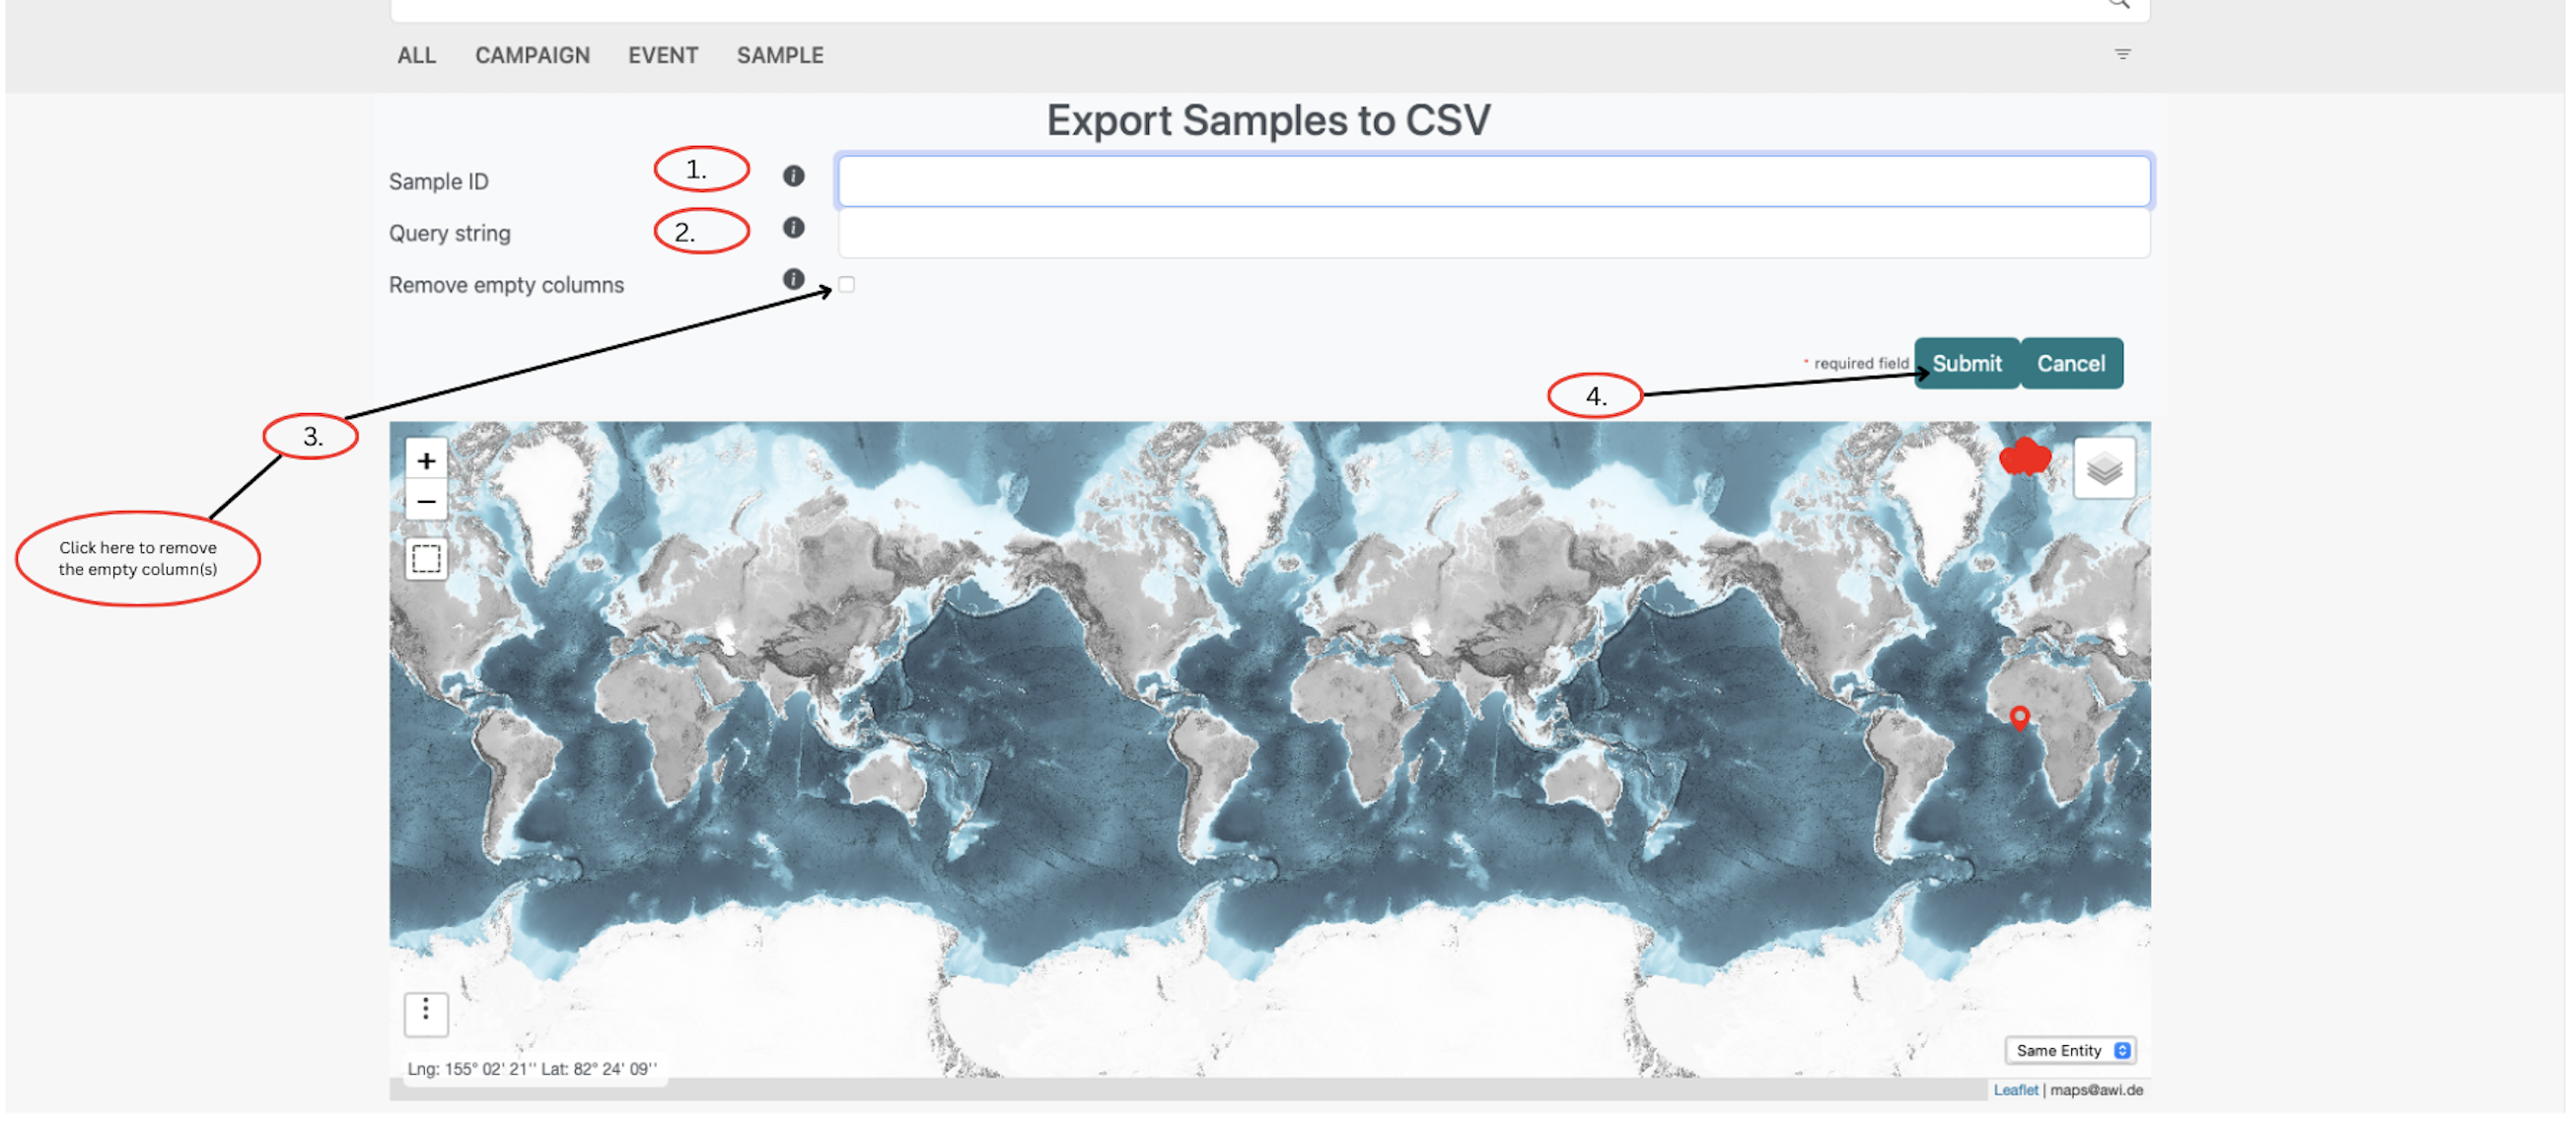 O2A SAMPLES SYSTEM: Steps on exporting samples to CSV The screenshot shows the steps to export sample data to CSV format in the O2A SAMPLES system. Users can enter the Sample ID and Query for the data they want to export. There is also an option to remove empty columns from the export. Finally, clicking the Submit button will complete the export.
Create Sample Template
Sample templates can be created to standardize the sample registration process. They allow frequently used columns to be pre‑defined, making it easier and faster to register new samples.
Steps to create a sample template
Step 1: Click the Create Sample Template button under the Sample Management menu. In the first field of the pop‑up form, enter the name of the new template.
Step 2: Fill in your name in the User Name field.
Step 3: Select the required columns you want to include in the template from the Required Columns field.
Step 4: Click the Submit button to create the sample template.
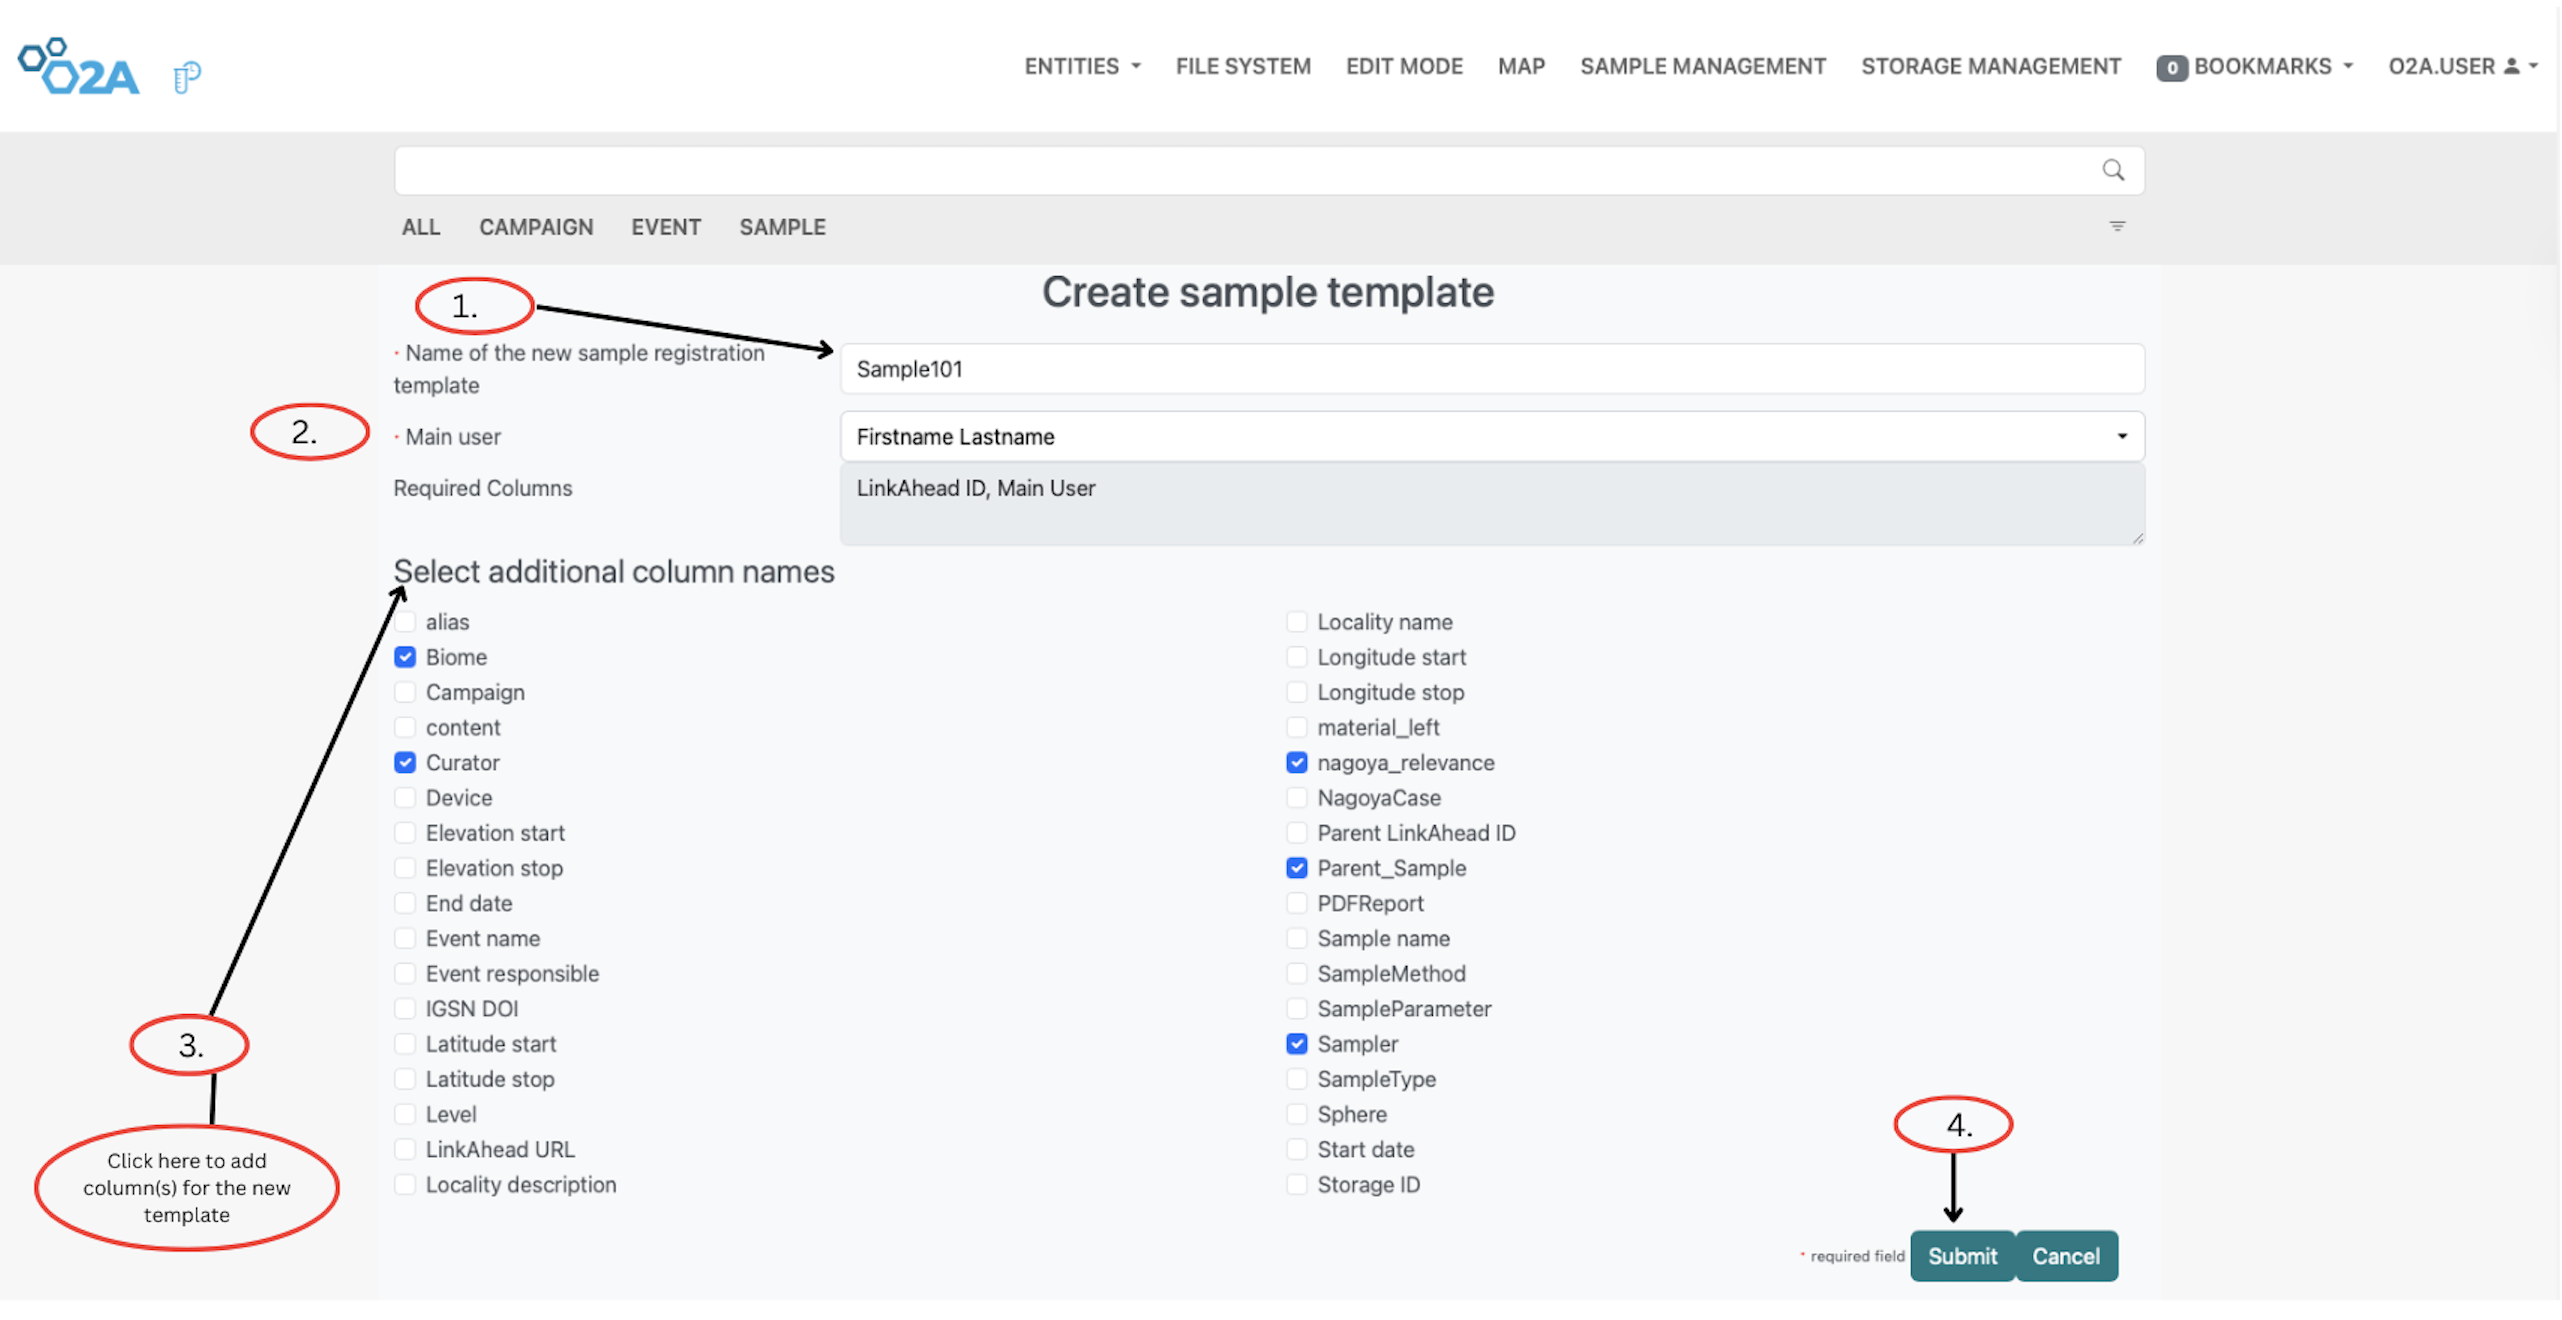 O2A SAMPLES SYSTEM: Steps on how to create a sample template The screenshot shows the steps to create a sample template in the O2A SAMPLES system. Users can enter the name of the new template, fill in their username from the list of available users, the next column is to select required columns. An additional column can be selected from the list of columns and click the Submit button to create the sample template.
Storage Management
The Storage Management menu allows you to manage storage containers for your samples. You can create new containers, view existing ones, and organize the contents of each container efficiently.
Steps to register a container
Step 1: Click the Storage Management menu in the navigation bar to open its options. Select Register from the sub‑menu. In the first field of the pop‑up form, enter the name of the container you want to register.
Step 2: Choose the appropriate Container Type from the drop‑down menu.
Step 3: Enter the dimensions of the container in the Dimensions field.
Step 4: Specify the number of containers you want to register.
Step 5: Select the template file format you want to use for the registration (e.g., CSV, XLSX).
Step 6: Optionally, specify a parent container if the new container is a sub‑container.
Step 7: Click the Submit button to complete the container registration.
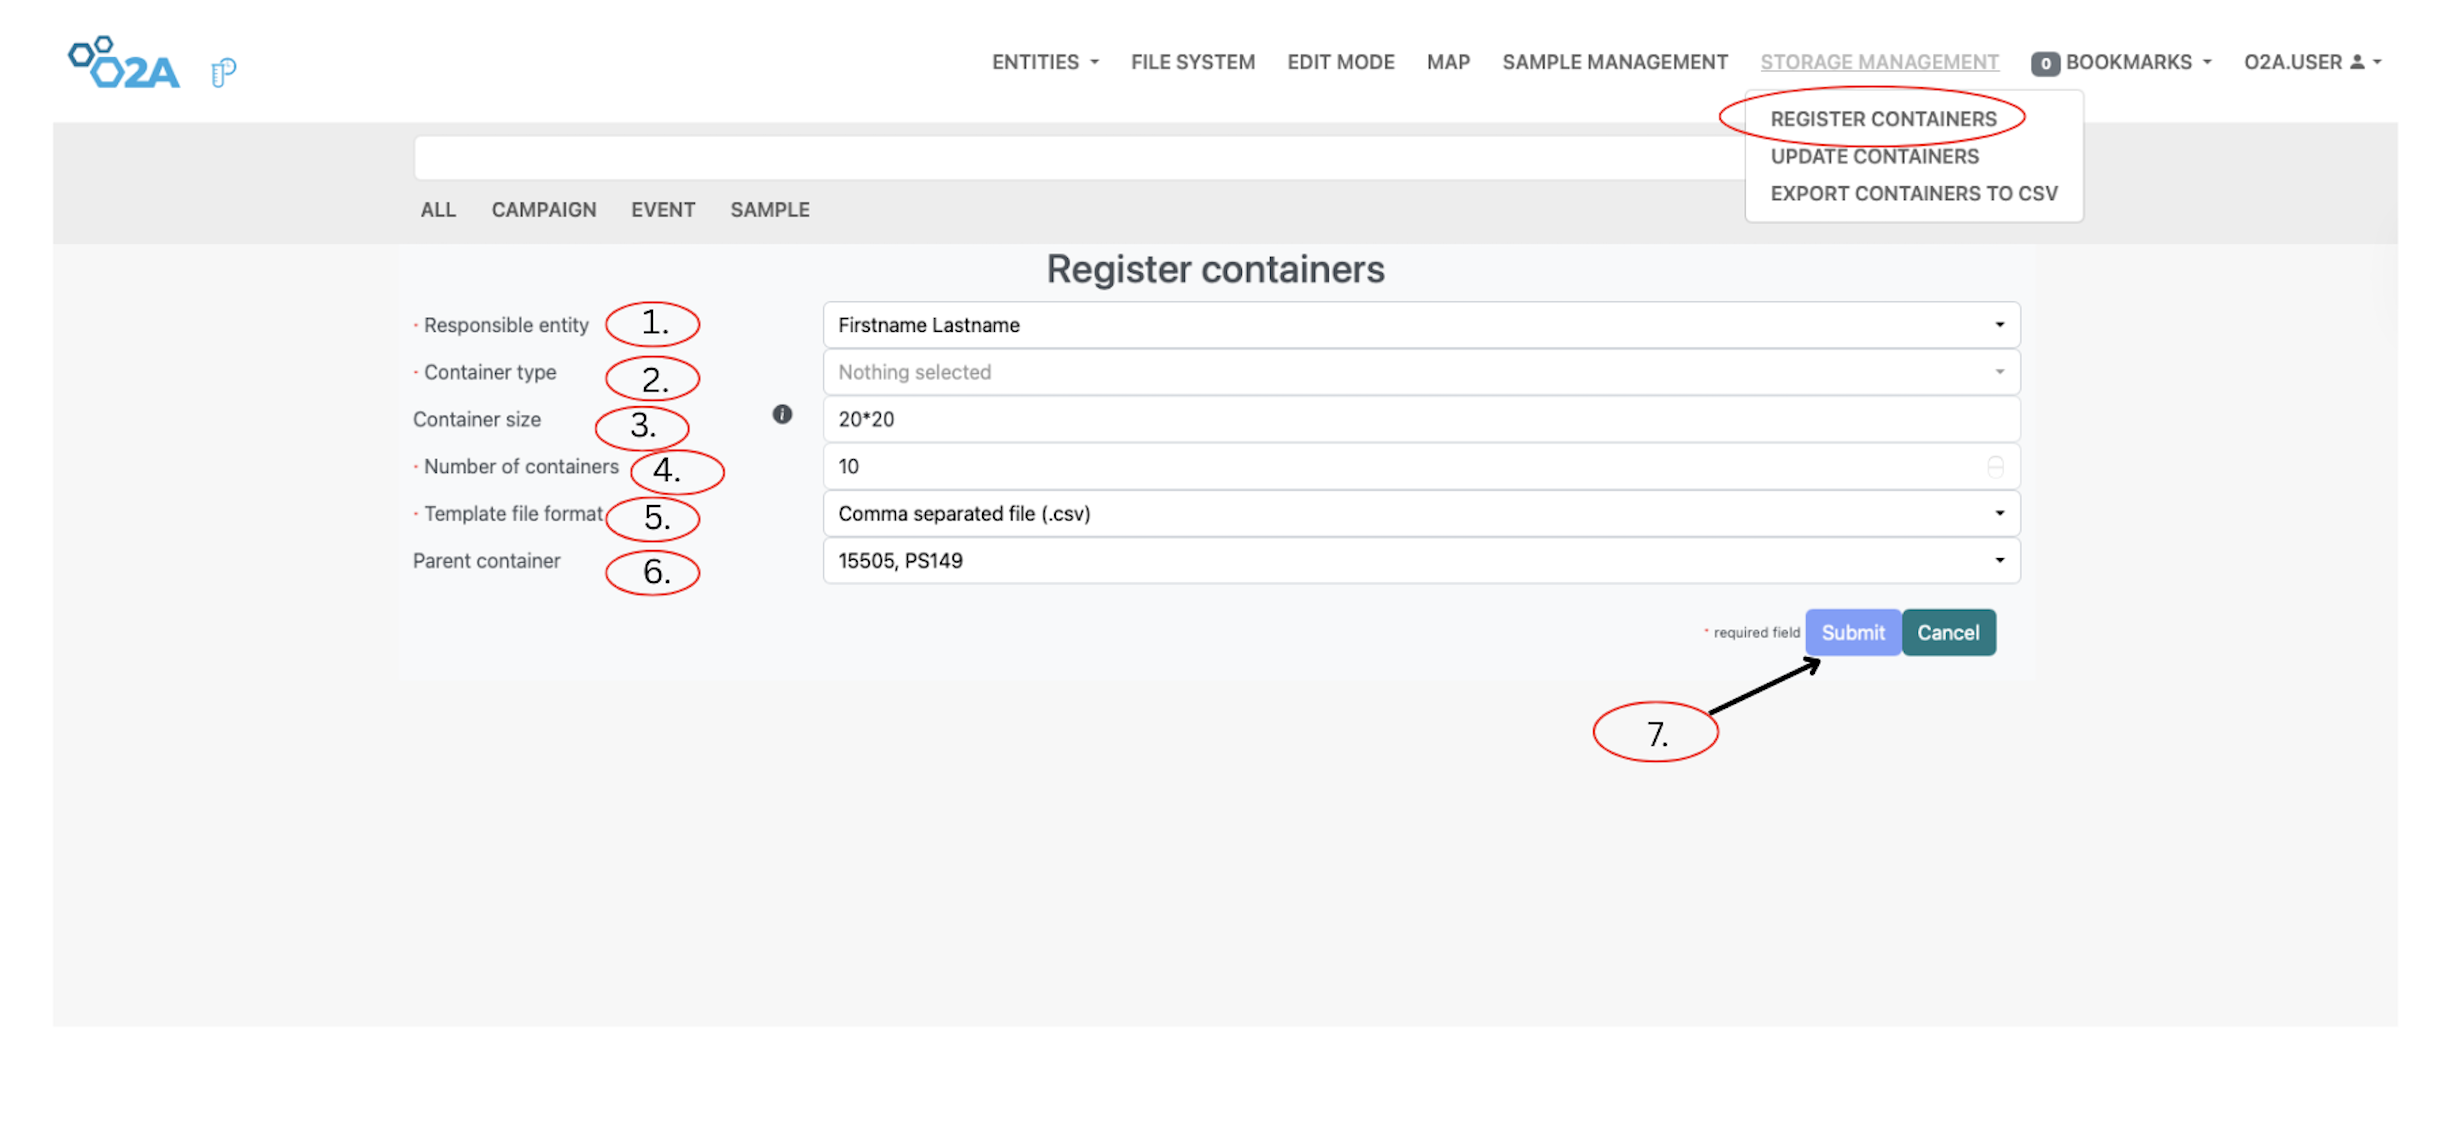 O2A SAMPLES SYSTEM: Steps on how to register a container The screenshot shows the steps to register a new container in the O2A SAMPLES system. The first column is the responsible entity to add the user name. The consequent columns allow users to enter the container type, container size where a value of 20*20 was imputed, then the number of containers type, template file format drop-town menu where you can choose the format. The final column is to select the parent container, click the Submit button to complete.
Update Container & Export Container to CSV
After registering a container, you can update its details or export its data to CSV format for reporting purposes or analysis. To update a container, click the Update Container button under the Storage Management menu. A pop-up window will appear where you can upload an updated container file from your local computer. After selecting the file, click the Submit button to apply the changes and update the container details in the system. To export a container to CSV format, click the Export Container to CSV button under the Storage Management menu. A pop-up window will appear where you can enter the Container ID. Click the Submit button to export the container data in CSV format. This allows you to keep your container information up-to-date and easily accessible for analysis or reporting. Below are the outlined steps for both updating a container and exporting it to CSV format respectively.
Steps to update a container
Step 1: Click the Update Container button under the Storage Management menu. A pop‑up window will appear where you can upload the container file you want to update from your local computer.
Step 2: After selecting the file, click the Submit button to update the container details in the O2A Sample system.
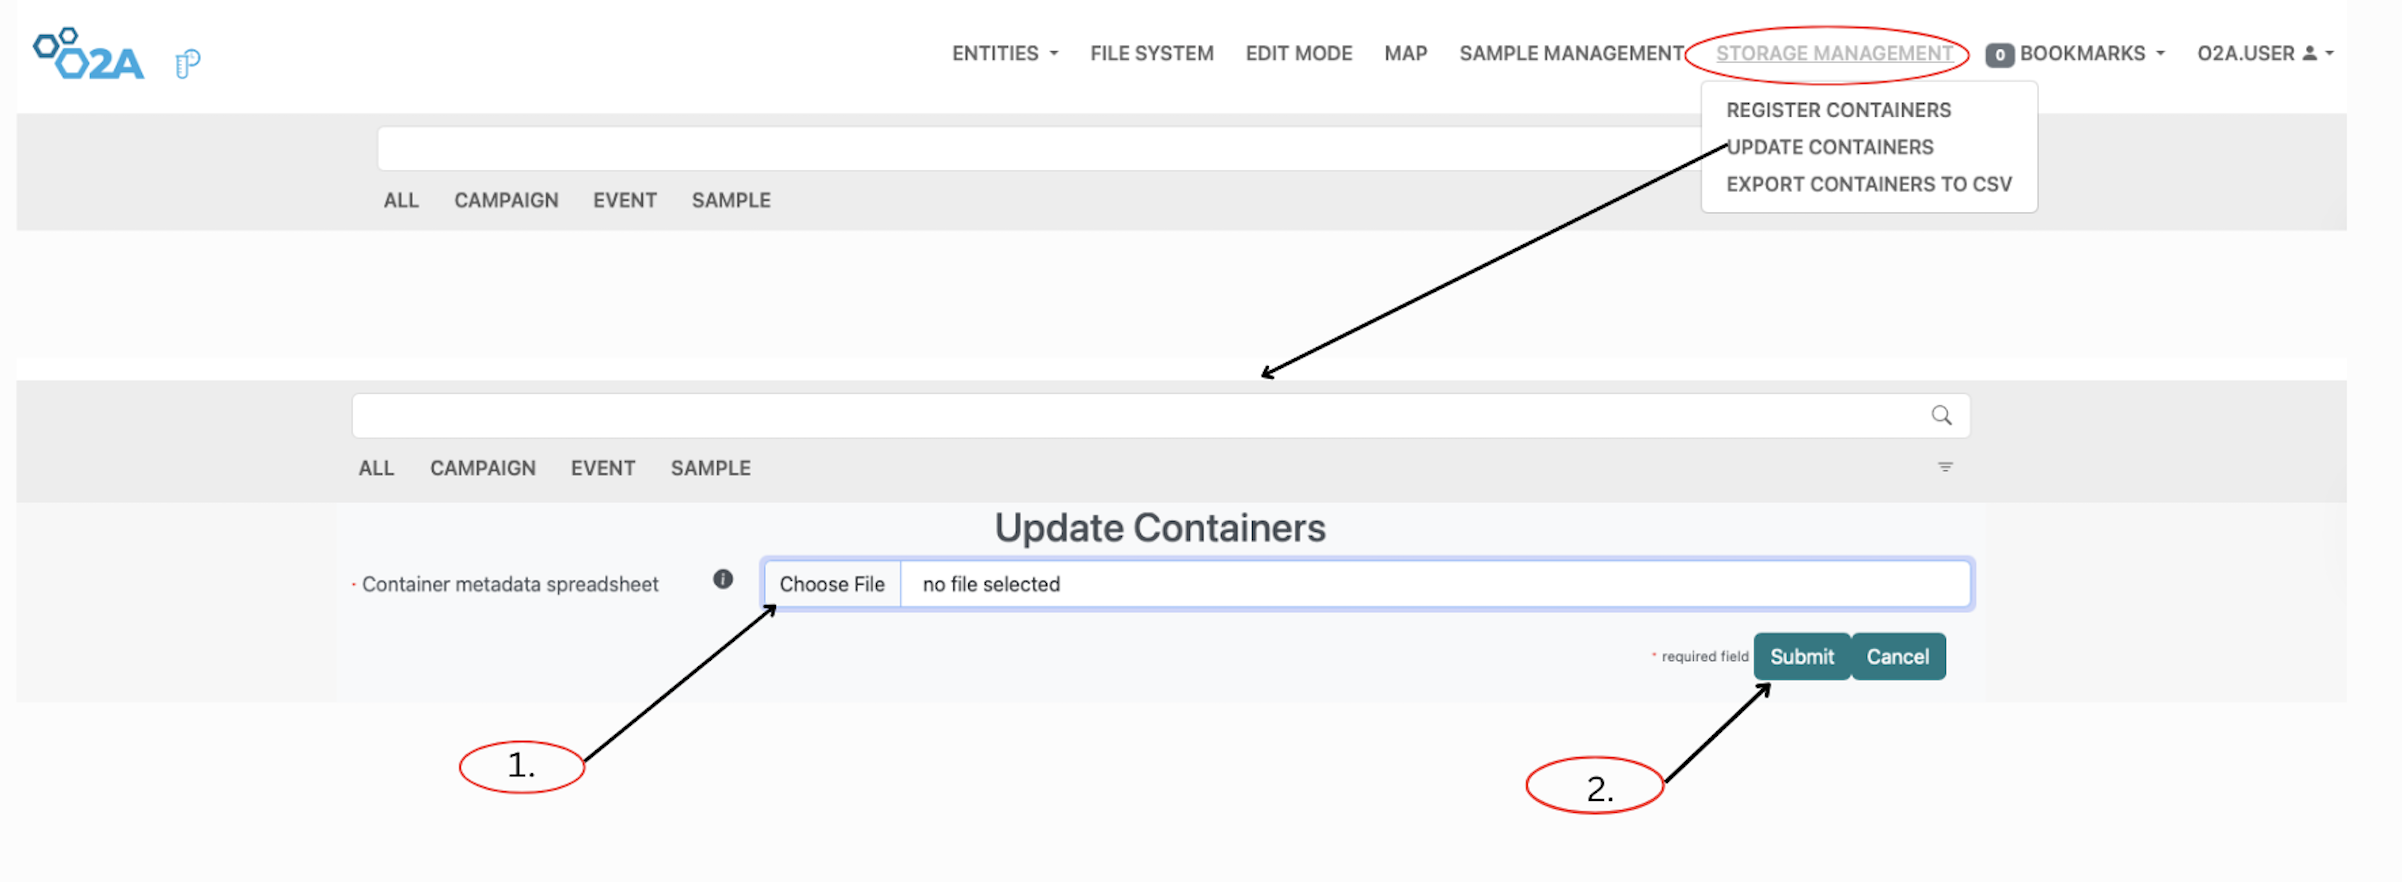 O2A SAMPLES SYSTEM: Steps on how to update a container The screenshot shows the steps to update a container in the O2A SAMPLES system. After clicking the Update Container button, a pop-up window appears where users can select a file from their local machine. Finally, click the Submit button to complete the update.
Steps to export a container to CSV
Step 1: Click the Export Container to CSV button under the Storage Management menu. A pop‑up window will appear. In the first field, enter the Container ID.
Step 2: Click the Submit button to export the container data in CSV format.
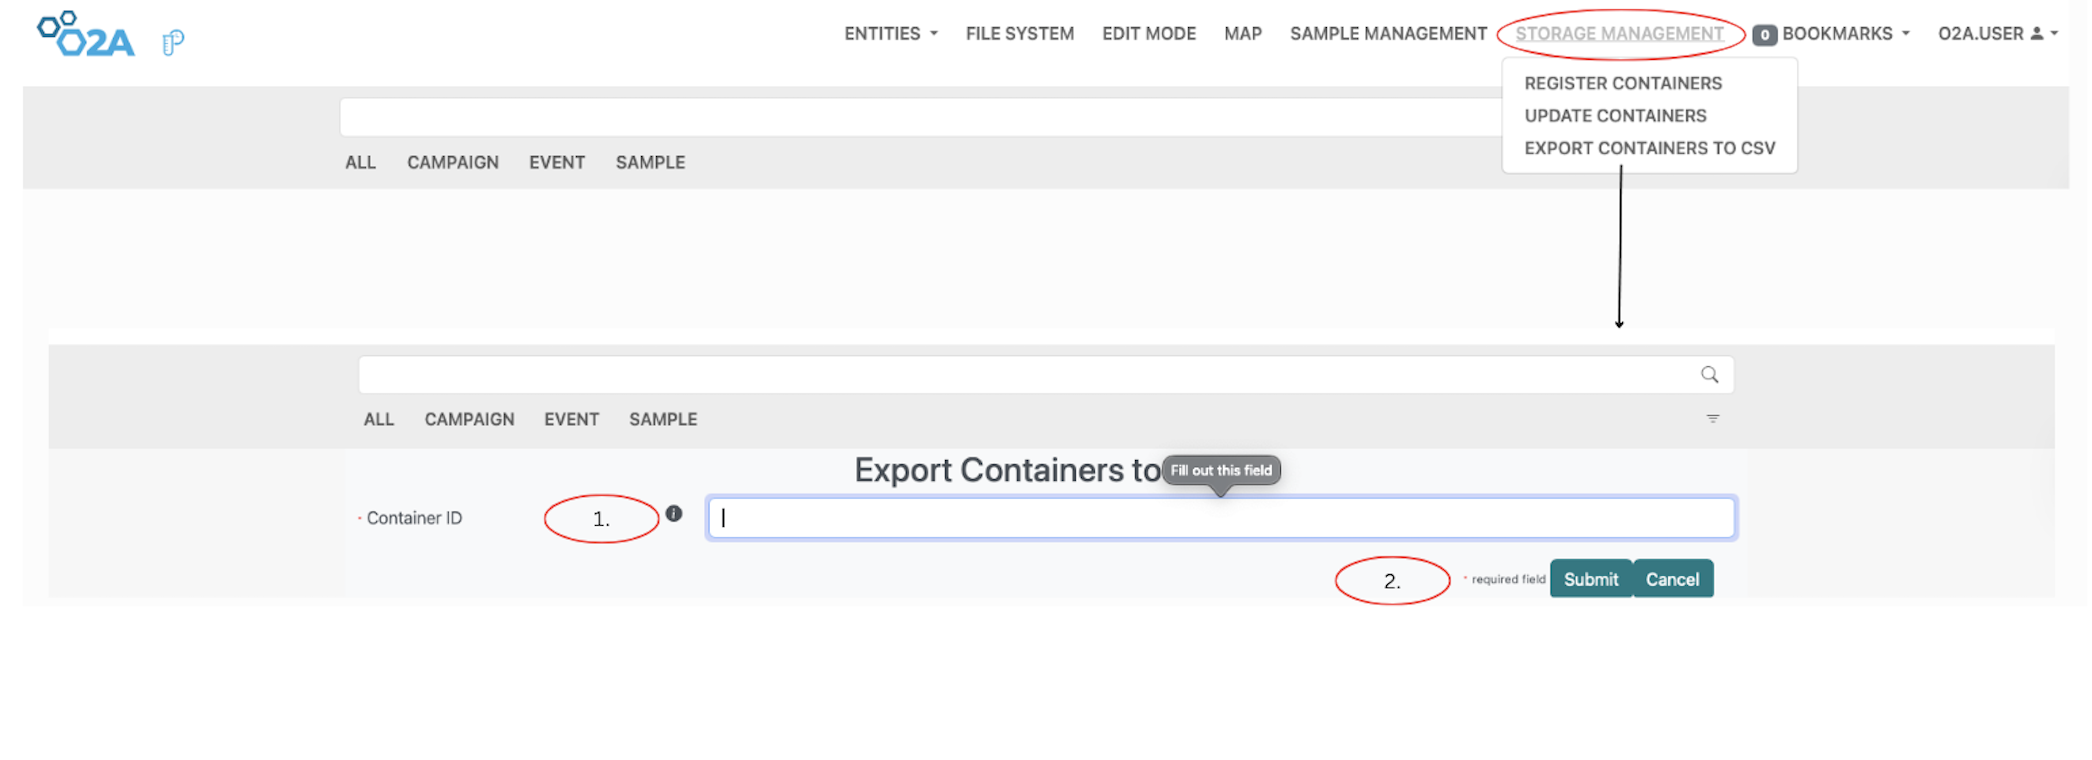 O2A SAMPLES SYSTEM: Steps on how to export a container to CSV The display shows the steps to export a container to CSV format in the O2A SAMPLES system. Users can enter the Container ID you want to export. Click on the Submit button to complete the export.
Maps
The Maps menu allows you to visualize the geolocation of your samples on a map. To access the Map menu, click on the Map option on the navigation bar. You can view the map to see the distribution of your samples and their corresponding storage locations. This can help you optimize your storage space and improve the efficiency of sample retrieval.The map interface may also include options to filter and search for specific samples based on their storage locations, allowing you to quickly find the information you need.
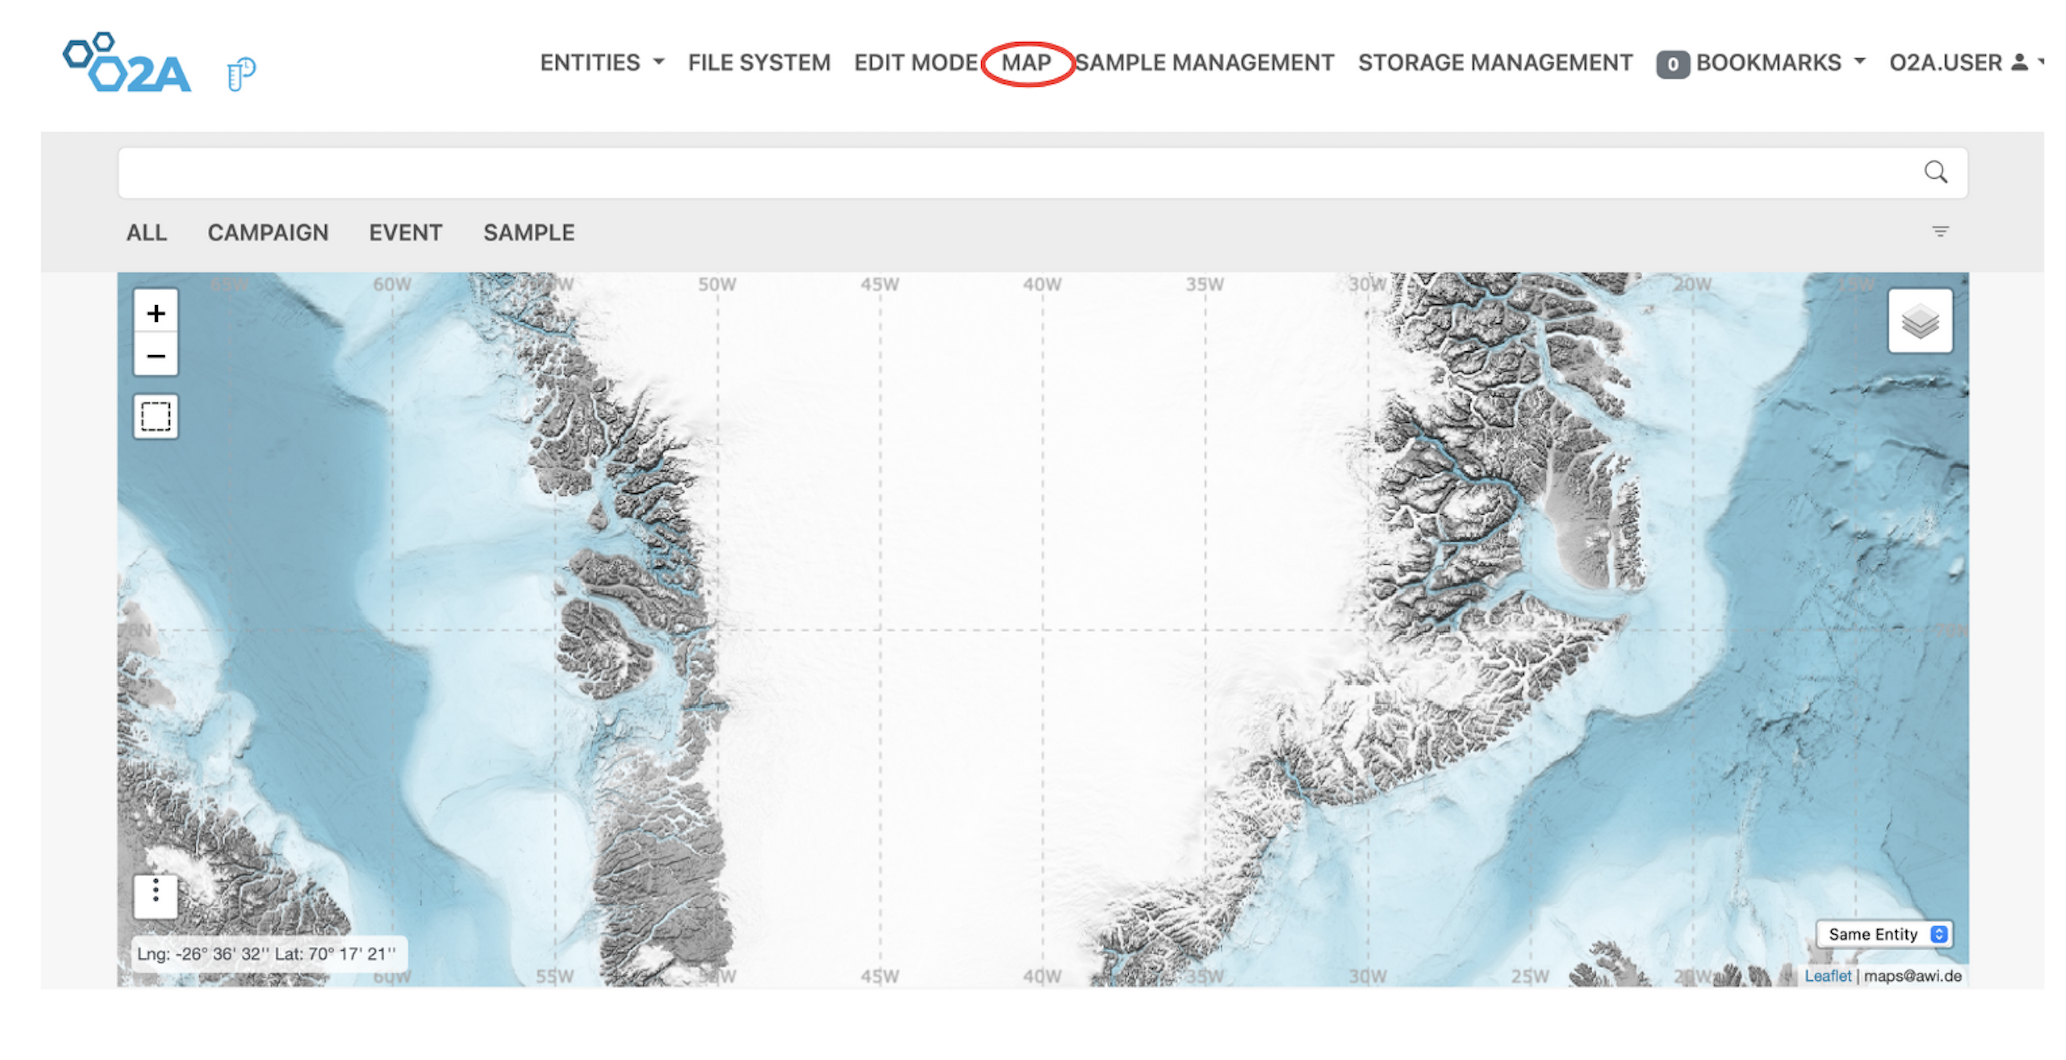 O2A SAMPLES SYSTEM: Map interface view The map interface in the O2A SAMPLES system allows users to visualize the geolocation of their samples. Users can see the distribution of their samples and their corresponding storage locations.
Bookmarks
The Bookmarks feature allows you to save specific contents or entities for easy access in the future. To access the Bookmarks feature, click on the Bookmarks menu on the navigation bar. A drop-down sub-menu will appear showing other features like Show All, Export file, Clear and Bookmark All.
Additionally, when you click on an entity, you can bookmark it by clicking the bookmark icon. This will show on the bookmark menu, and from there you can manage your bookmarks by showing all, exporting to file, and clearing bookmarks.
![]() O2A SAMPLES SYSTEM: Bookmark icon on entity view The screenshot shows the bookmark icon on the entity view in the O2A SAMPLES system. Users can click the bookmark icon to save the entity. The bookmarked entity will then appear in the Bookmarks menu for management and quick retrieval.
O2A SAMPLES SYSTEM: Bookmark icon on entity view The screenshot shows the bookmark icon on the entity view in the O2A SAMPLES system. Users can click the bookmark icon to save the entity. The bookmarked entity will then appear in the Bookmarks menu for management and quick retrieval.
Bookmarks can be particularly useful for frequently accessed storage locations or for keeping track of important areas within your storage facilities. You can also manage your bookmarks by adding new ones, editing existing bookmarks, or deleting those that are no longer needed.
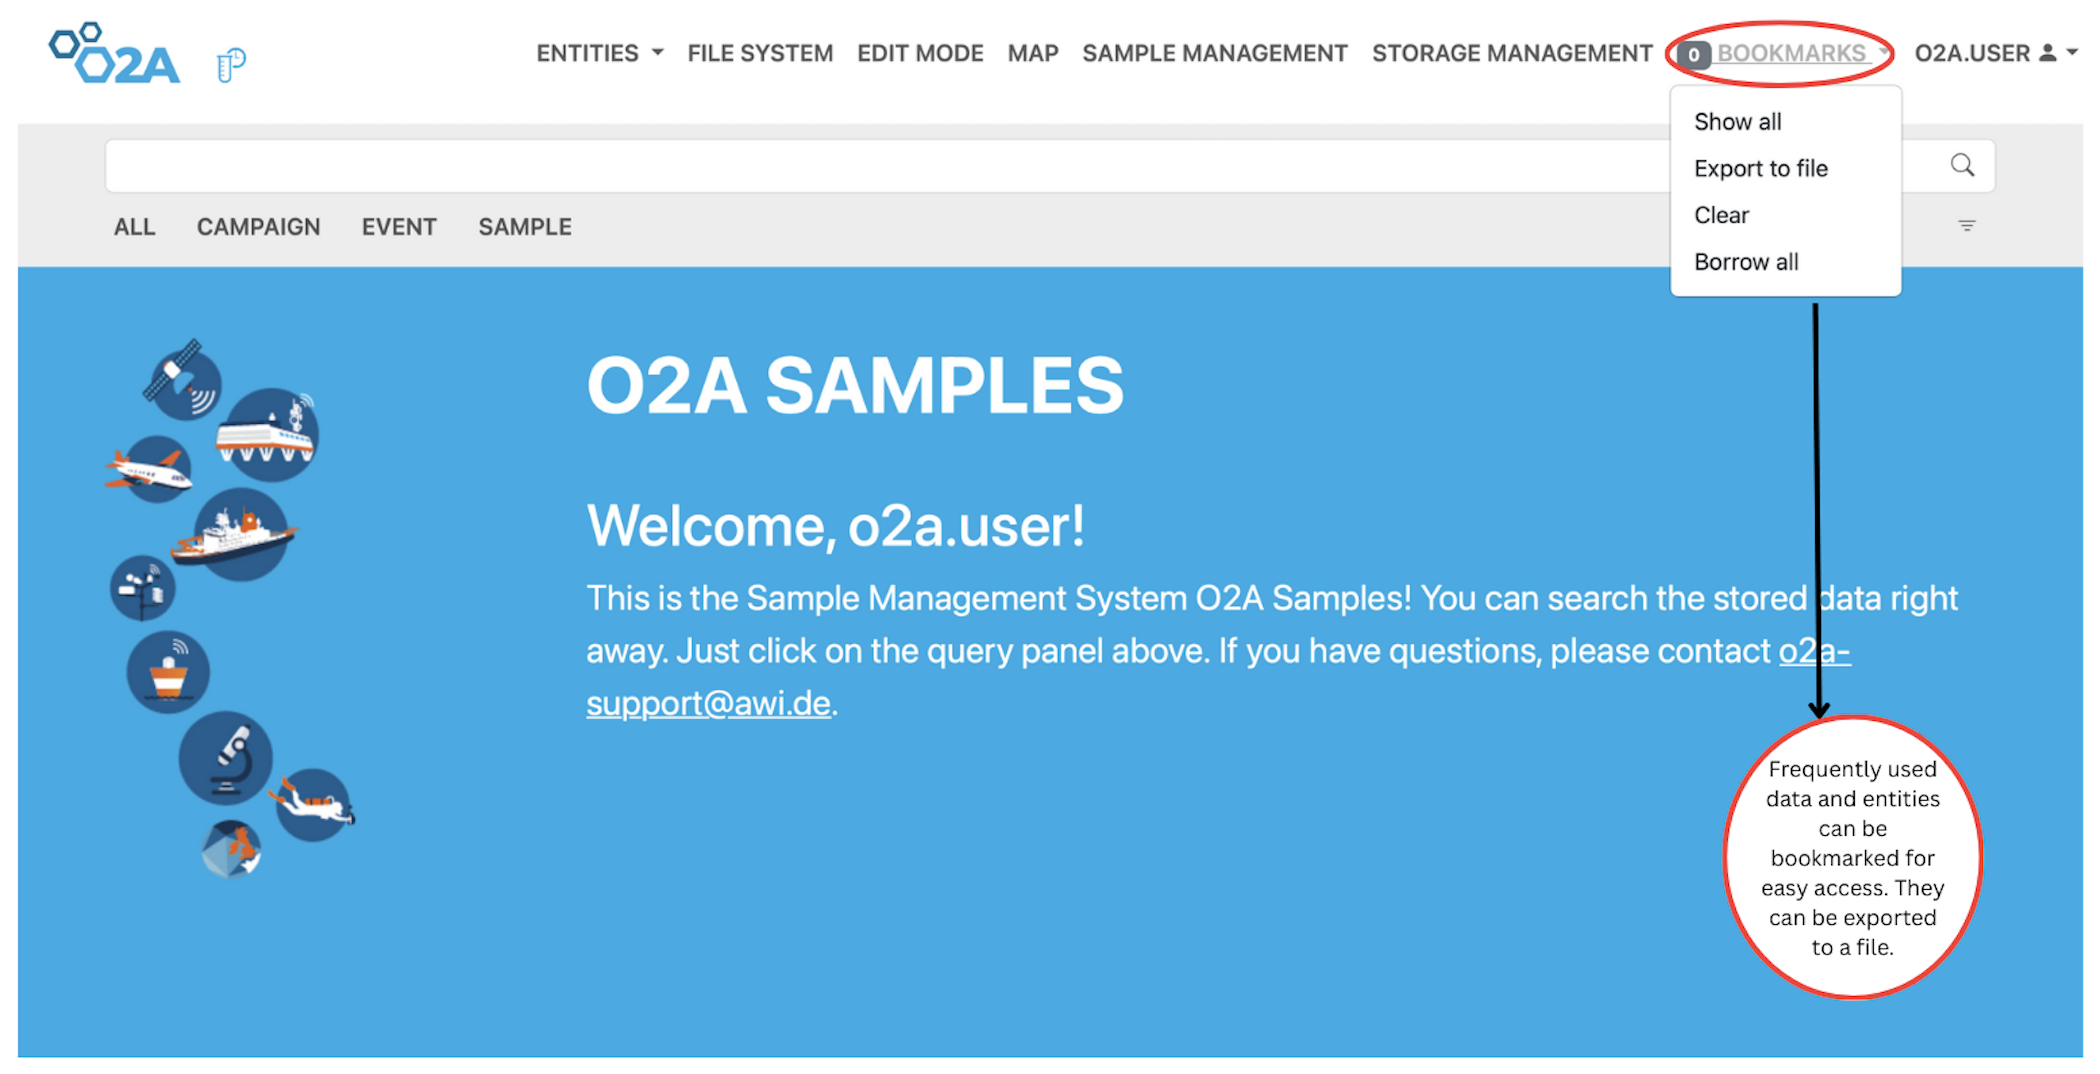 ogadi O2A SAMPLES SYSTEM: Bookmarks interface view The screenshot shows the Bookmarks interface in the O2A SAMPLES system. Users can access the Bookmarks menu to manage their saved locations on the map. The drop-down sub-menu includes options to show all bookmarks, export to file, clear bookmarks, and bookmark all current locations on the map for easy access in the future.
Bookmarks: Borrow all
Another feature of the Bookmarks meun, is the Borrow all essentailly to loan multiple marked contents. Intially when you record a container, you would see a loan request on the Container menu. If you want to borrow a sample within that container, you can do that using the loan request but if you want more than one container, you can mark them and aftewards utilize the Borrow All feature to obtain all the marked containers.
On clicking the Borrow All sub-menu, a pop-up form will appear where you can provide the required details for borrowing the previously marked contents. This form will typically include fields for your Name, Email Address, Expected Return Date, Destination, and Purpose of Borrowing. Once you have filled in all the necessary information and submitted the form, an email will be sent to the administrator to initiate the loan process. This feature streamlines the borrowing prcocess, especially when you need to borrow multiple containers or samples at once.
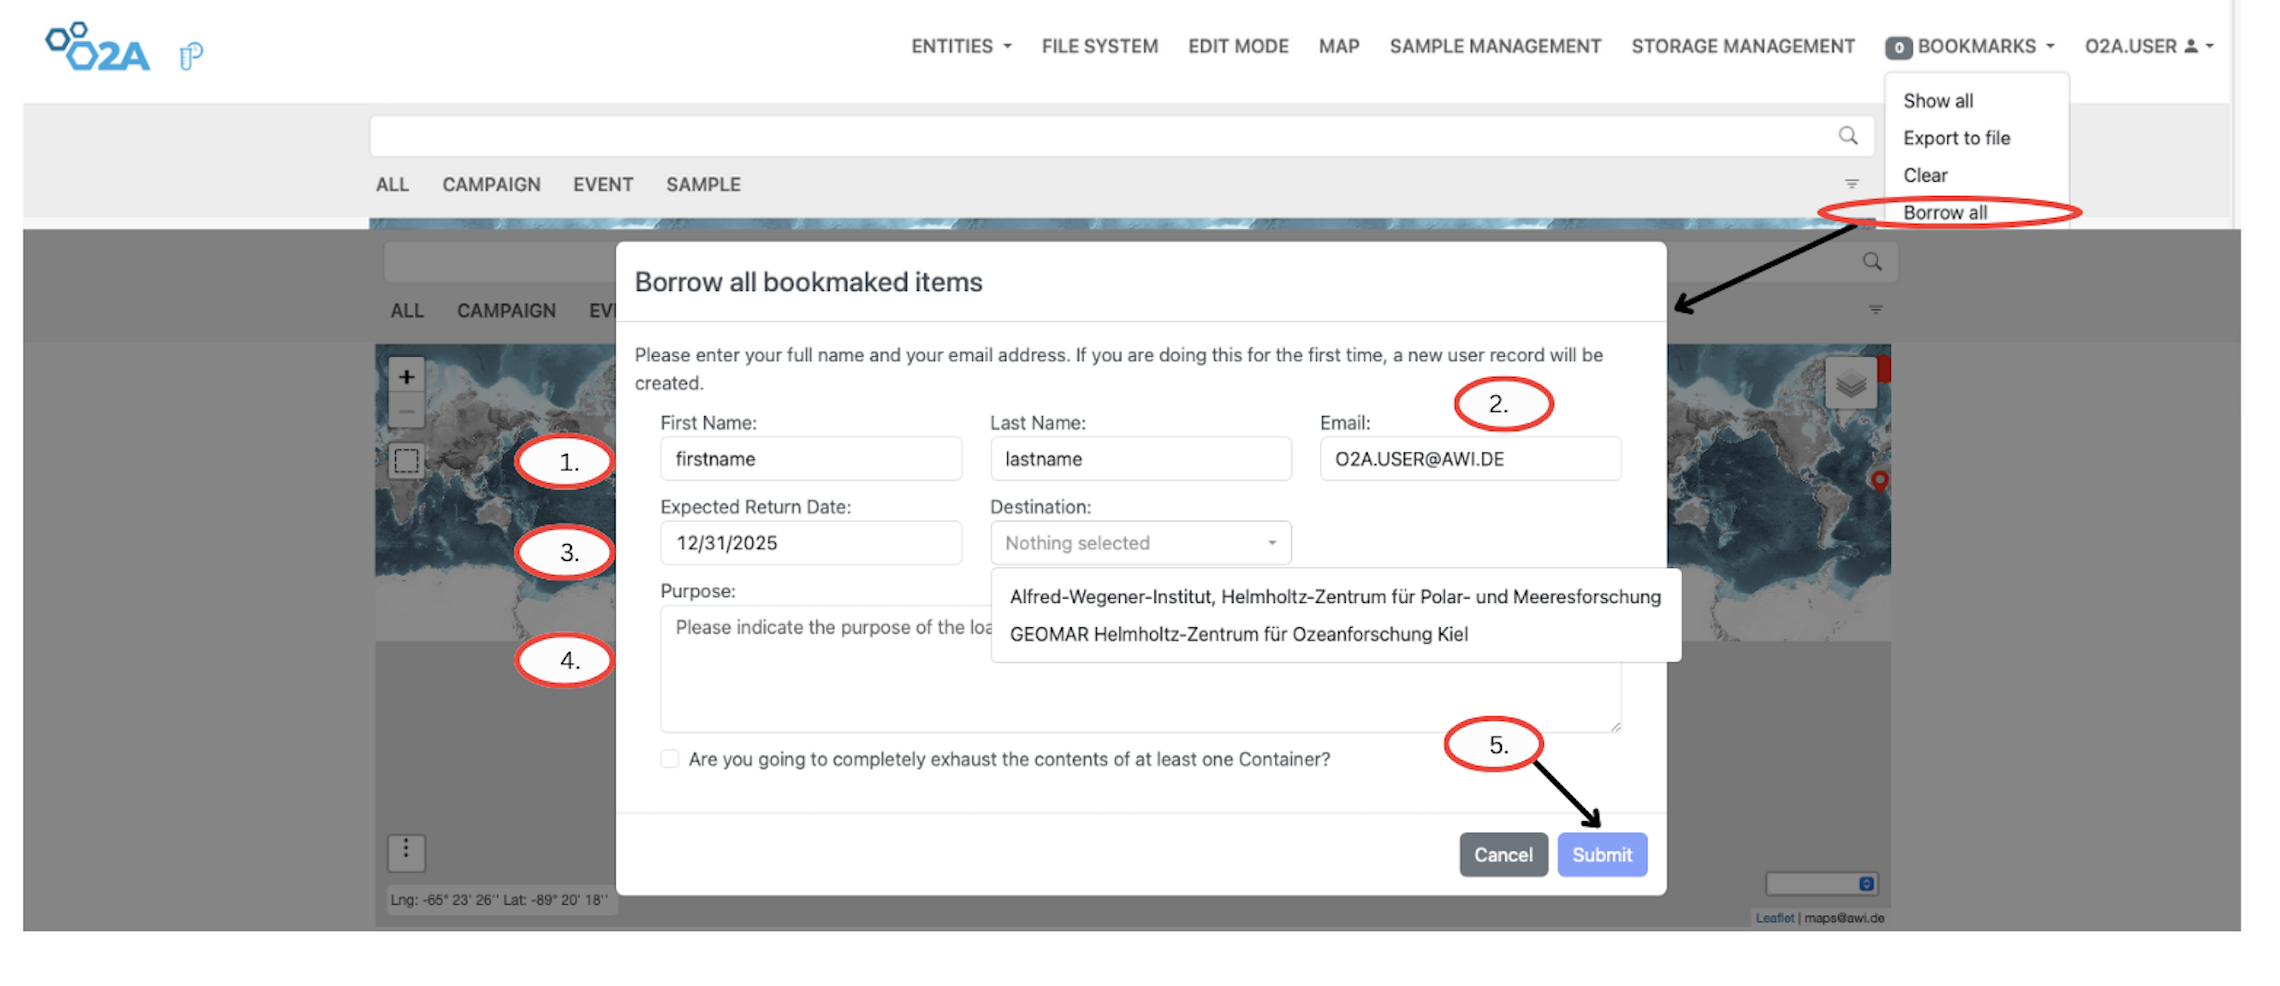 O2A SAMPLES SYSTEM: Borrow all bookmarks request form The screenshot shows the Borrow All bookmarks request form in the O2A SAMPLES system. Users can fill in their name, email address, expected return date, destination, and purpose of borrowing. After submitting the form, an email will be sent to the administrator to initiate the loan process for all marked contents.
To navigate the Borrow All feature,follow the steps outlined below. This will guide you through the process of borrowing all bookmarks contents efficiently.
Steps to borrow all bookmarks contents
Step 1: Click the Borrow All button under the Bookmarks sub‑menu. A pop‑up window will appear where you can enter your User Name.
Step 2: Enter your Email Address in the corresponding field.
Step 3: Specify the Expected Return Date for the borrowed bookmarks. In the field next to it, select the Destination.
Step 4: Enter the Purpose of borrowing the bookmarks in the Purpose field.
Step 5: Click the Submit button to complete the borrowing process.
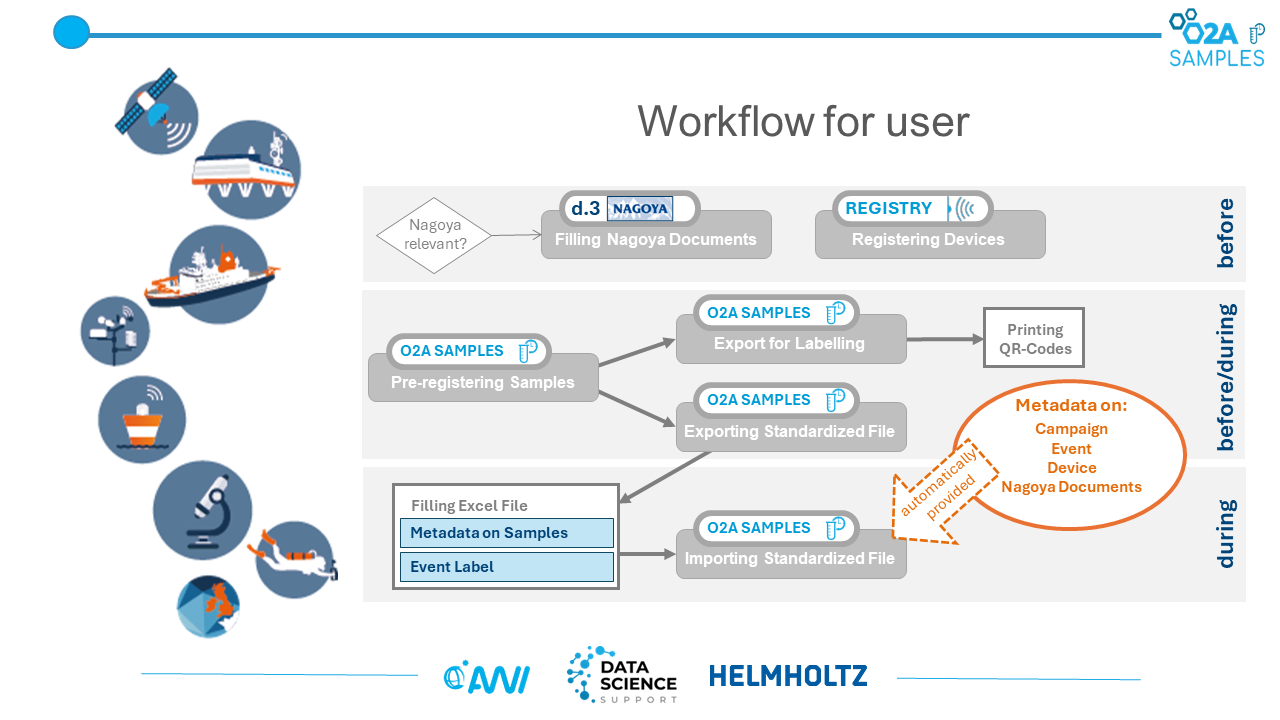
Workflow for Sample Management: Registering Samples and creating sample templates
After a successful campaign where you have collected valuable samples and returned to base. The next task is to register, update and manage your sample. This is where the O2A Sample System comes to the rescue providing a Simplified Sample Metadata , Traceable and Standardized Sample management system.
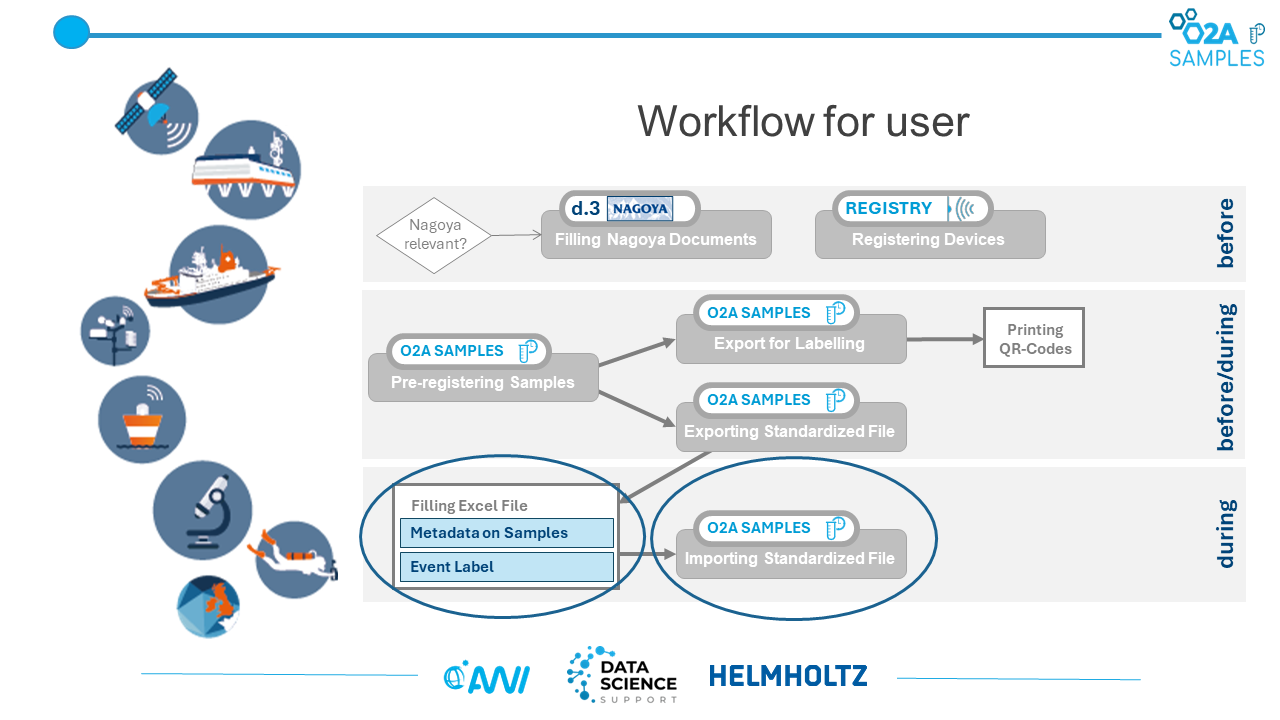
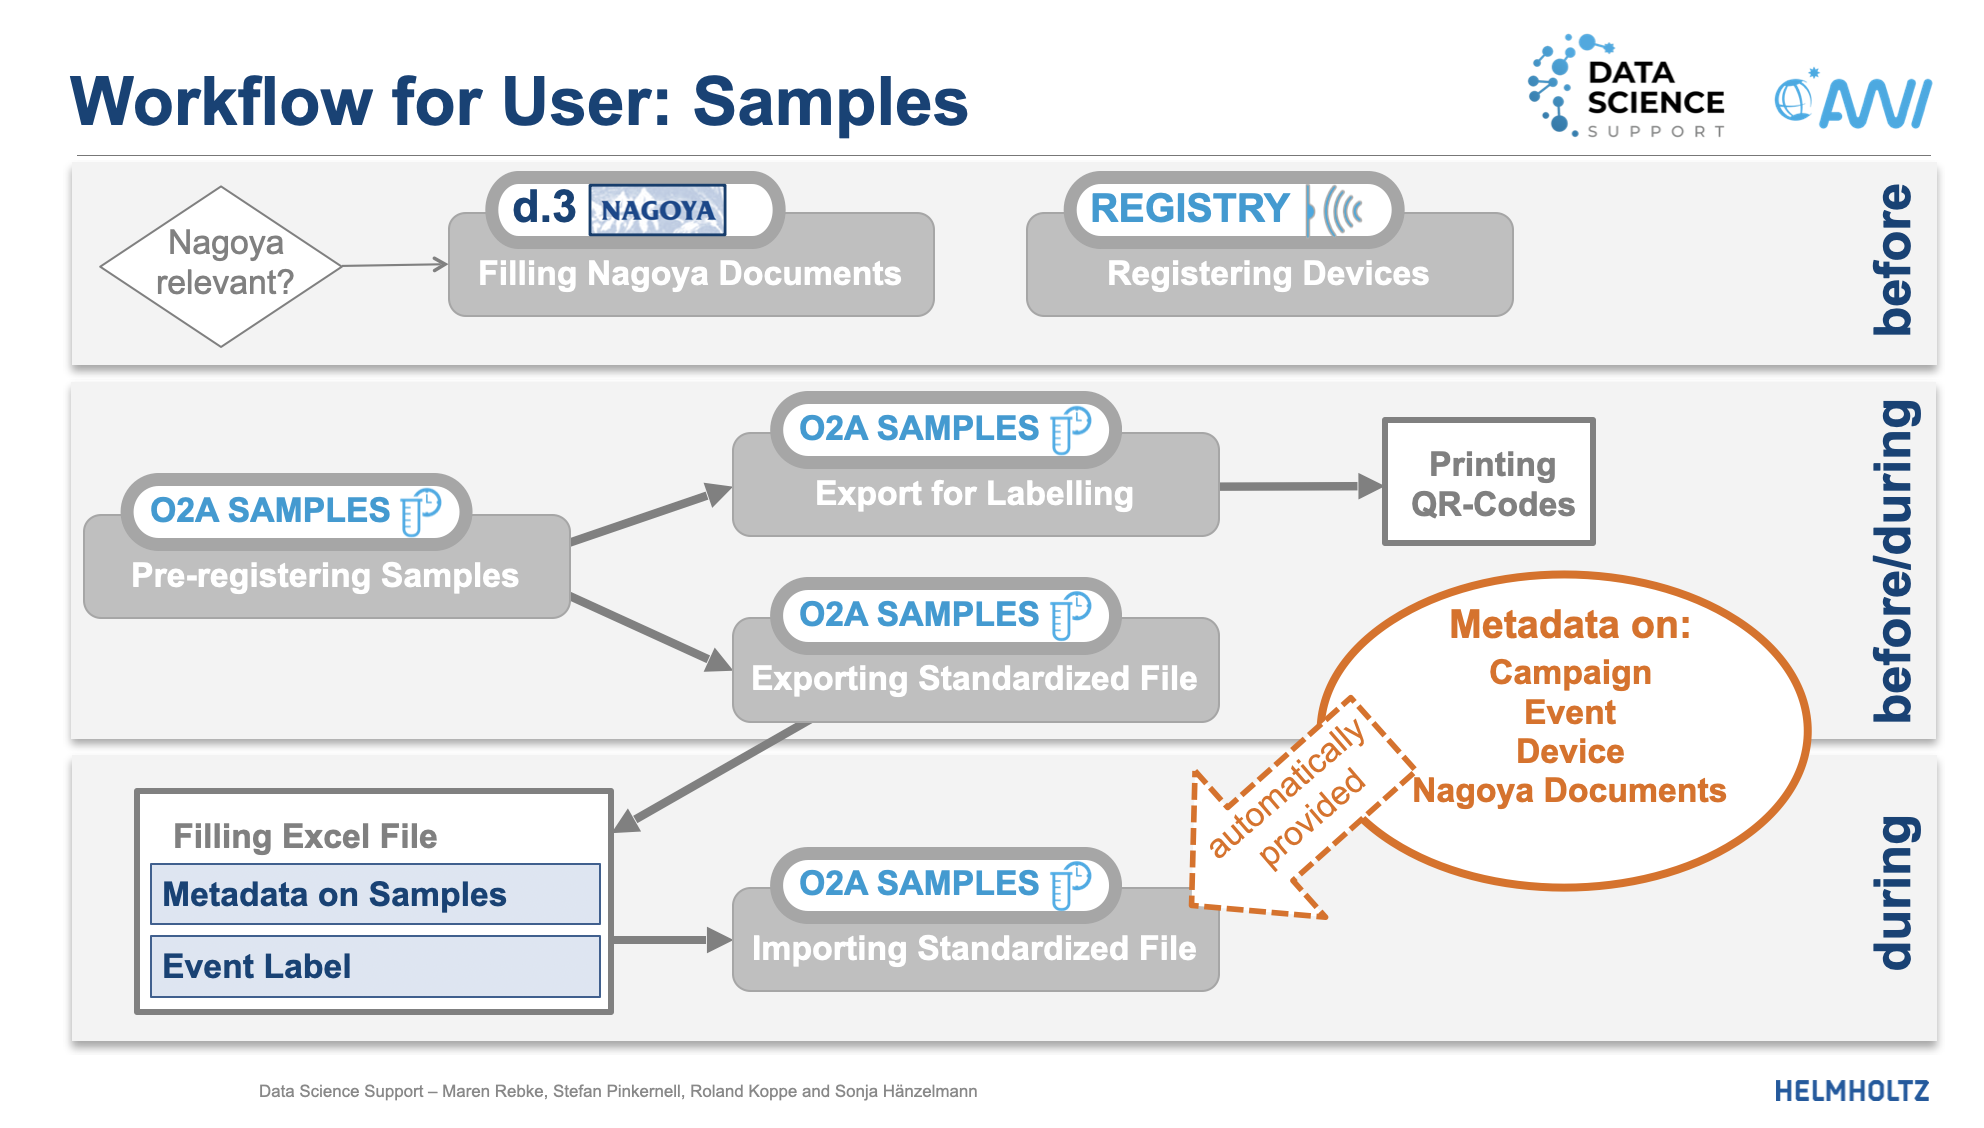 Flowchart illustrating the workflow for sample management in O2A Samples. The flowchart shows the workflow for handling samples and related metadata. The process begins by determining whether Nagoya documentation is relevant. If applicable, Nagoya documents are completed and devices are registered. Samples are then pre-registered in the O2A system and exported for labelling or exported as a standardized file. The standardized file can be used to fill an Excel file containing sample metadata and event labels, and later imported back into the system. The diagram also indicates that metadata is automatically provided for campaigns, events, devices, and Nagoya documents during the process.
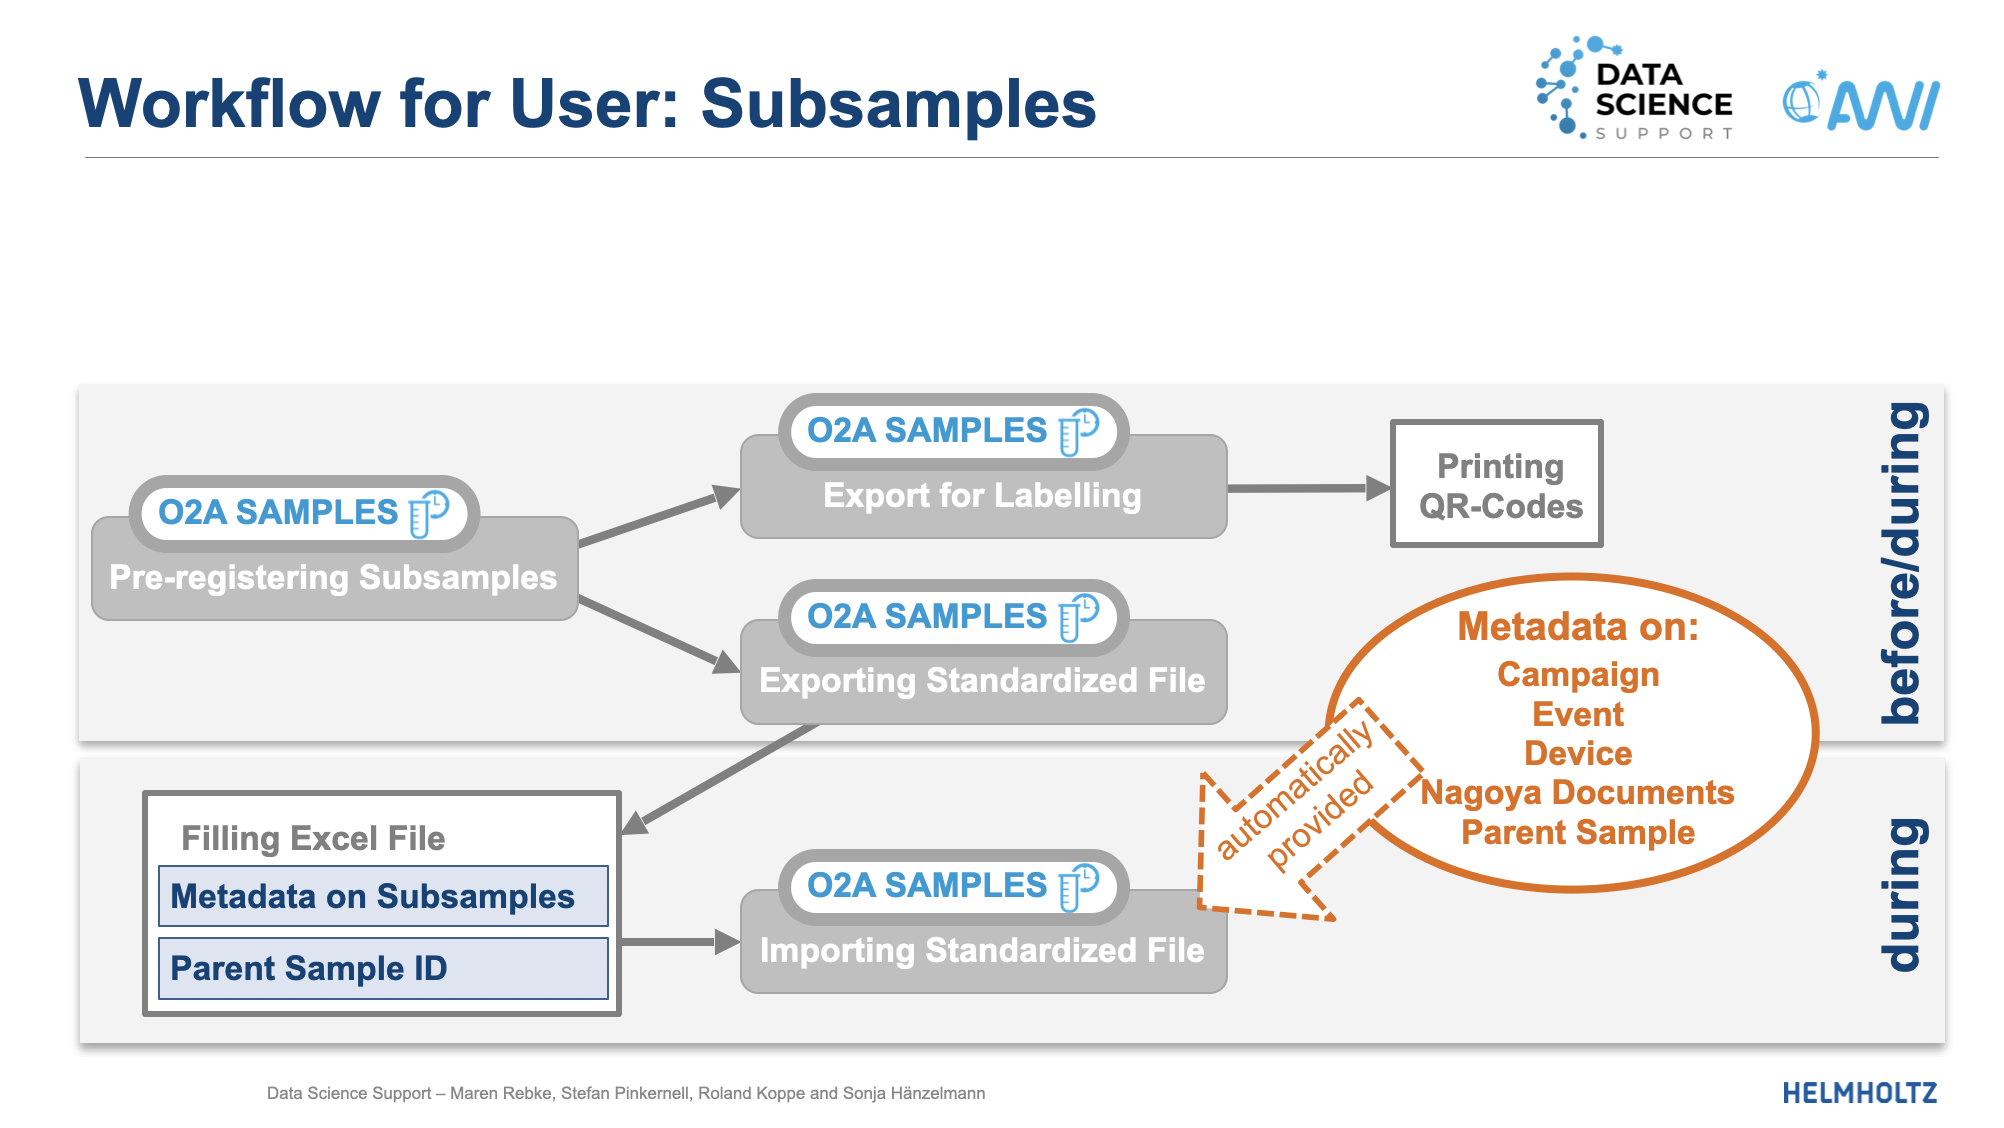 Flowchart illustrating the workflow for registering subsample in O2A Samples. The flowchart shows the workflow for registering subsamples in O2A Samples. If there are subsamples, they are registered in the system and exported as a standardized file. The standardized file is then used to fill an Excel file containing subsample metadata and event labels, which is later imported back into the system. The diagram also indicates that metadata is automatically provided for campaigns, events, devices, and Nagoya documents during the process.
Usually the workflow for sample management in O2A SAMPLES involves several key steps that users can follow to ensure their samples are properly registered and maintained within the system. Users start by registering parent samples, which represent the original physical samples collected during research. If there are any derived samples (child samples) that need to be registered, users can do so by linking them to their respective parent samples. This hierarchical structure allows for better organization and traceability of sample data.
After registering samples, users can update sample details as needed to keep the information accurate and up-to-date. This may include adding new metadata, correcting errors, or modifying existing data. Additionally, users have the option to export their sample data to CSV format. This feature allows for easy integration with other tools and software that support CSV files. Finally, users can create sample templates to standardize the registration process for future samples, ensuring consistency and efficiency in how samples are managed within O2A SAMPLES.
To summarize, the workflow for sample management in O2A SAMPLES can be outlined as follows:
Step 1: Register parent samples using the Register Sample feature. Step 2: If needed, register child samples that are derived from the parent samples using the Register Child Sample feature. Step 3: Update sample details as necessary using the Update Sample feature. Step 4: Export sample data to CSV format for analysis or reporting purposes using the Export Sample to CSV feature. Step 5: Create sample templates to standardize the registration process for future samples using the Create Sample Template feature.
Workflow for Sample Management: Registering Containers
You have now understood the workflow for registering samples, now let’s move to the workflow for registering containers in O2A SAMPLES. Containers are physical holders used to store or transport physical samples. Properly managing these containers is crucial for maintaining the integrity and organization of your sample collection. Once you have registered your samples, you can proceed to register the containers that will be used to store these samples. This involves providing details about the container such as its name, type, dimensions, and quantity. You can also update container details as needed to ensure that the information remains accurate over time. Additionally, you have the option to export container data to CSV format for inventory management or reporting purposes. Finally, organizing containers effectively is important for efficient storage management, and this can be achieved by utilizing the parent container option during registration to create a hierarchical structure for your storage system.
As with sample management, a subsequent workflow can be outlined for registering containers in O2A SAMPLES:
Step 1: Register new containers using the Register feature under the Storage Management menu, providing details such as container name, type, dimensions, and quantity. Step 2: Update container details as necessary using the Update Container feature to maintain accurate information about storage locations. Step 3: Export container data to CSV format for inventory management or reporting purposes using the Export Container to CSV feature. Step 4: Organize containers effectively by utilizing the parent container option during registration to create a hierarchical structure for storage management.
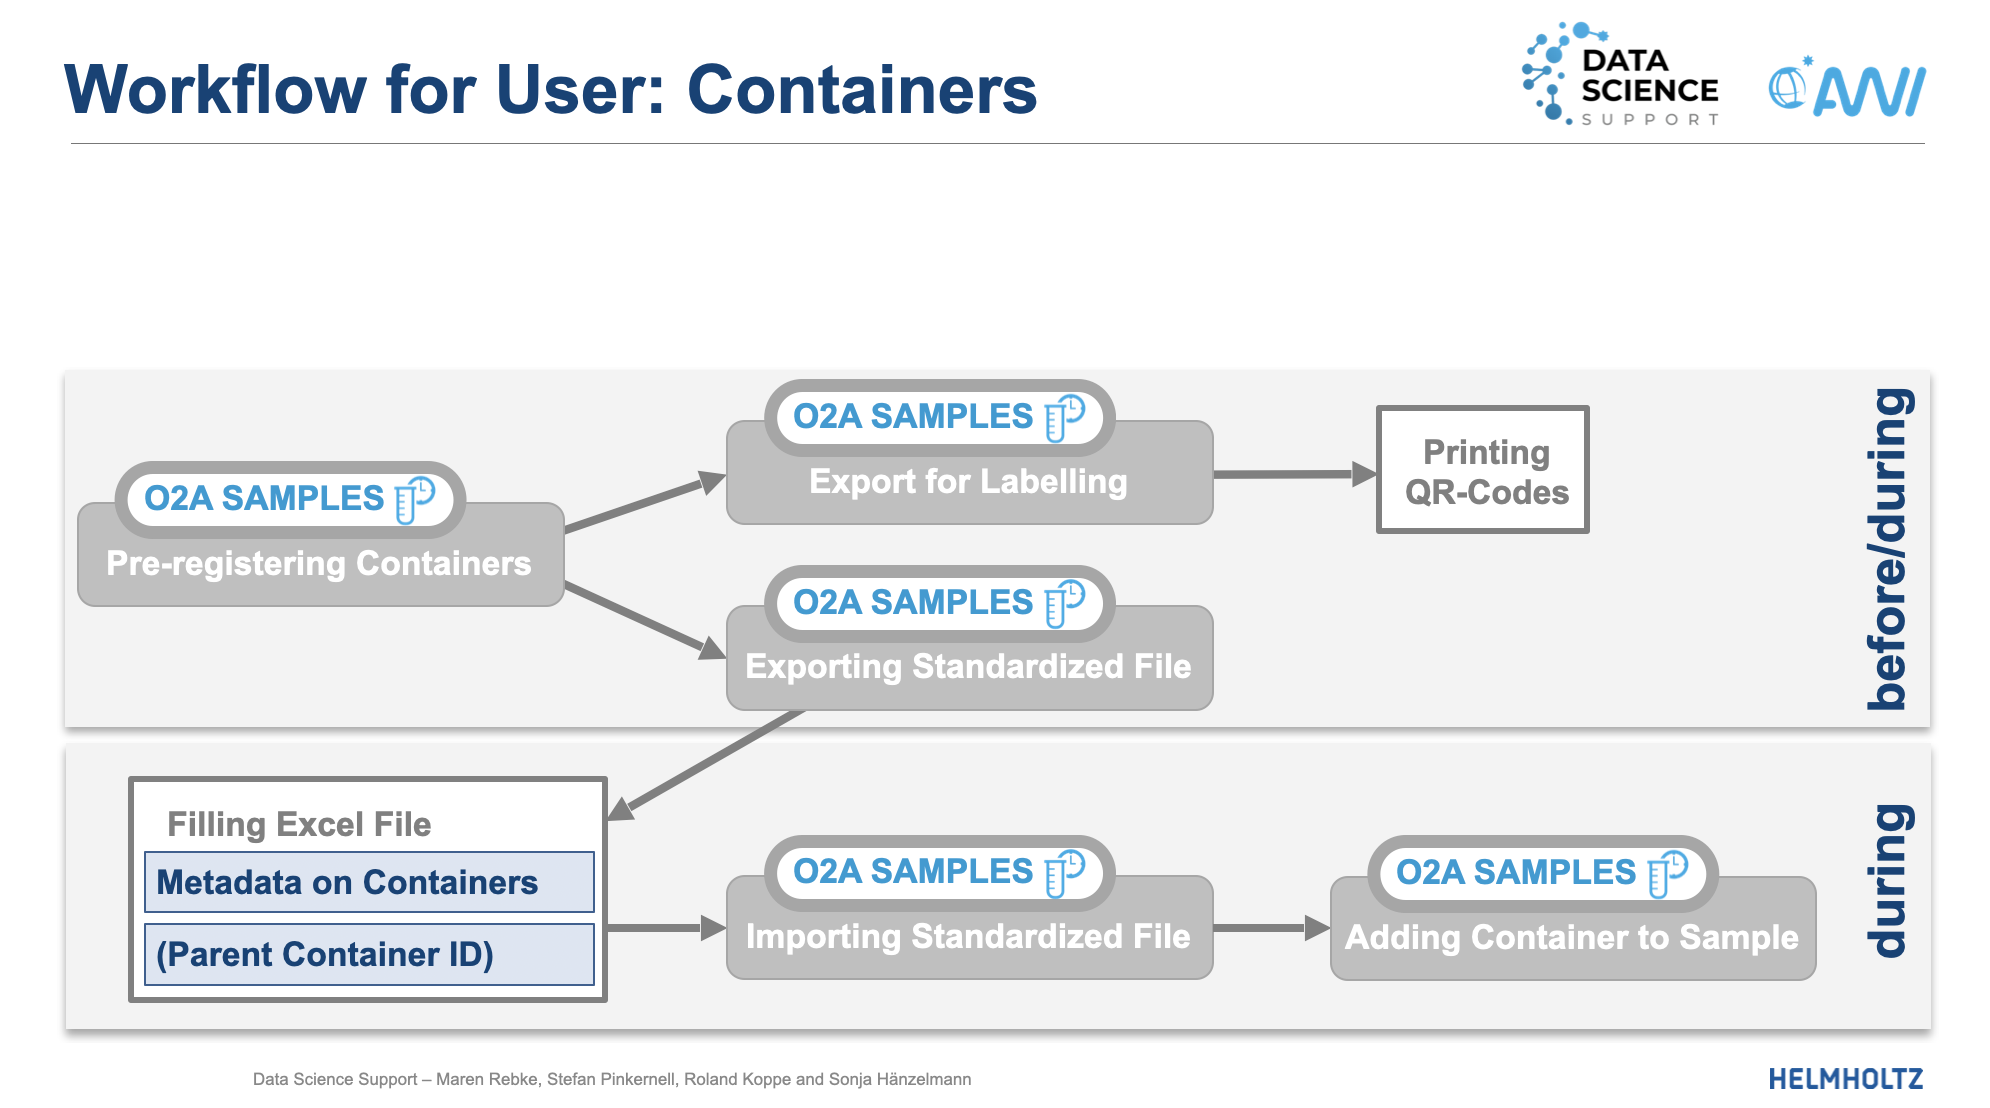 Workflow diagram illustrating the process of registering containers, updating details, exporting, and organizing container within the O2A SAMPLES. The diagram shows a flowchart for managing containers in O2A SAMPLES. The process starts with registering new containers, followed by updating container details as needed. Users can then export container data to CSV format for inventory management or reporting purposes. Finally, the workflow emphasizes the importance of organizing containers effectively by utilizing the parent container option during registration to create a hierarchical structure for storage management.
Block B
Going beyond the standard functionalities of O2A SAMPLES, Block B focuses on additional features such as querying samples based on specific criteria. The Query feature allows users to search for samples based on various parameters, making it easier to locate specific samples or groups of samples that meet certain conditions.
Firstly, before discusiing in details the different ways to query samples, you have the option to use filters and the search bar to qickly find samples. The screenshot below shows the filter and search bar options for querying samples in O2A SAMPLES.
 O2A SAMPLES SYSTEM: Query filter and search bar interface view The screenshot shows the use of filter and search bar in the O2A SAMPLES system. To activate the filter within campaign,event or sample, the three-lined icon located at the rightside of the page under the search bar should be clicked. This is cannot be appicable for the All sub-menu, for All submenu use the search bar directly
There are different ways to query samples in O2A SAMPLES, depending on the level of detail and specificity you require.
You can query samples based on their:
- RecordType
- Record
- By Exact Name
- Based on Property values
- By Count
To begin your search, you usually start by typing FIND in the search bar located at the top of the interface, CQL would automatically pop up at the edge, which stands for CaosDB Query Language. This is the query language used to interact with the sample management system. By using CQL, you can create complex queries to filter and retrieve samples based on specific attributes or conditions.
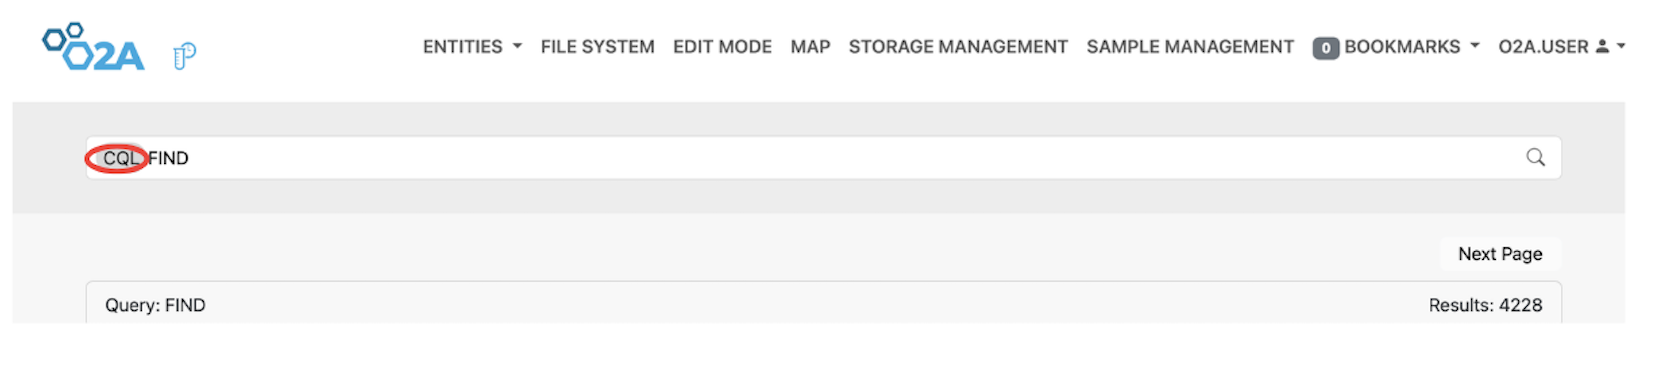 O2A SAMPLES SYSTEM: CQL query language interface view The screenshot shows the CQL query language interface in the O2A SAMPLES system. Users can type their queries in the search bar, and the CQL syntax will automatically appear to assist in constructing valid queries for retrieving sample data based on specific criteria.
- RecordType
After typing the FIND the first method is to query using RecordType, for example, if you want to query a sample with the RecordType of Campaign, you would type FIND RecordType Campaign in the search bar. This will return all samples that are categorized under the RecordType "Campaign".
 O2A SAMPLES SYSTEM: Querying samples by RecordType interface view The screenshot shows the interface view of querying samples by RecordType in the O2A SAMPLES system. After typing "FIND RecordType Campaign" in the search bar, the system returns all samples categorized under the RecordType "Campaign", the query produced 1 result.
- Record
The same process applies if you want to query samples by Record. You would simply replace "RecordType" with "Record" in the query to retrieve the relevant samples based on those Record.
 O2A SAMPLES SYSTEM: Querying samples by Record interface view The screenshot shows the interface view of querying samples by Record in the O2A SAMPLES system. After typing "FIND Record Campaign" in the search bar, the system returns all samples categorized under the Record "Campaign", the query returned 339 result.
It is also possible to query based on entity, with this you will get the result of all the samples associated with the entity, including the RecordType, Record or Property.
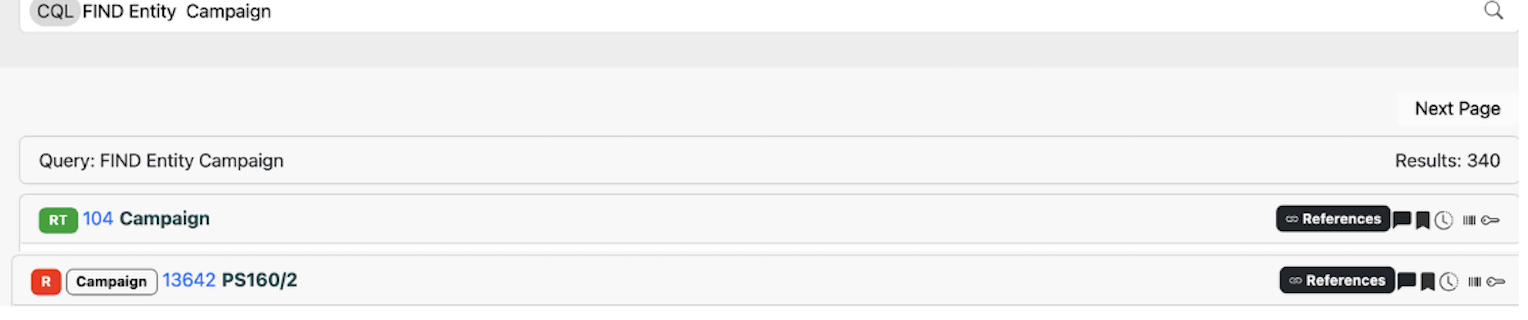 O2A SAMPLES SYSTEM: Querying samples by entity interface view The screenshot shows the interface view of querying samples by entity in the O2A SAMPLES system. After typing "FIND Entity Campaign" in the search bar, the system returns all samples associated with the entity "Campaign", including those categorized under RecordType, Record, or Property related to "Campaign". The query produced 340 results.
- By Exact Name
You do not have to always query samples by RecordType or Record, you can also query samples by specific Exact name, The capitalization does not matter, the most important thing is that the name is Exact otherwise you would see "There were no results for this query.". However, the query system also helps you while you type for example the first few letters of the name, it would automatically suggest the possible names that match the letters you have typed. This makes it easier to find the exact name of the sample you are looking for, especially if you are not sure about the full name or if there are many samples with similar names.
 O2A SAMPLES SYSTEM: Querying samples by exact name interface view The screenshot shows the interface view of querying samples by exact name in the O2A SAMPLES system. After typing "FIND marine bed " in the search bar, the system could suggests possible names that match exactly the letters typed, such as "marine bed", when you start typing.
- Based on Property values
To streamline your search, you can also query samples based on specific Property values. This allows you to filter samples that have certain attributes or characteristics defined by their properties. For example, if you want to find all samples that have a specific property value, you can construct a query that targets that property and its corresponding value. This method is particularly useful when you are looking for samples that meet specific criteria or when you want to narrow down your search results based on certain attributes.
 O2A SAMPLES SYSTEM: Querying samples by property values interface view The screenshot shows the interface view of querying samples by property values in the O2A SAMPLES system. After typing for example "FIND Campaign with PI" in the search bar, the system returns all samples that have the specified property value, allowing users to filter samples based on specific attributes or characteristics defined by their properties. The query returned 322 results.
To achieve this, start by typing FIND followed by the record name then WITH and the property value in the search bar. This option is not limited to querying based on a single property value, you can also query samples based on multiple property values. This allows for more complex and specific searches, enabling you to find samples that meet multiple criteria simultaneously. You can add multiple levels of properties in your query search.
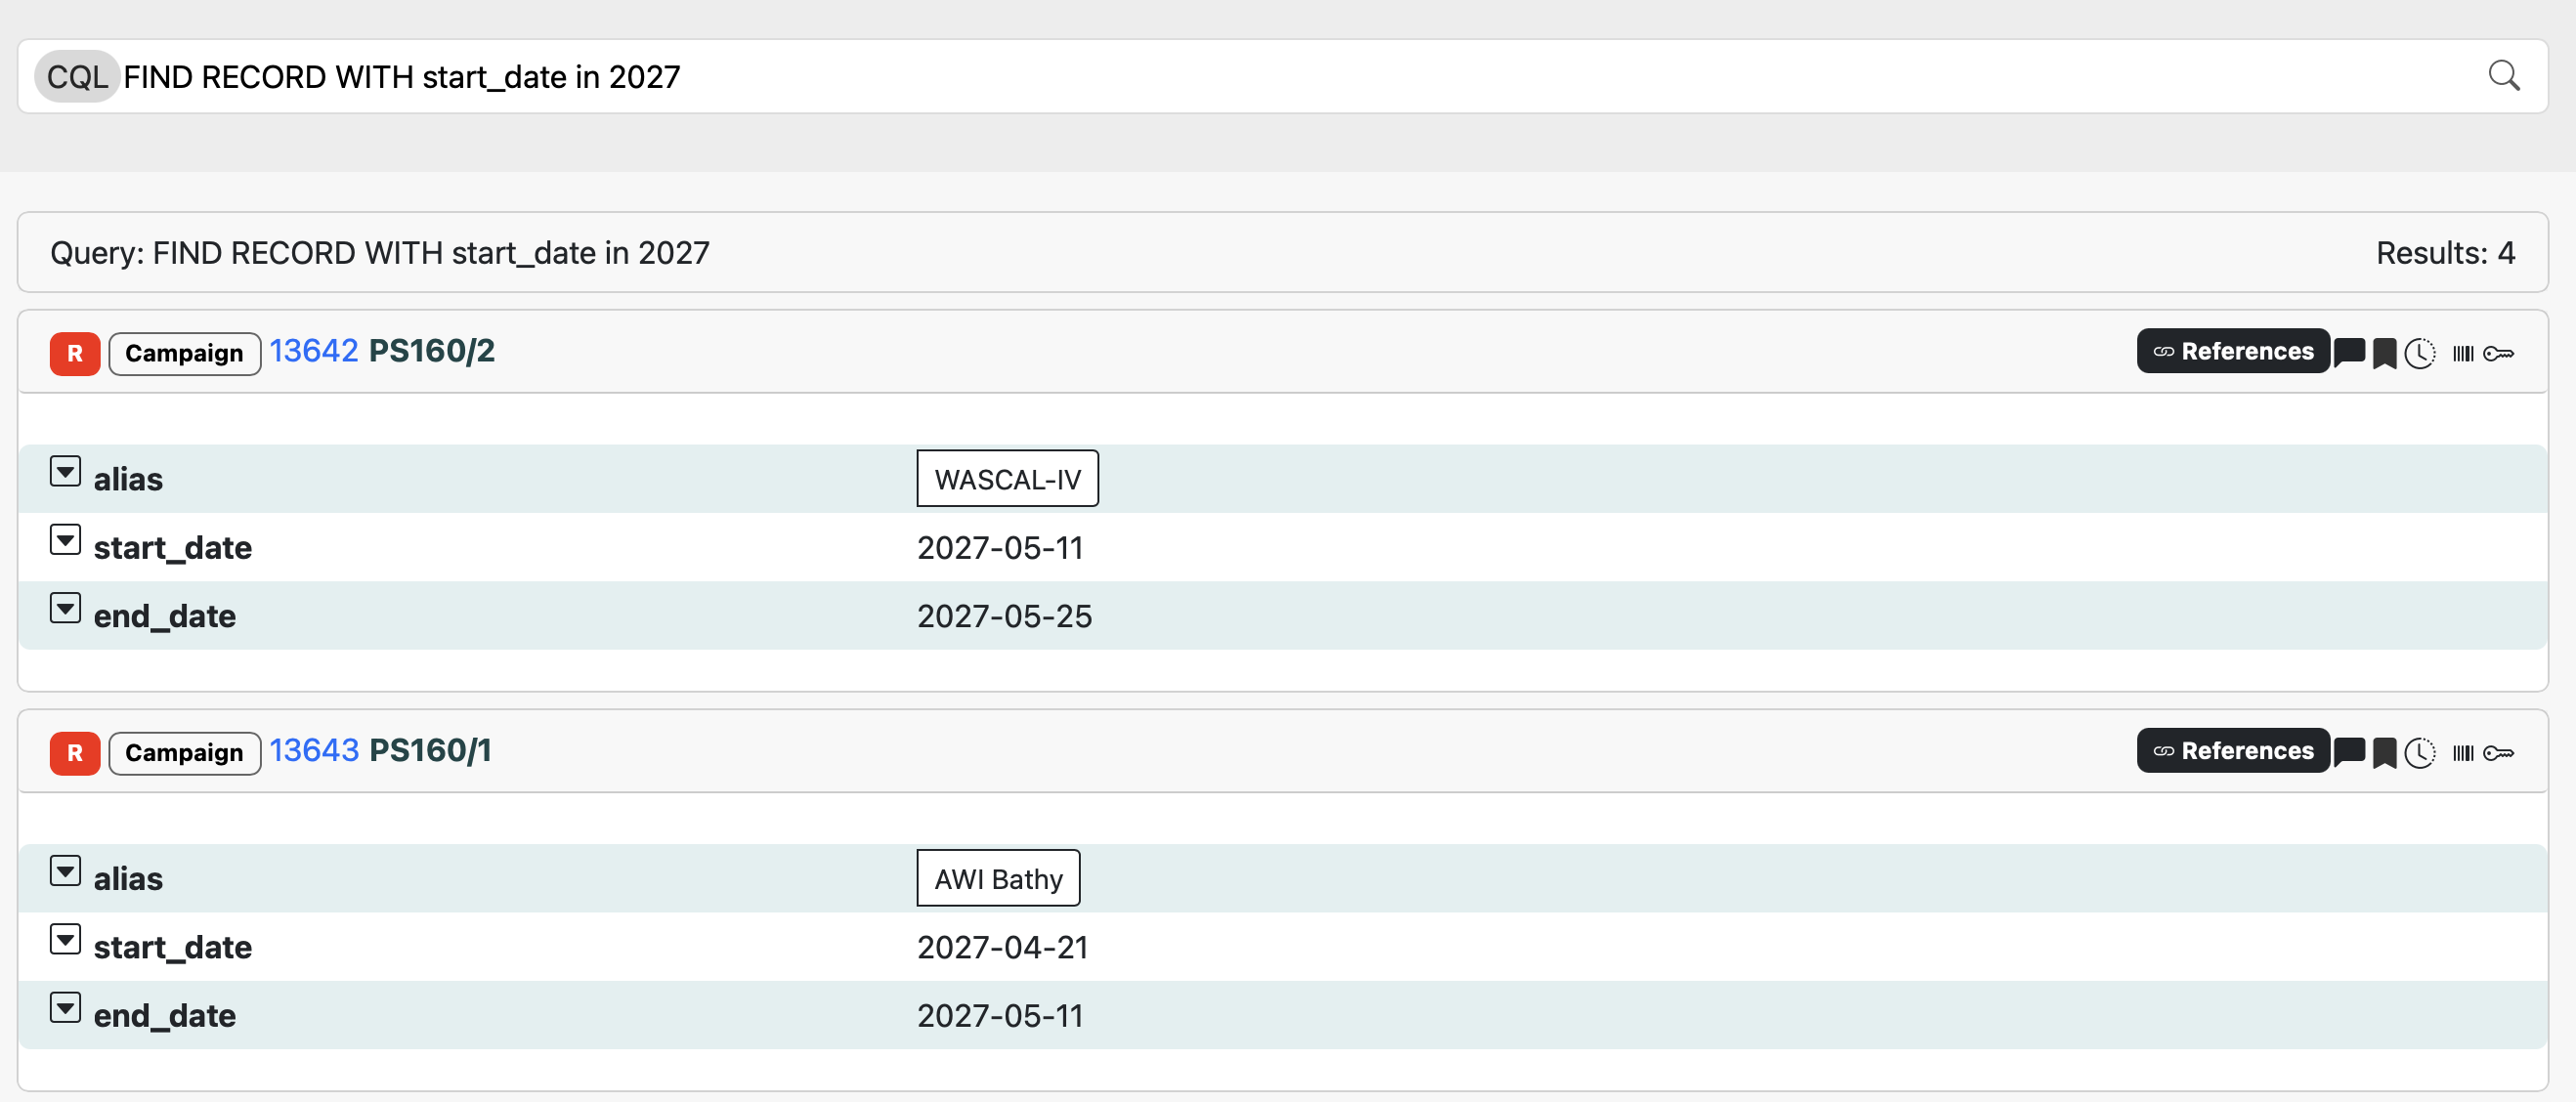 O2A SAMPLES SYSTEM: Querying samples by multiple property valuesThe screenshot shows the interface view of querying samples by multiple property values in the O2A SAMPLES system. After typing "FIND RECORD WITH start_date in 2027" in the search bar, the system returns 4 results that contained the specified property values, allowing users to streamline the query with multiple properties.
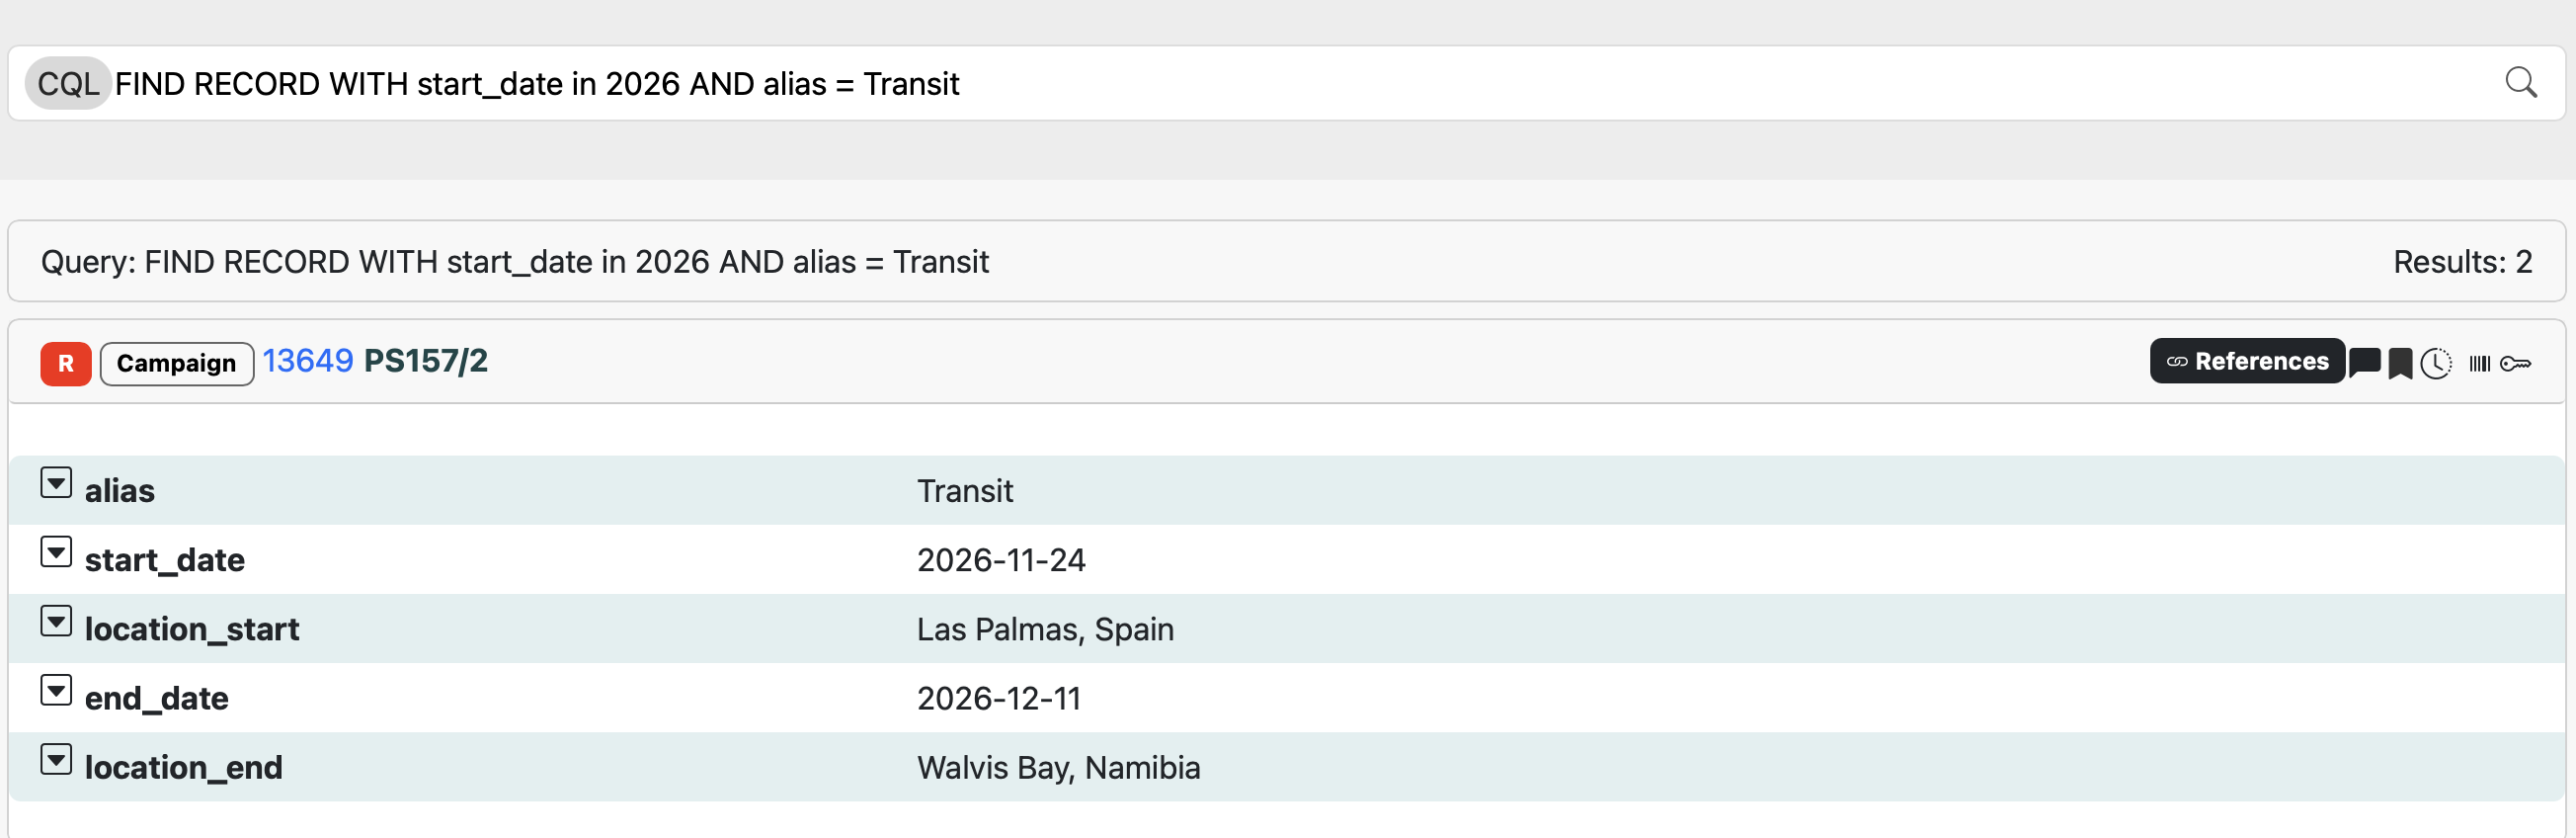 O2A SAMPLES SYSTEM: Querying samples by with additional level property values The screenshot shows the interface view of querying samples by with additional level property values in the O2A SAMPLES system. After typing "FIND RECORD WITH start_date in 2026 AND alias= Transit" in the search bar, the system returned only 2 results based on the property with additional levels.
- By Count
You can also use COUNT instead of FIND , but this will only return the number of samples that match the query criteria instead of the actual sample details. This can be useful when you want to quickly assess how many samples meet certain conditions without needing to see the full list of results.
 O2A SAMPLES SYSTEM: Querying samples using COUNT interface view The screenshot shows the interface view of querying samples using COUNT in the O2A SAMPLES system, which is another way to query samples instead of FIND. After typing "COUNT Campaign" in the search bar, the system returns only the number not details of the samples, a total of 339 couts resulted from the query.
In addition to these methods mentioned above, you can start to query samples starting with SELECT ... FROM rather than the usual FIND. This allows you to specify the exact fields you want to retrieve from the samples that match your query criteria. A comma can be used to seperate the property list names after the SELECT statement. An example can be seen below:
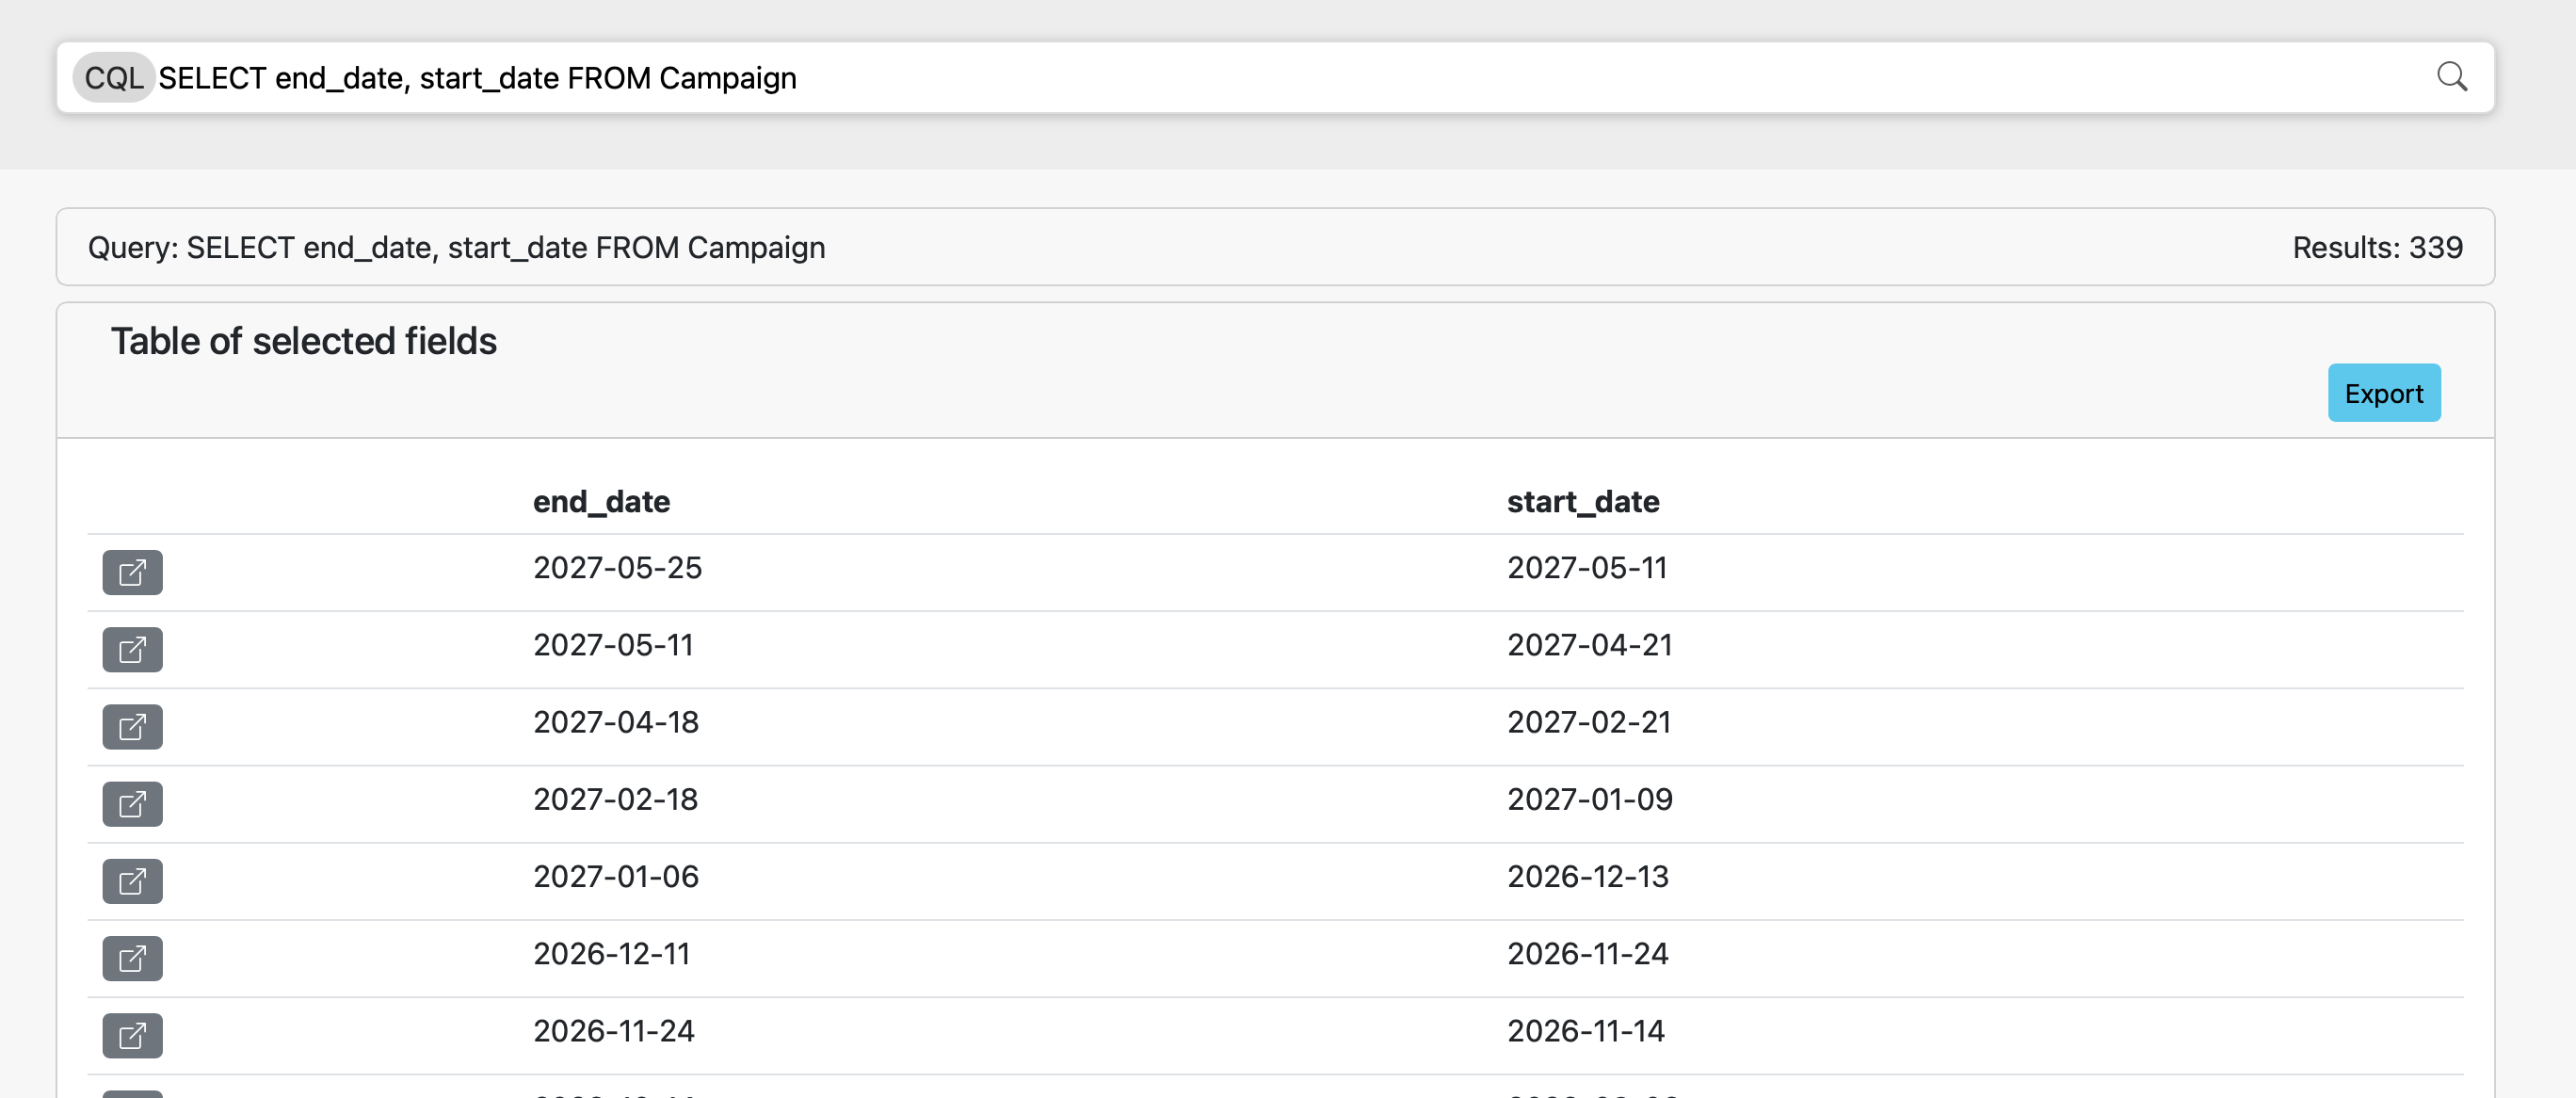 O2A SAMPLES SYSTEM: Querying samples using SELECT statement interface view The screenshot shows the interface view of querying samples using the SELECT statement in the O2A SAMPLES system. After typing "SELECT end_date, start_date FROM Campaign" in the search bar, the system returned two column table, on the left-side the end_date and on the right-side the start_date.* A total of 339 results were returned from the query.
You can use any of the methods mentioned above to query your samples based on your specific needs and preferences. The O2A SAMPLES system provides a flexible and powerful querying interface that allows you to retrieve the information you need efficiently and effectively.
User Workshop
The O2A SAMPLES Management System user workshop slides provide an introduction to the sample management workflow. They explain how users can prepare sample metadata, register samples, work with templates, fill metadata files, update sample information, manage containers, and retrieve sample data.
The slides can be used as training material for new users before working with real sample data in the system.
Slide 1: Introduction to O2A SAMPLES. The slide introduces O2A SAMPLES and gives a general overview of the sample Management system.
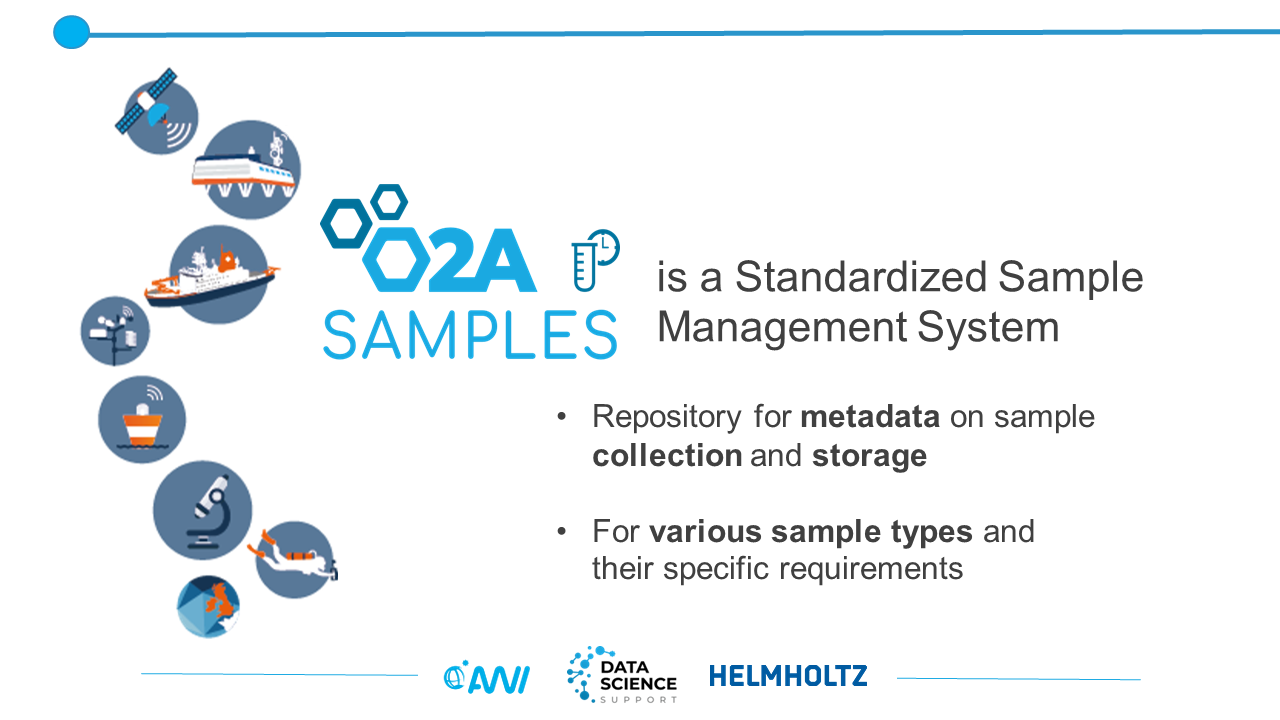
Slide 2: Overview of O2A SAMPLES. The slide provides additional introductory information about O2A SAMPLES and explains the purpose of the system.
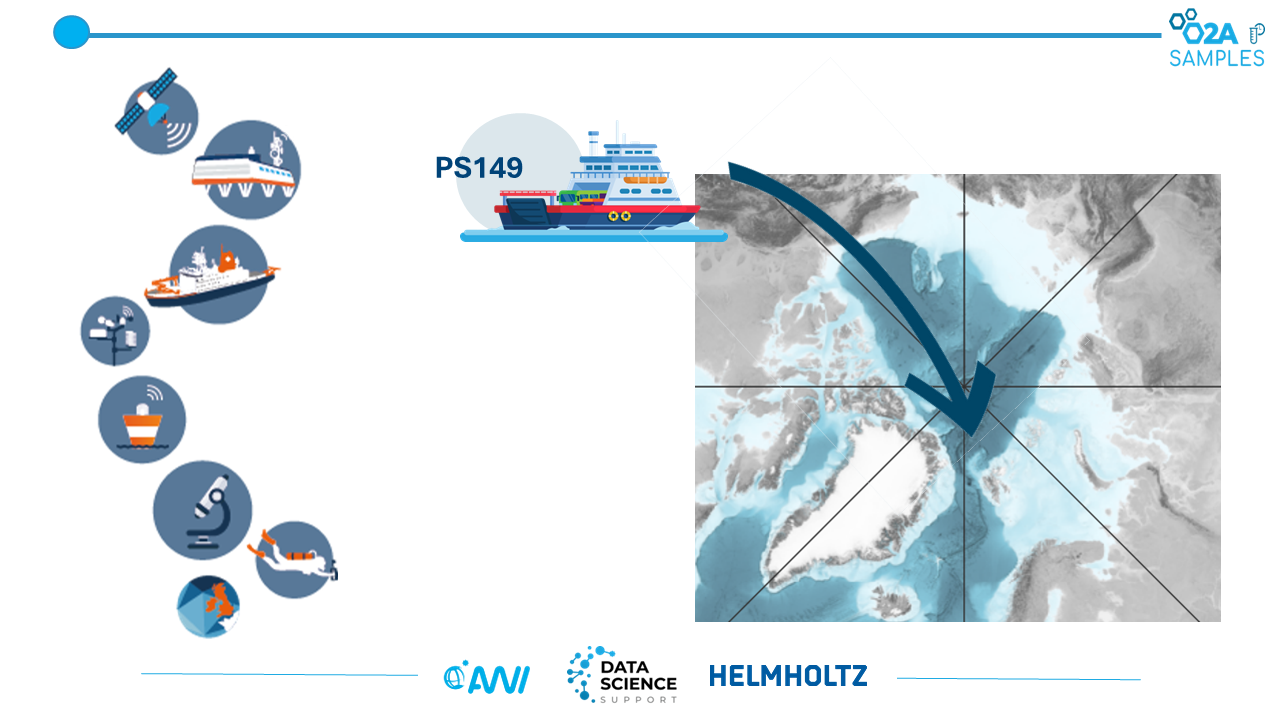
Slide 3: Workshop scenario: Research vessel Polarstern. The slide introduces the workshop scenario. The workshop scenario is based on the collection and registration of biological samples from the research vessel Polarstern.

Slide 4: Collection of biological samples with a multinet. The slide shows that biological samples are collected during the campaign using a multinet sampling device.
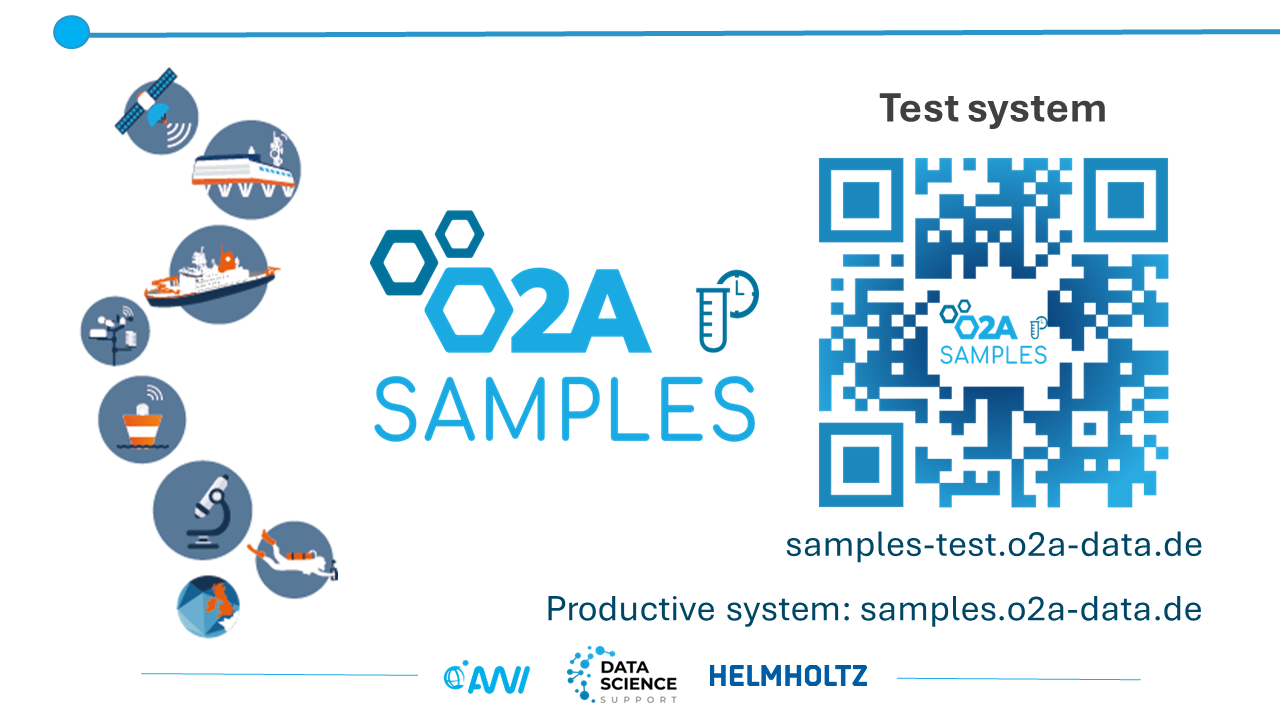
Slide 5: Accessing the O2A SAMPLES system. The O2A SAMPLES system is available as a test system and a productive system. The test system is intended for testing and training purposes. Data entered into the test system may be deleted. The productive system is used for registering and managing actual sample data.
Slide 6: Overview of the sample management workflow. The slide shows the main steps of the workflow, from registering samples to updating metadata and exporting sample information.
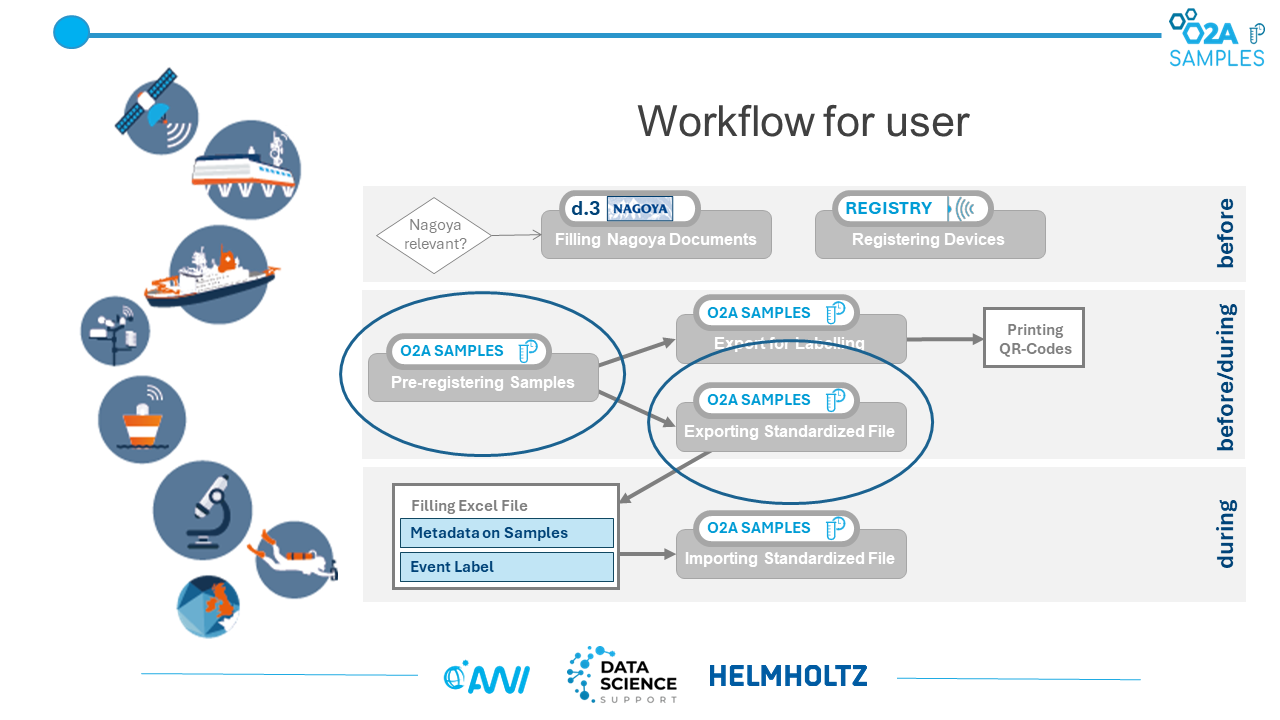
Slide 7: Pre-registration of samples and download of the standardized file. _The slide shows the first step of the workflow that will be used in the workshop. Users pre-register the samples and download a standardized file for entering sample information.

Slide 8: Preparation steps for using CSV files The slide explains important preparation steps for CSV files. It also highlights possible formatting issues when using German Excel settings.
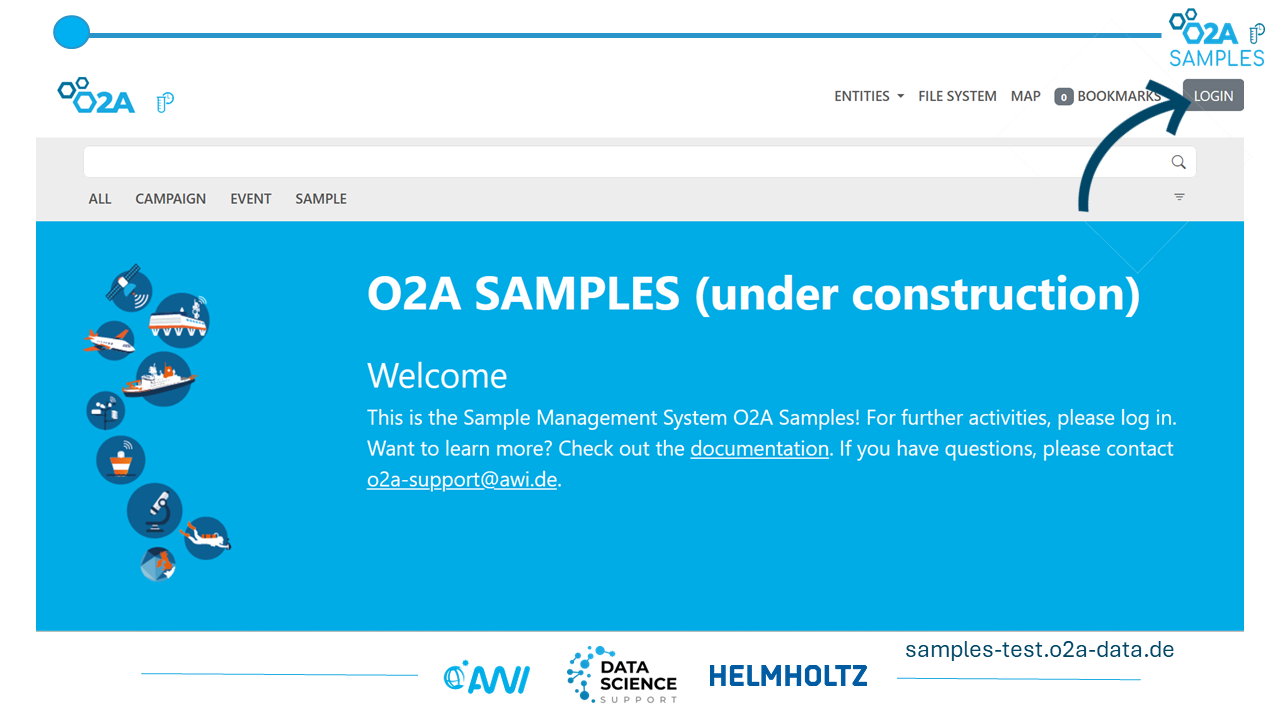
Slide 9: Opening and logging into the system. The slide shows the first step when using the system. Users open the O2A SAMPLES system and log in before registering samples.
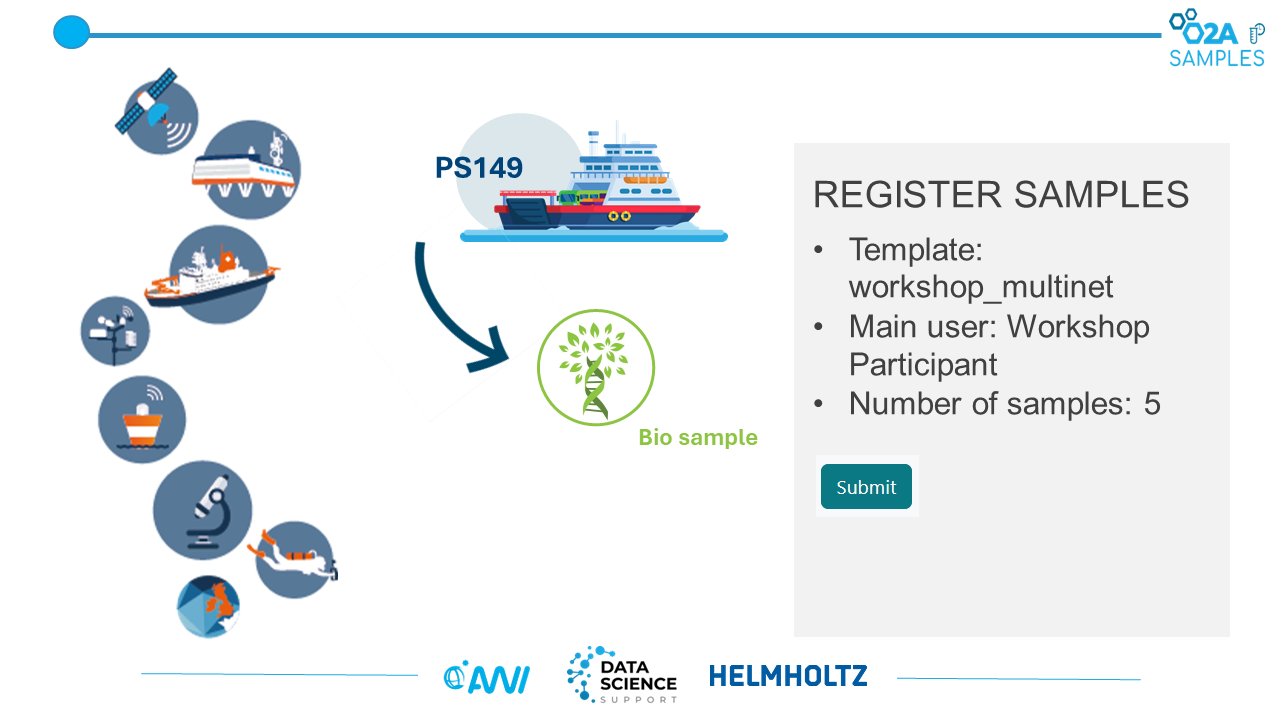
Slide 10: Registration of samples collected with a multinet. The slide shows the registration of five samples. Since the multinet has five nets, one sample is registered for each net.
Slide 11: Entering metadata and uploading the completed file. The slide shows the workflow used in the workshop for entering sample metadata and uploading the completed file.
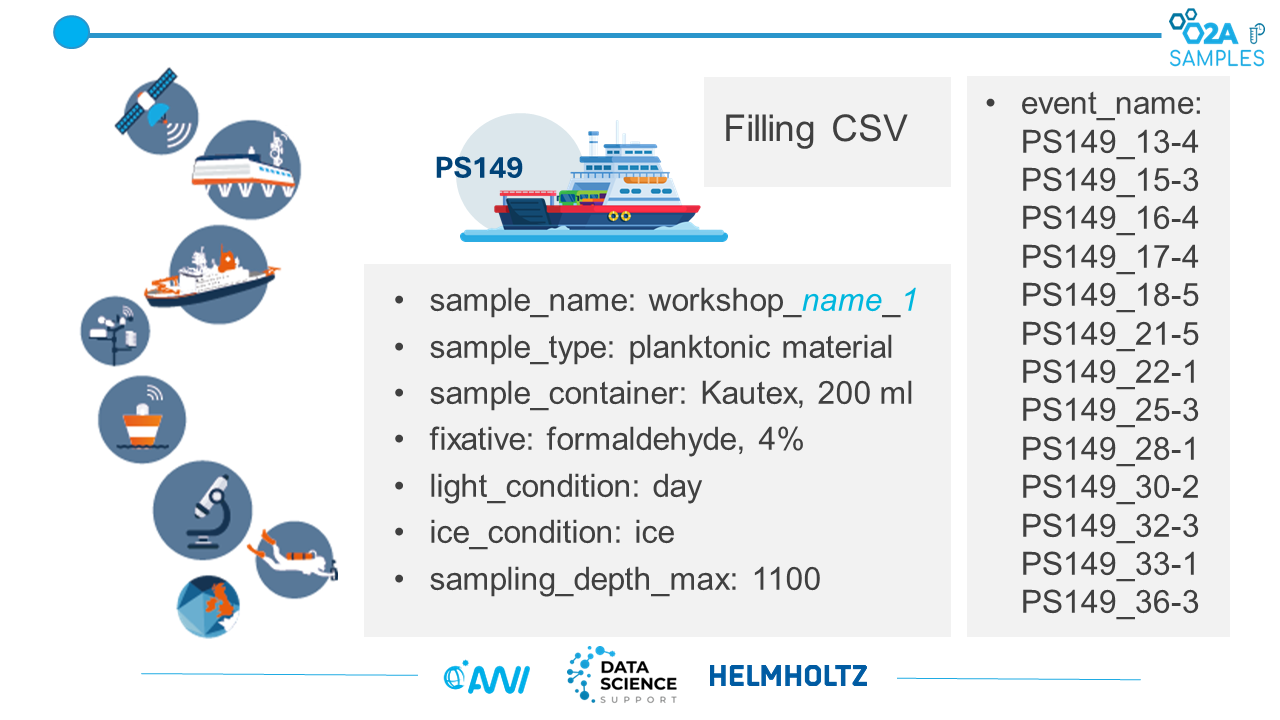
Slide 12: Metadata fields for sample registration. The slide shows the example metadata fields completed in the workshop before the sample information is uploaded.
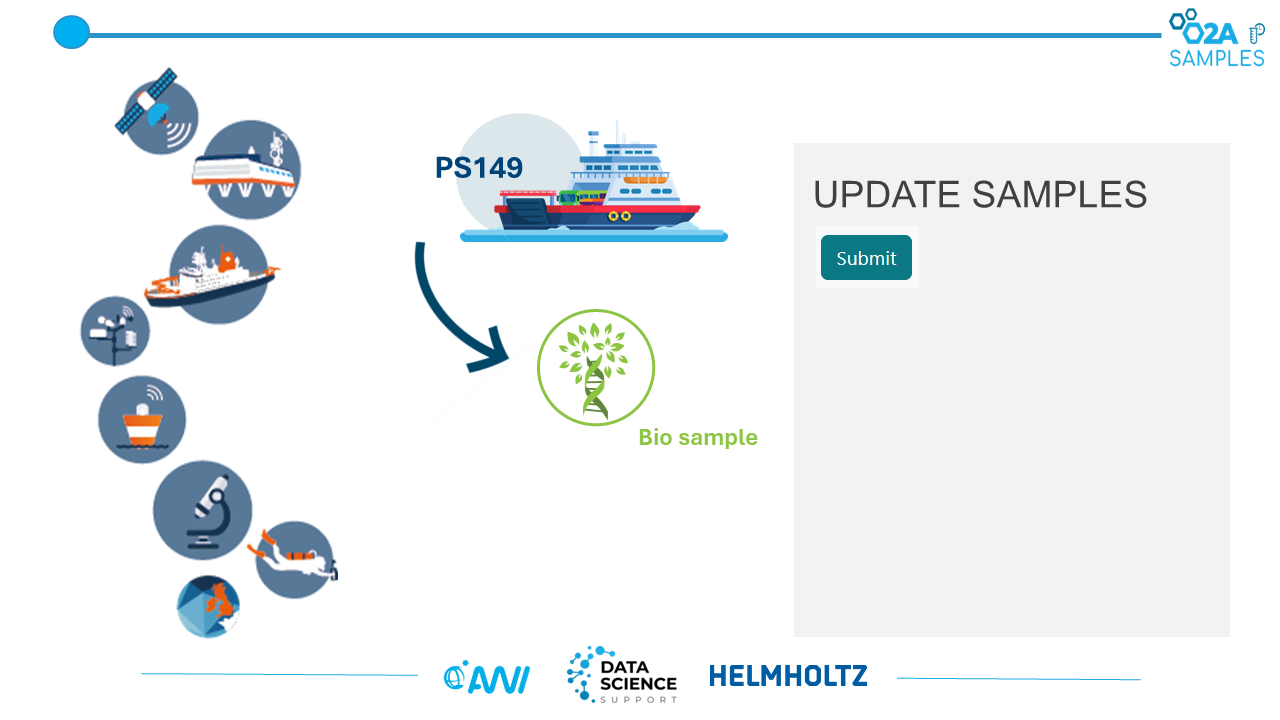
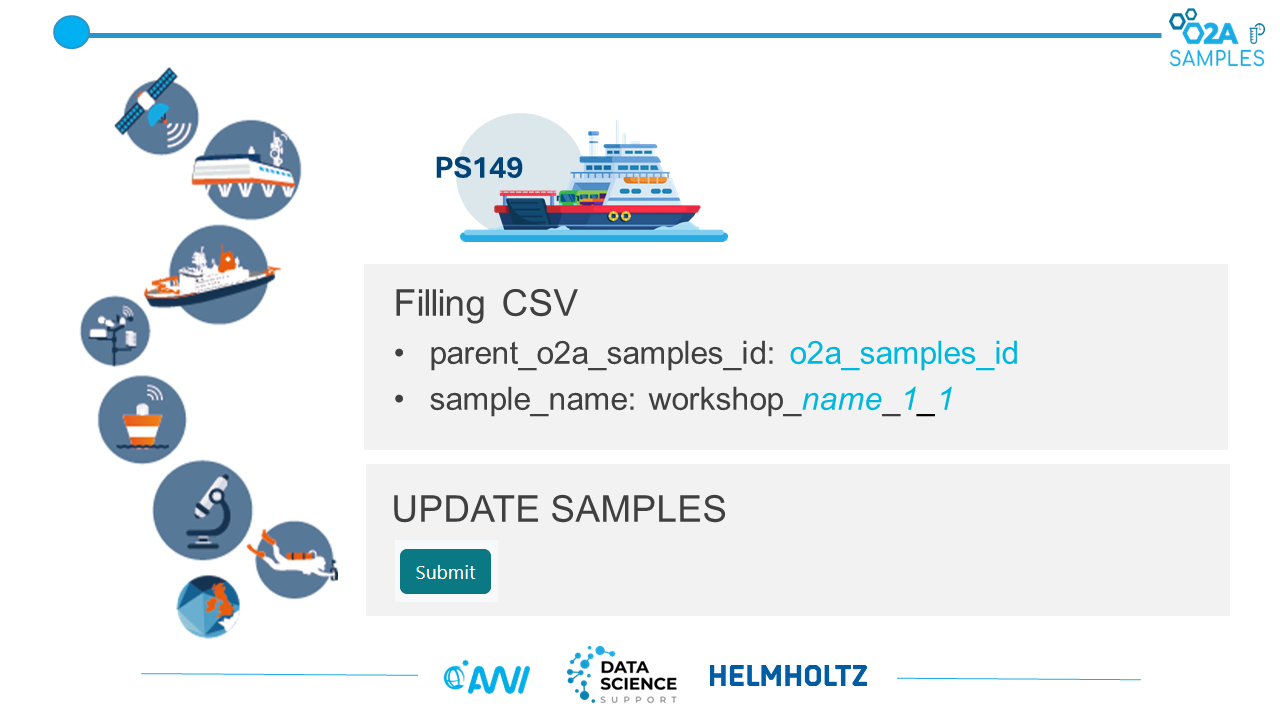
Slide 13: Updating sample information. The slide shows how users update the sample records after entering the required metadata in the file.
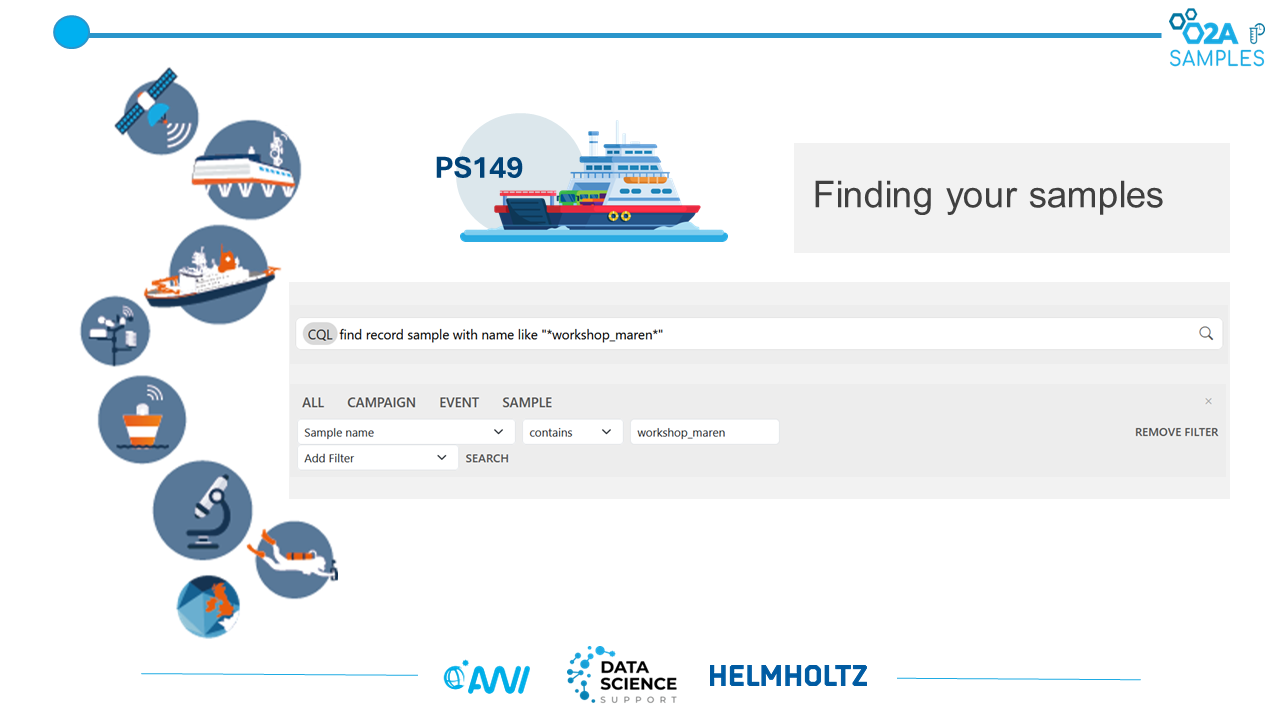
Slide 14: Finding registered samples in O2A SAMPLES. The slide shows how users can search for samples after uploading the file and view the stored sample information in the system.
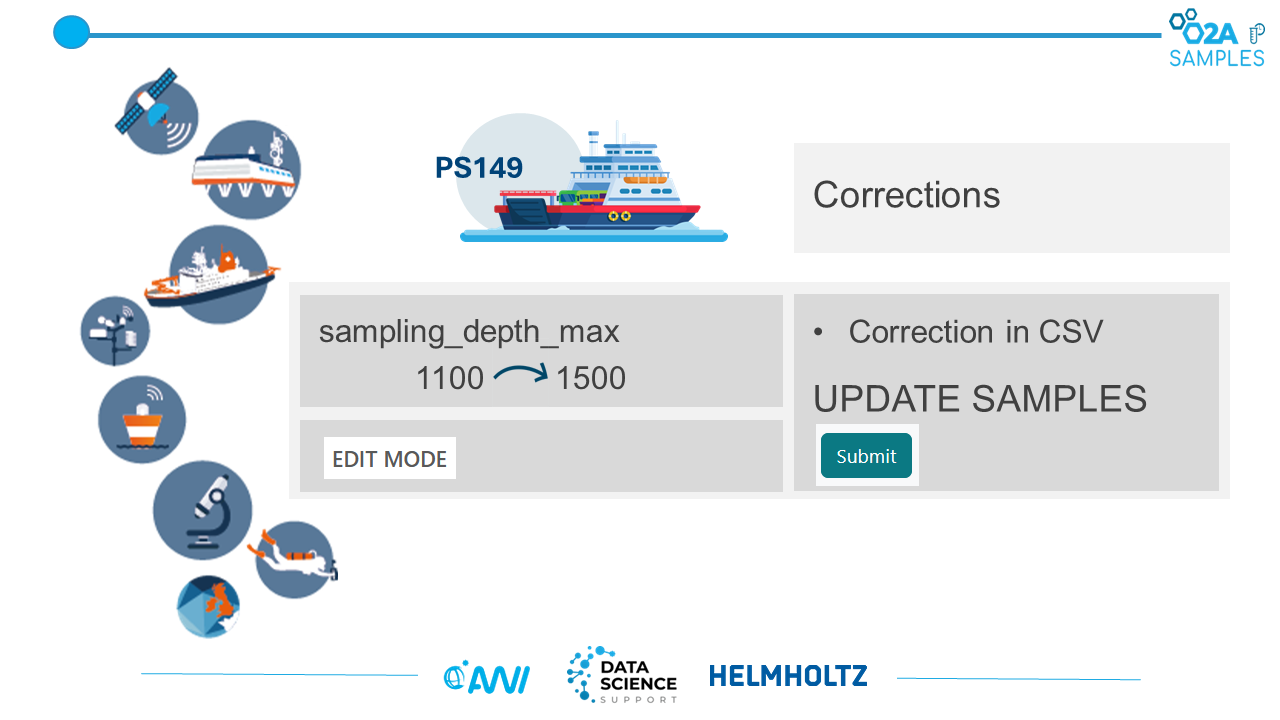
Slide 15: Correcting mistakes in sample information. The slide shows two different approaches how users can correct the incorrect metadata values: by using the edit mode or correcting the CSV and update samples.
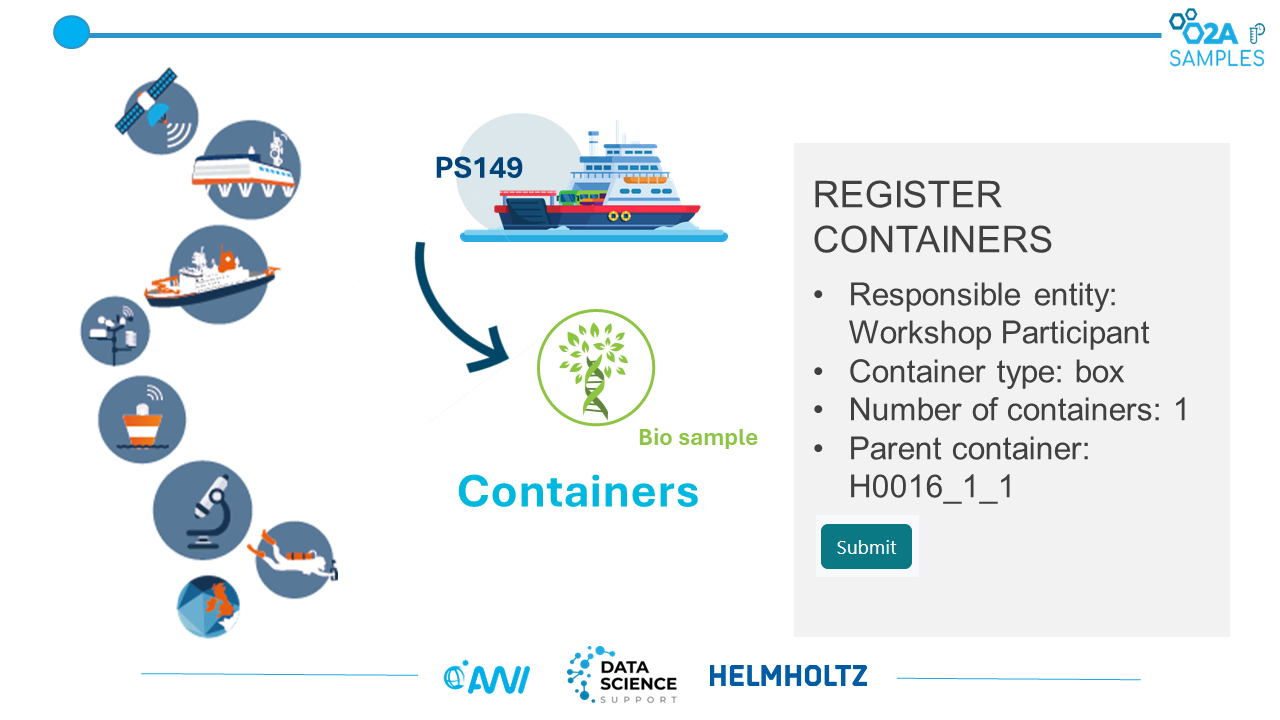
Slide 16: Registering a container for sample storage. The slide shows how to register a storage box for the samples. The box is stored in shelf-board H0016_1_1, inside shelf H0016_1, in room H0016.
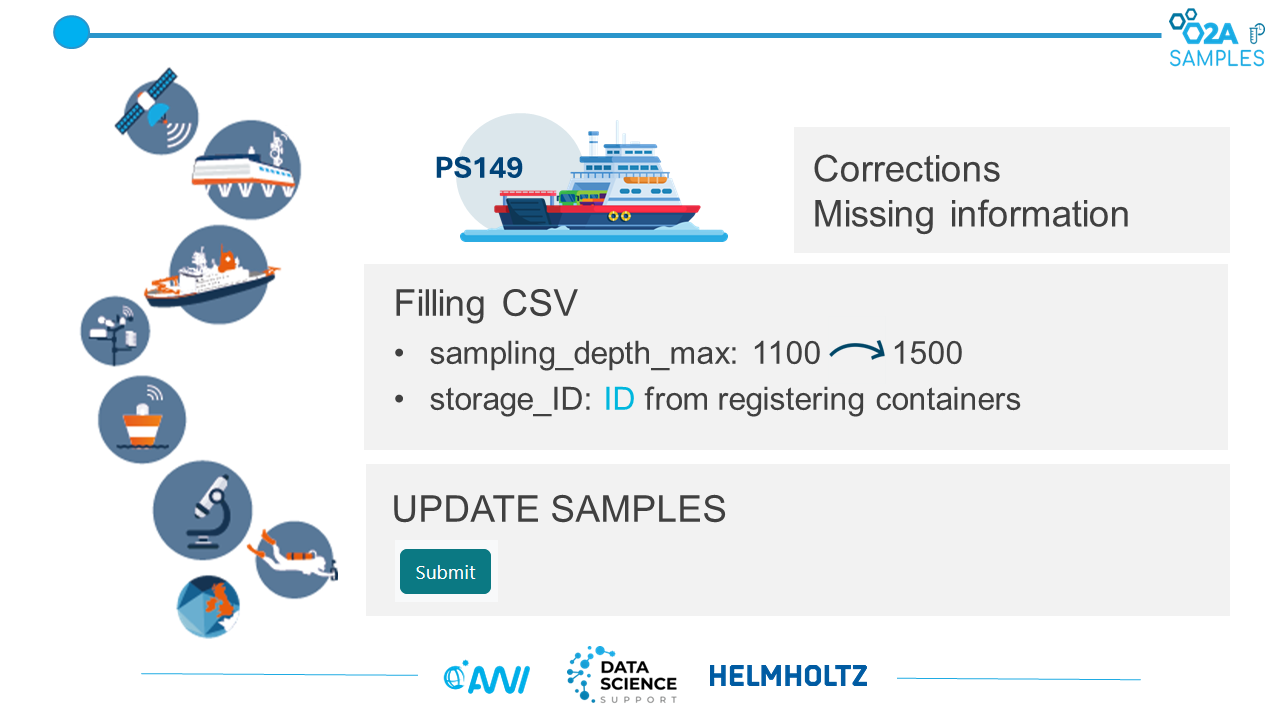
Slide 17: Updating corrected metadata using a CSV file. The slide shows how users can correct the sample metadata and add missing information in the CSV file and upload the updated information again.
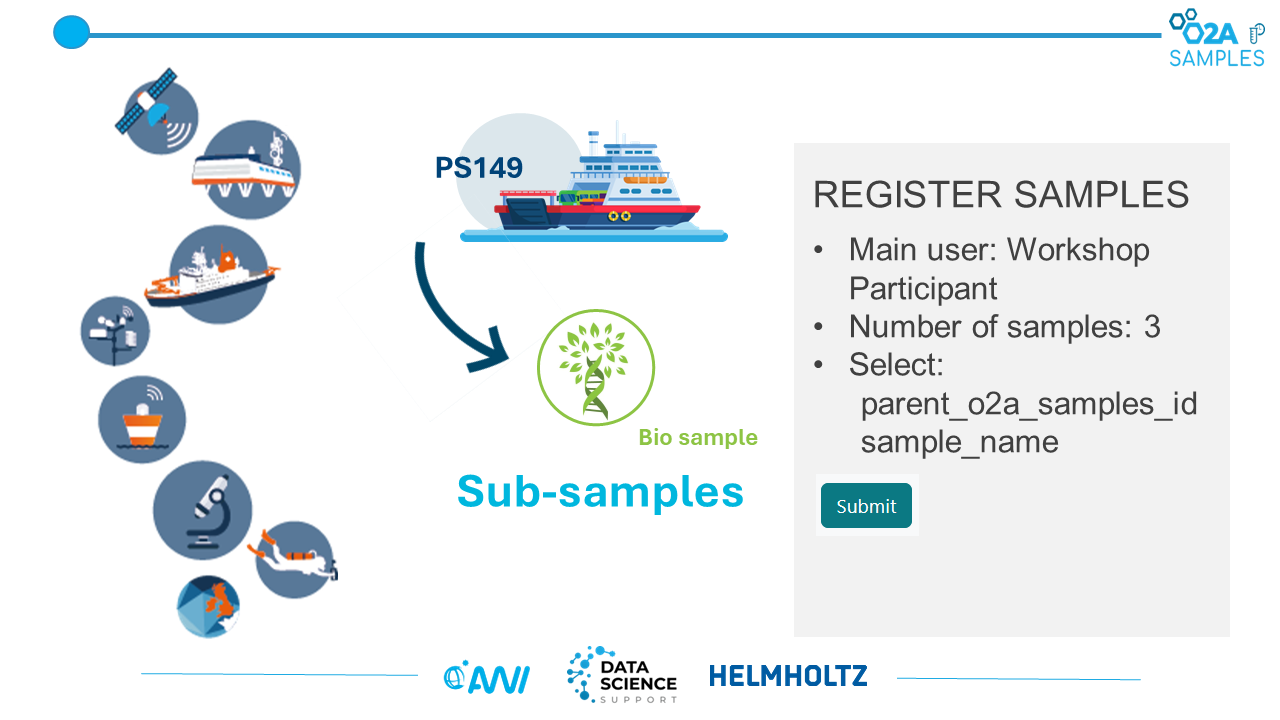
Slide 18: Registering sub-samples. The slide shows how to create and register three sub-samples from one selected sample collected with a specific net.
Slide 19: Completing and uploading the sub-sample file. The slide shows how users enter the required information for the sub-samples in the file and upload it to the system.
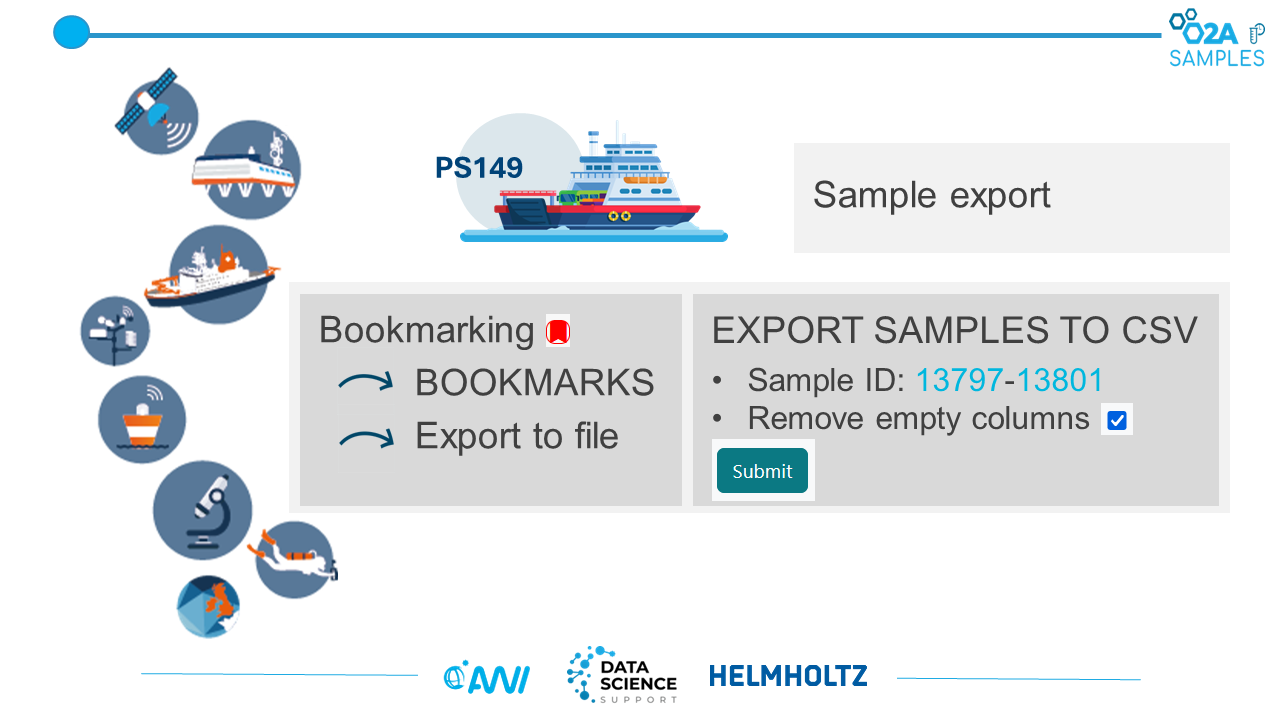
Slide 20: Exporting sample information from O2A SAMPLES. The slide shows different ways to export sample information. Users can bookmark selected samples and export them to a file or use the Export Samples to CSV function.

Slide 21: Data Science Support contact information. The slide provides contact information for the Data Science Support team.

Slide 22: Additional information about Data Science Support. The slide shows a QR code that users can scan to access further information about the Data Science Support team.
References
- Data model tutorial Data model tutorial
- CaosDB Research Data Management for Complex, Changing, and Automated Research WorkflowsCaosDB Research
- BIS Manual BIS Manual